
My son turned 3 yesterday. For his birthday, I wanted to bake an eggless chocolate cake with frosting and all. Earlier, I baked an eggless carrot cake and also a chocolate cake without eggs, using soy milk.
Jump to:
This eggless chocolate cake was way before I started the blog, and for some reason, I did not save the recipe. It had a soy milk ganache for the frosting and came out very well. I wish I had saved the recipe.
I wanted to bake a layered chocolate cake because he loves it and was going through various resources to find a good chocolate cake recipe without eggs.
I bought the EnerG egg replacer from the grocery store earlier this month. I thought I would buy a ready-made cake mix from the store, use the egg replacer instead of the eggs, and bake the cake.
Then only I found that EnerG does not give desired results with store-bought mixes. So I dropped that idea.
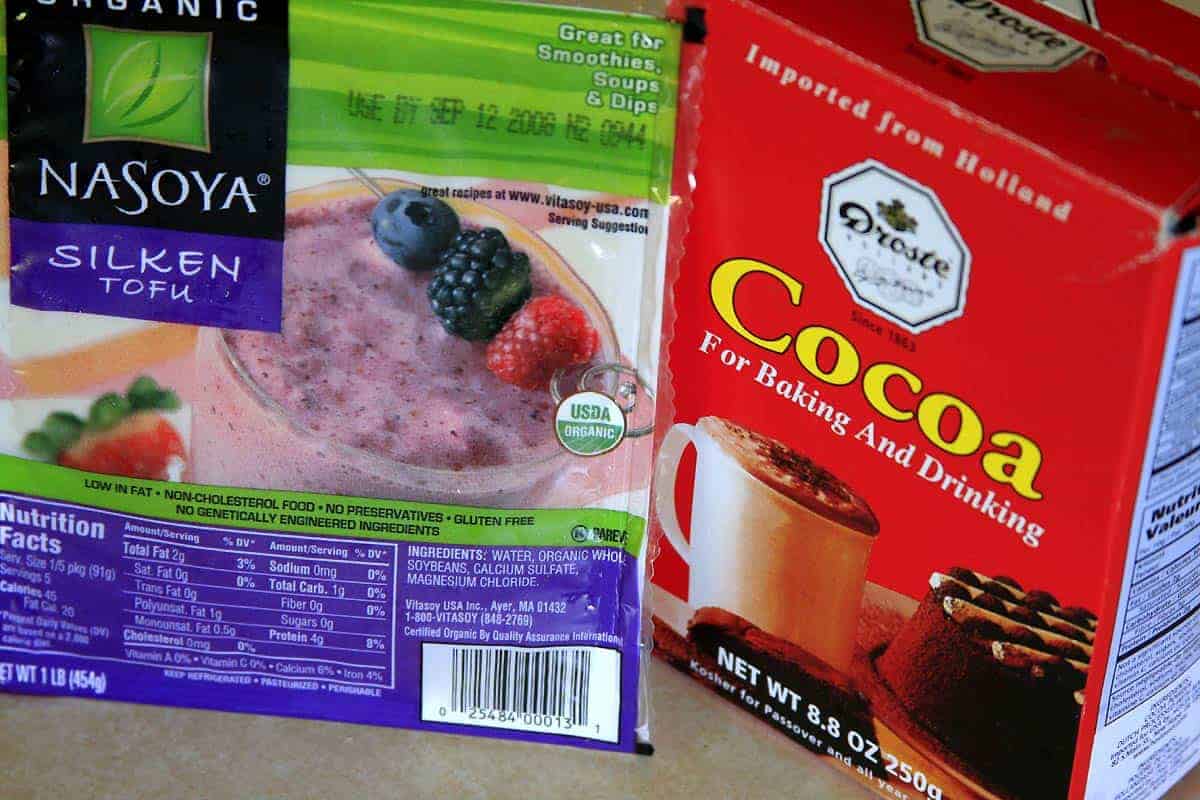
I have read in many books/sites that tofu is a good egg substitute in baked goods. I also had silken tofu sitting in the refrigerator and decided to use it to make the cake.
Some of the chocolate cake recipes I was looking for had a minimum of 3 eggs. Then I found a recipe that required only 2 eggs in my "Baking for Dummies" book.
I proceeded with that recipe and used pureed tofu instead of eggs. The rule is adding ¼ cup of tofu per egg to be replaced.
This was the first time I was baking a layered chocolate cake without eggs and also using tofu as an egg substitute in a cake recipe.
Even though I proceeded with the recipe, I was skeptical about the taste and texture until I cut the cake on Sunday and tasted it.
I baked the cake on Saturday, let it cool off until Sunday afternoon, and then frosted it. I was more anxious than my son to taste the cake.
We also talked about running to the grocery store on Sunday evening to buy a ready-made cake if this one flops.
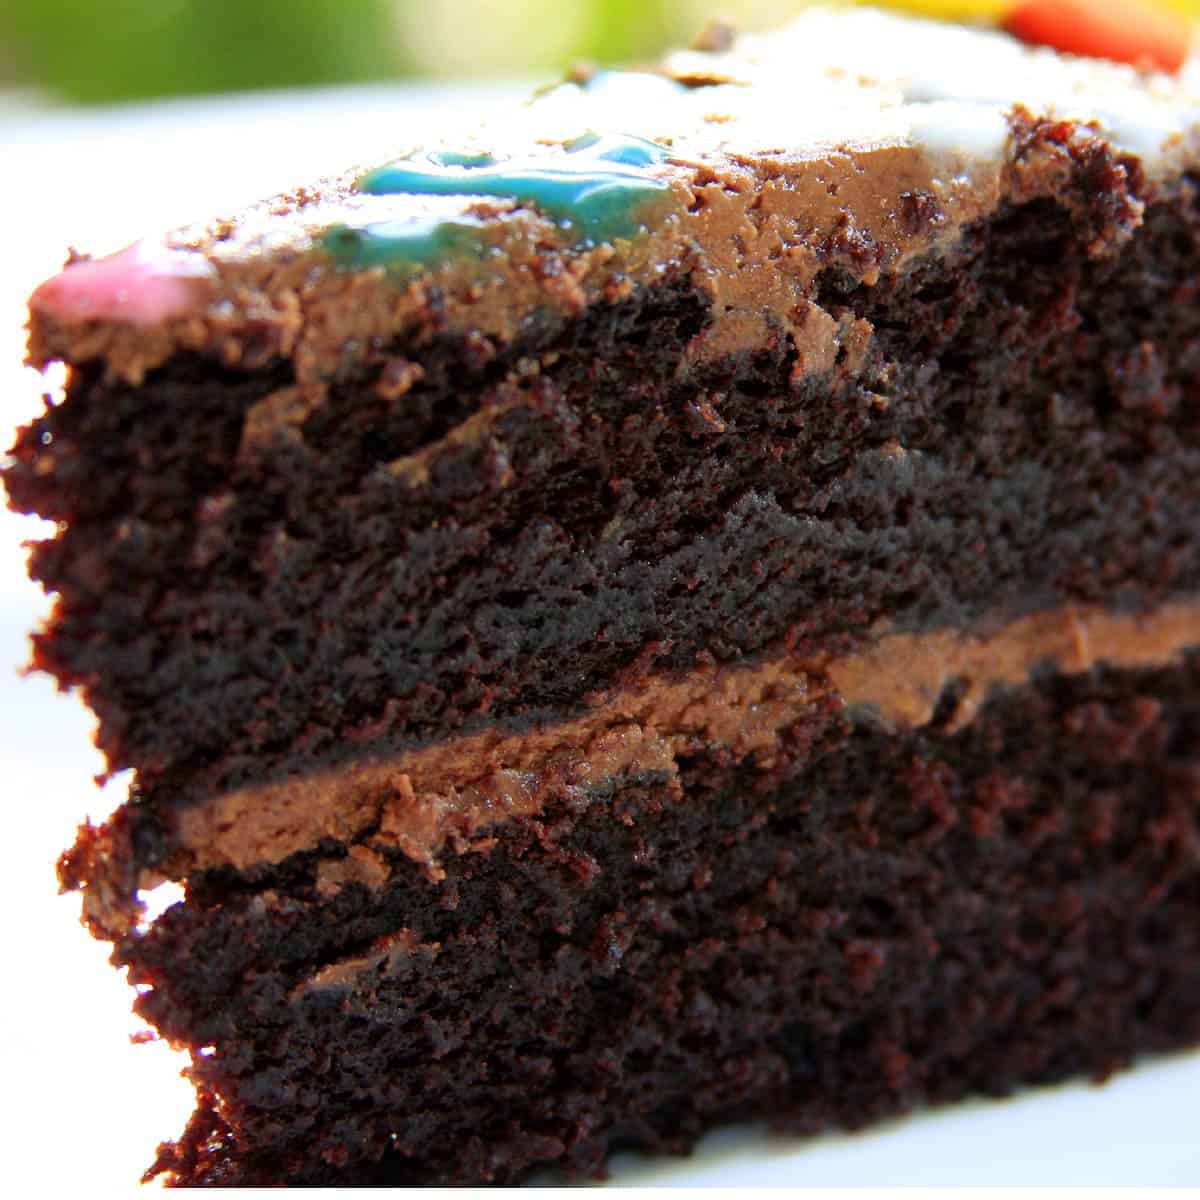
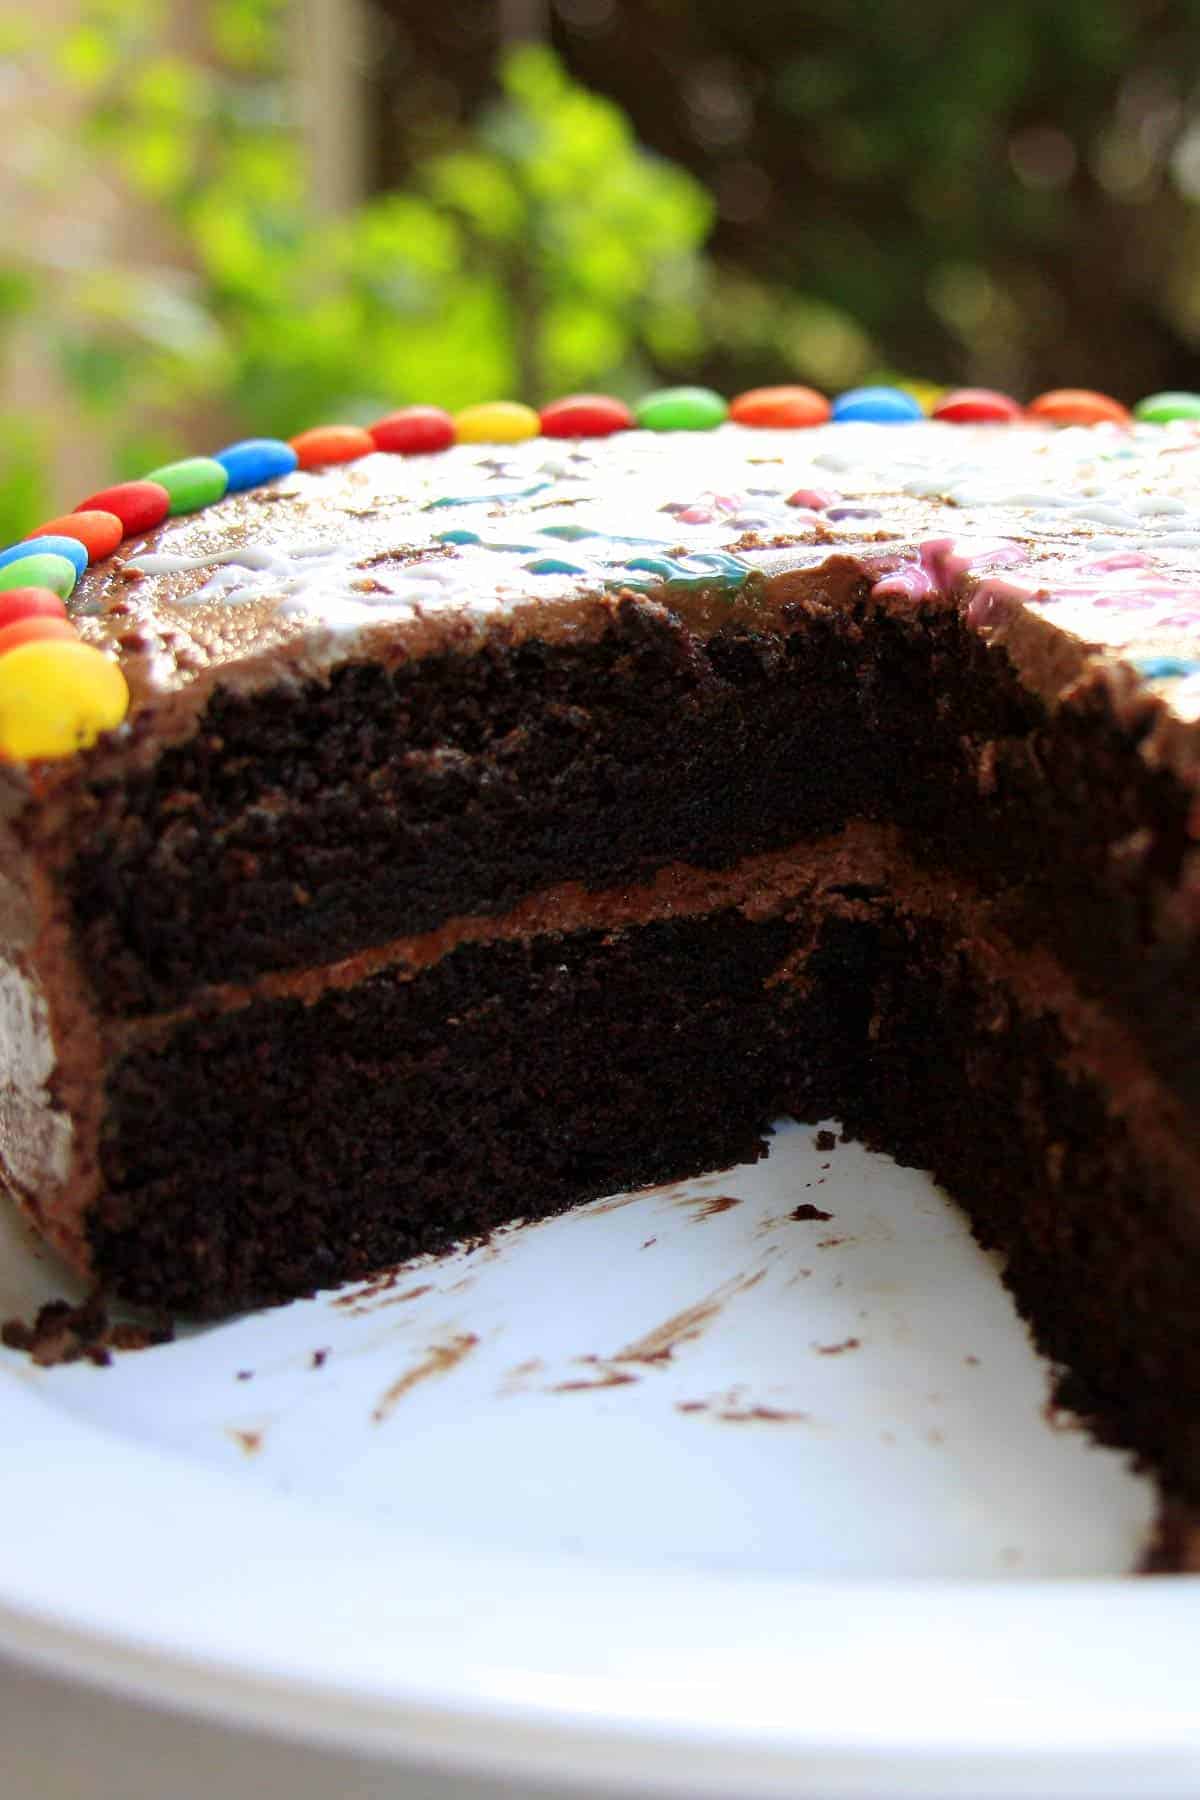
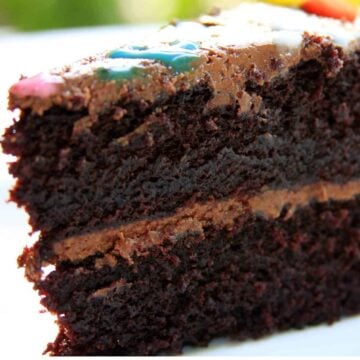
But I need not have worried so much after all! The eggless chocolate cake turned out so moist, and together with the icing, it was no different than the usual cakes.
We did not taste/smell the tofu at all. More than anything, I was so happy that my son liked the cake very much.
Why this recipe works?
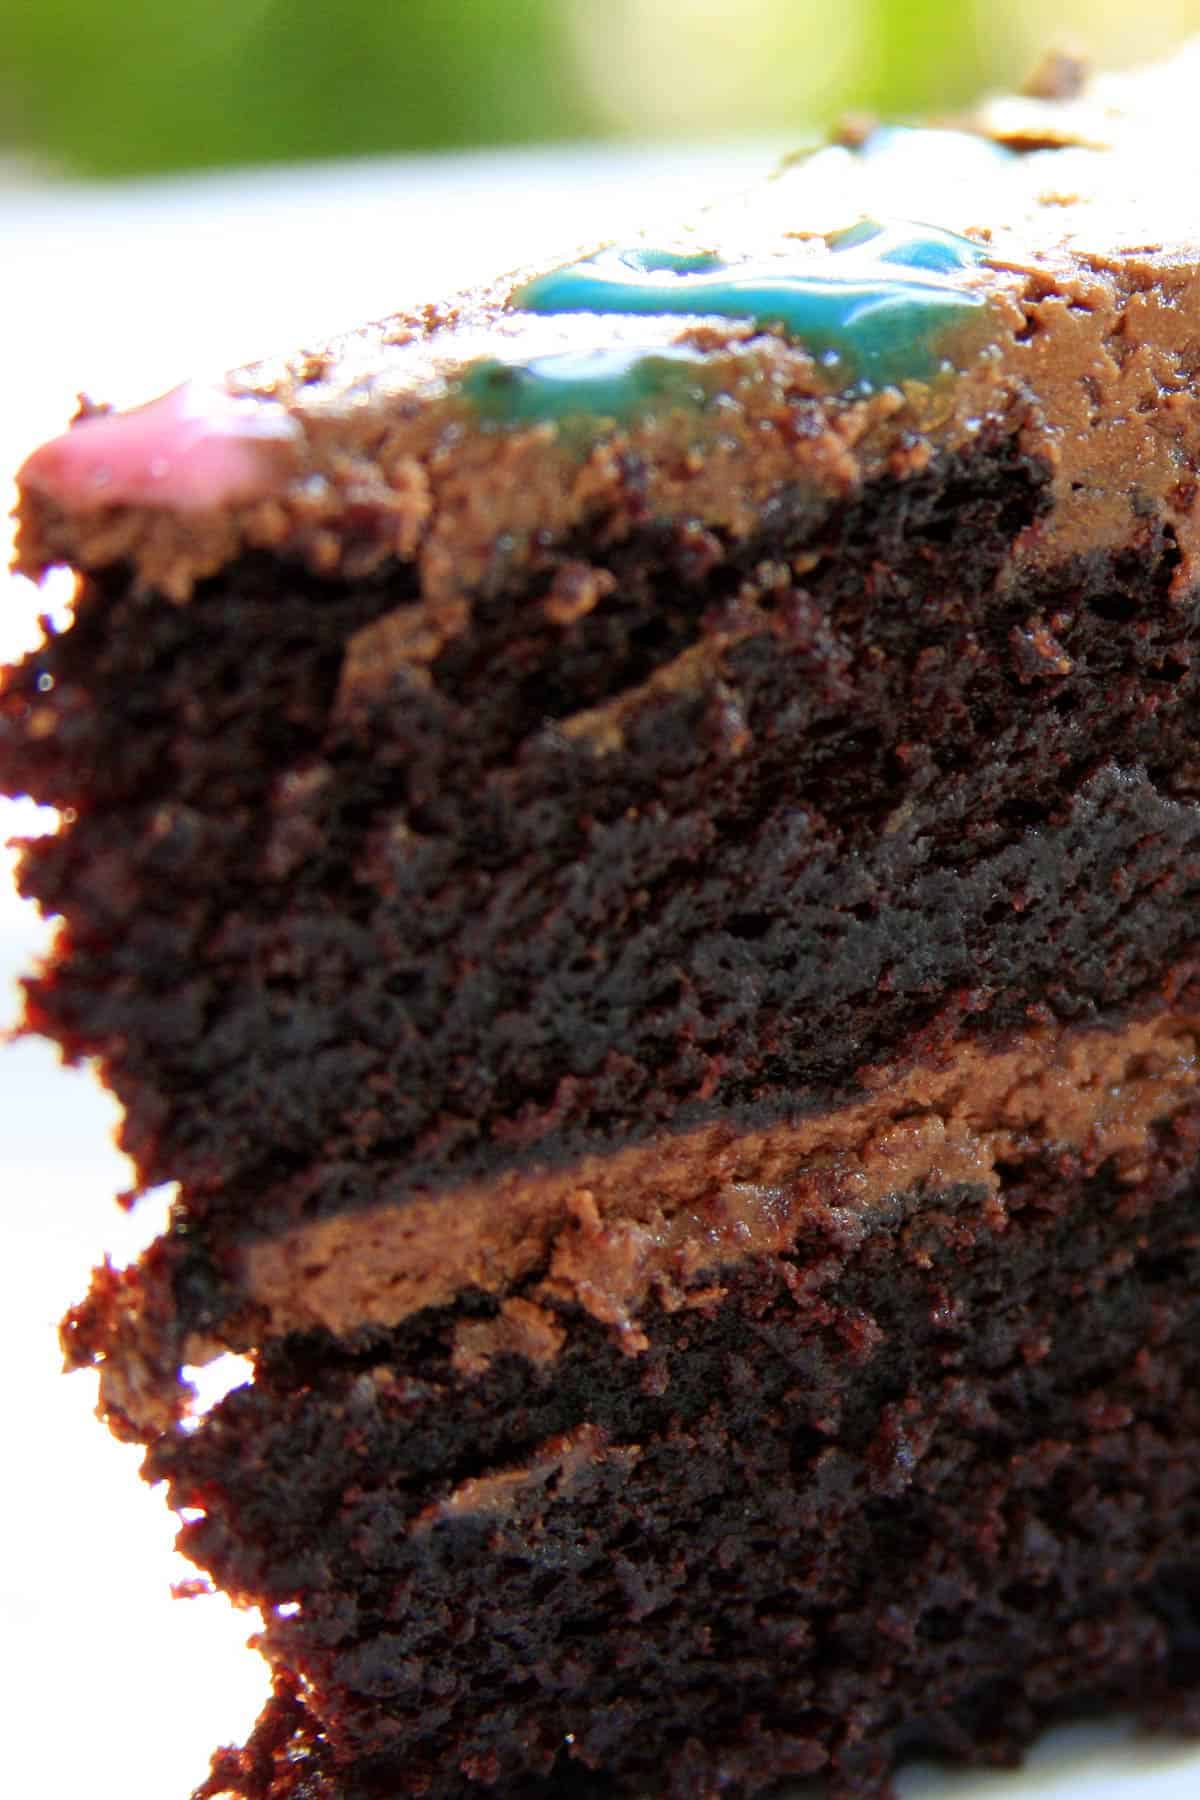
This eggless chocolate cake is a dream come true for chocolate lovers. It’s moist, rich, and has an incredibly tender crumb that melts in your mouth. The deep chocolate flavor is perfectly balanced, making it hard to believe there are no eggs involved! This cake is sure to satisfy your sweet tooth with its decadent taste and flawless texture.
What makes it work so well? The secret lies in silken tofu. It’s an excellent egg substitute, providing the moisture and binding needed for a dense, fudgy texture. Silken tofu is neutral in taste, allowing the rich cocoa to take center stage while ensuring the cake stays soft and tender.
Vegetable oil further boosts the moisture, ensuring that the cake stays soft, even days after baking. Unlike butter, oil keeps the cake rich and melt-in-your-mouth without drying out.
Baking soda and baking powder are key for giving the cake its perfect rise and airy texture. Together, they ensure that the cake rises evenly and stays light, even without eggs.
For an extra depth of flavor, high-quality cocoa powder is a must. Paired with hot coffee, the chocolate flavor intensifies, making every bite more indulgent without overpowering sweetness.
Best of all, this recipe is wonderfully simple. You only need a bowl and a whisk—no fancy equipment required. Minimal cleanup, maximum results!
This recipe has been a no-fail favorite since I first baked it in 2008, and countless readers have enjoyed it ever since. If you're looking for the best eggless chocolate cake, give this one a try—you won’t be disappointed!
Ingredients
- 2 Cups All Purpose Flour
- 1 Teaspoon Salt
- 1 Teaspoon Baking Powder
- 2 Teaspoons Baking Soda
- ¾ Cup Unsweetened Cocoa Powder
- 2 Cups Granulated Sugar (See My Notes)
- 1 Cup Vegetable Oil (I Used Canola Oil)
- 1 Cup Hot Coffee (I Mixed 1.25 Teaspoons Of Instant Coffee Powder With 1 Cup Of Hot Water)
- 1 Cup Milk (I Used 2% Milk)
- ½ Cup Silken Tofu Pureed (I Used Nasoya Brand Silken Tofu)
- 1 Teaspoon Vanilla Extract
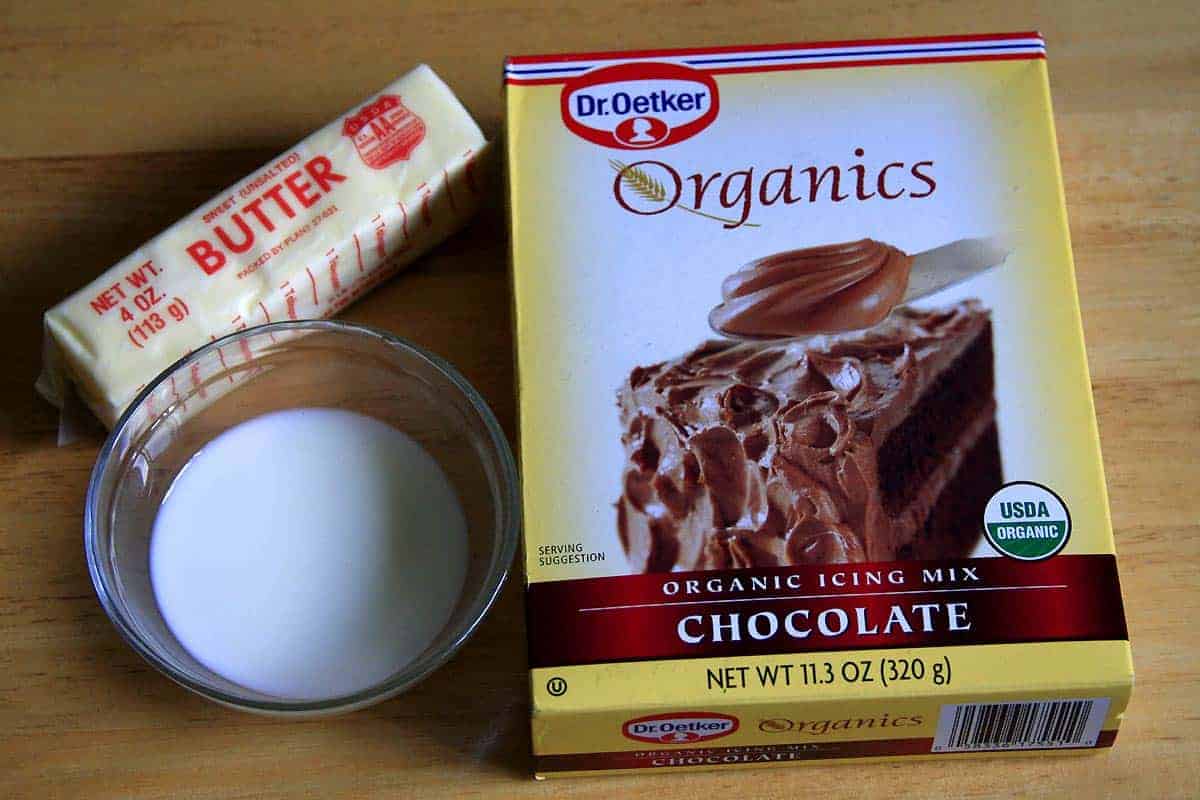
- 1 Packet Dr Oetker's Organic Chocolate Icing Mix
- ¼ Cup Hot Milk/Hot Water (Heat It In The Microwave Oven For 15 Seconds)
- ⅓ Cup Soft Butter At Room Temperature (Which is 5 Tablespoons + 1 Teaspoon)
- ¼ Teaspoon Vanilla Extract
- A Pinch Baking Soda
Cake Preparation
Here are the step-by-step instructions on making this simple and delicious egg-free chocolate cake from scratch:
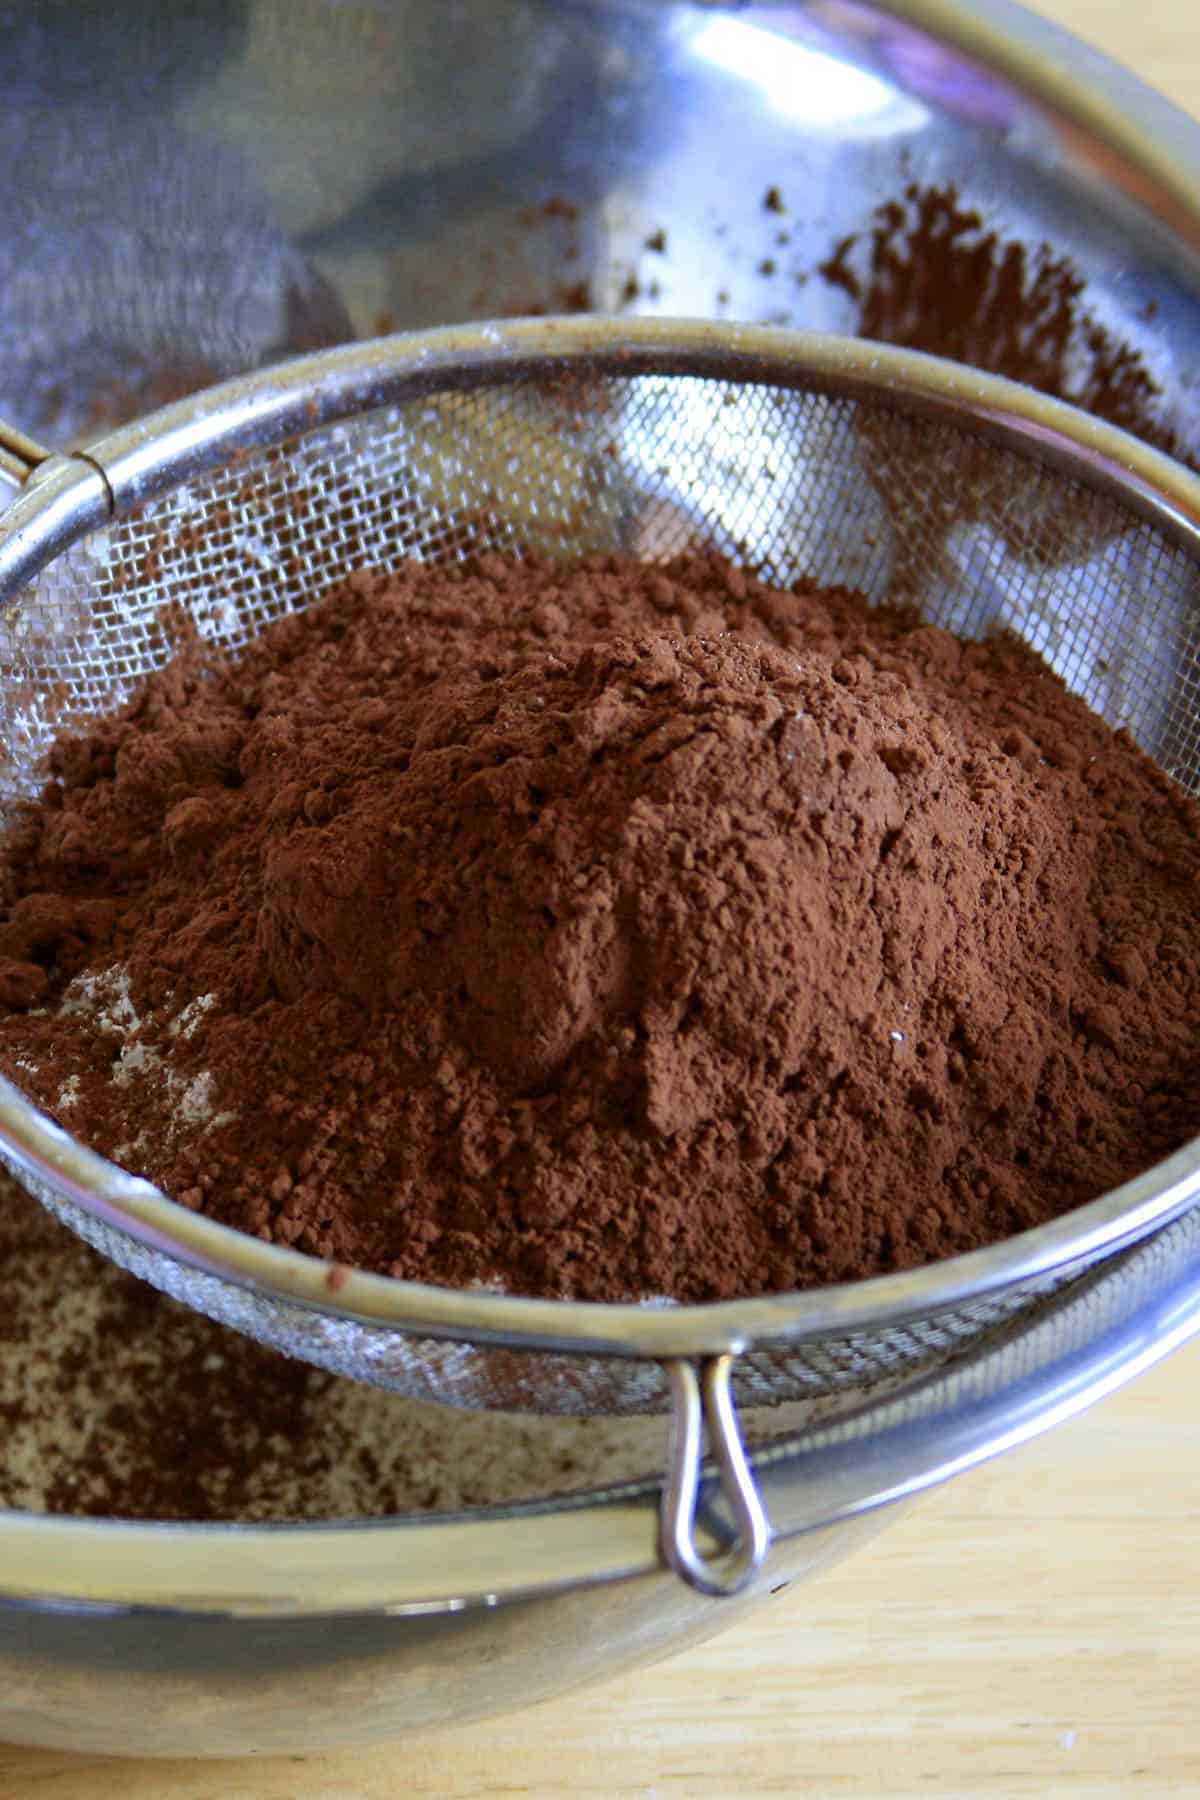
1. Sift the flour, salt, baking powder, baking soda in a large bowl.
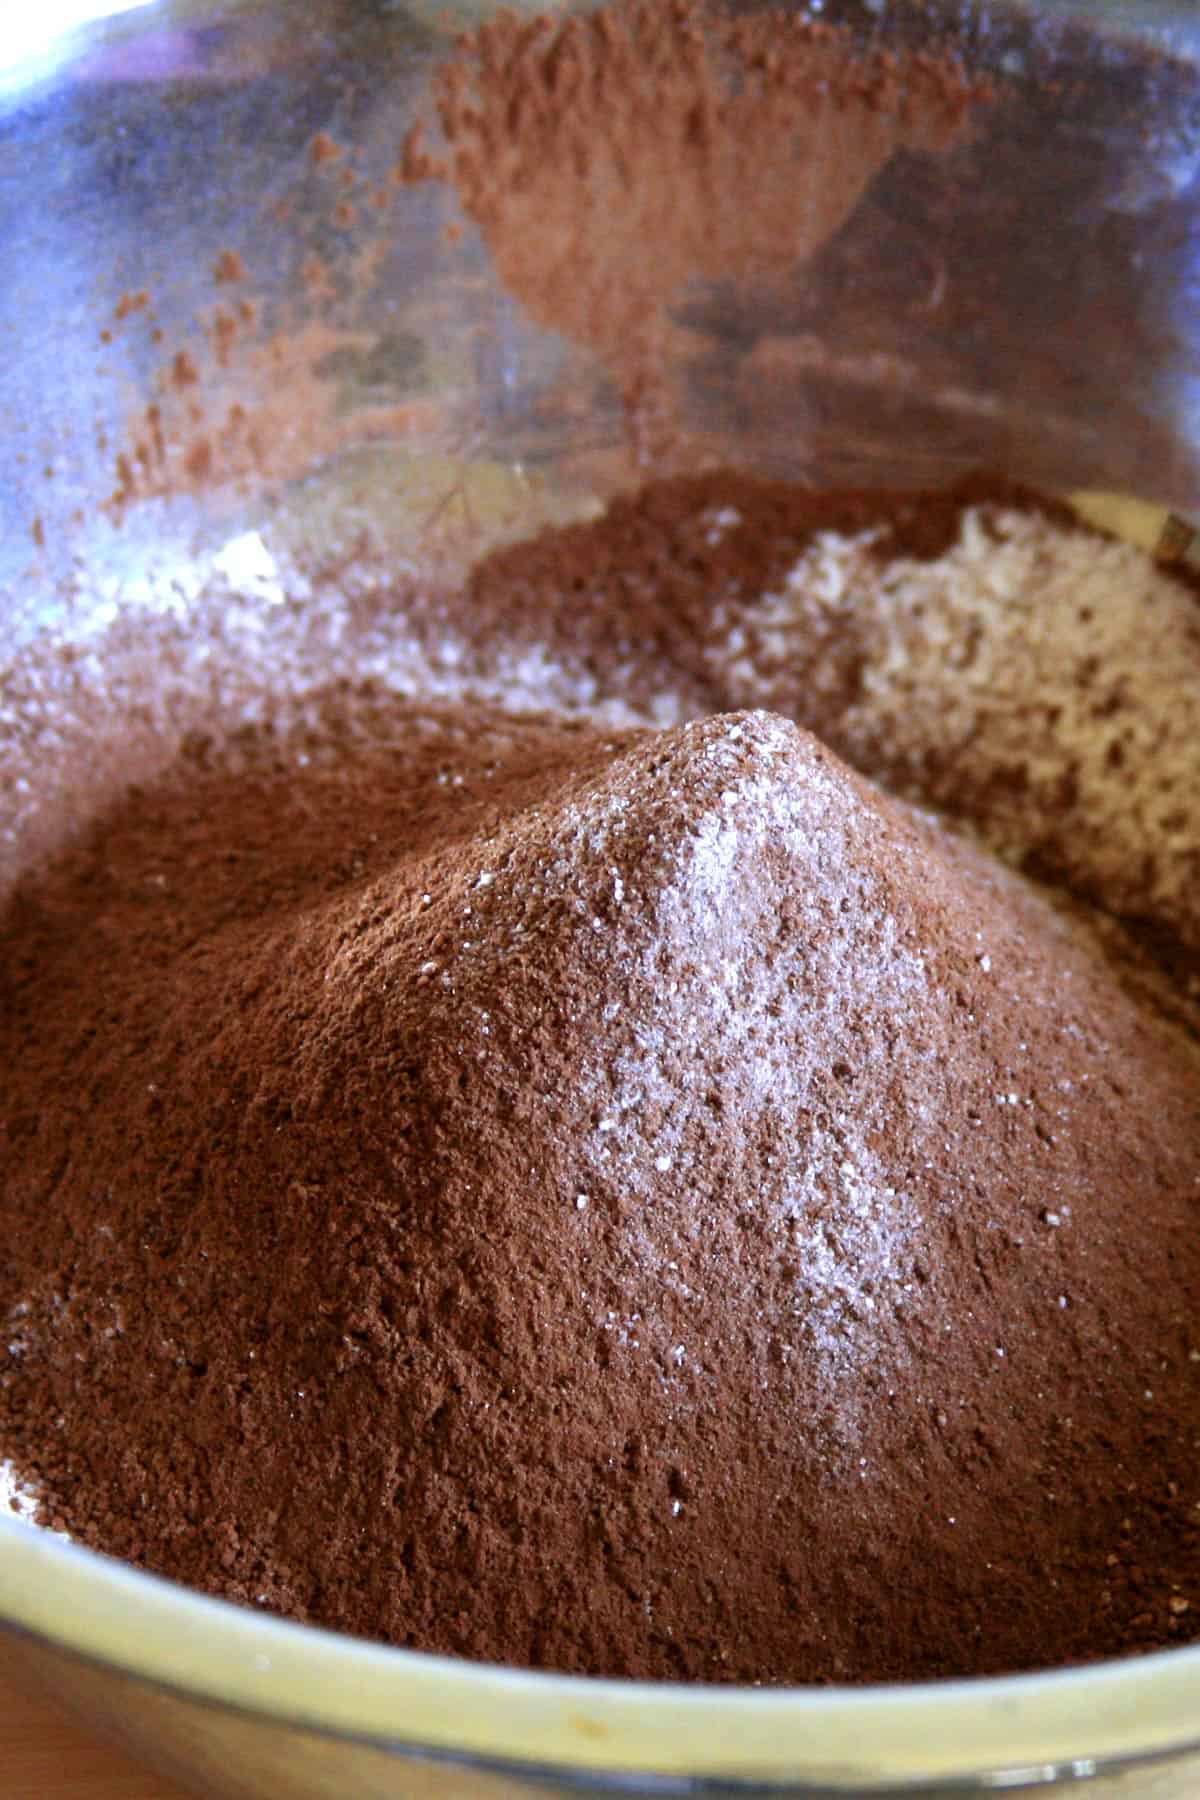
2. Add Cocoa Powder.
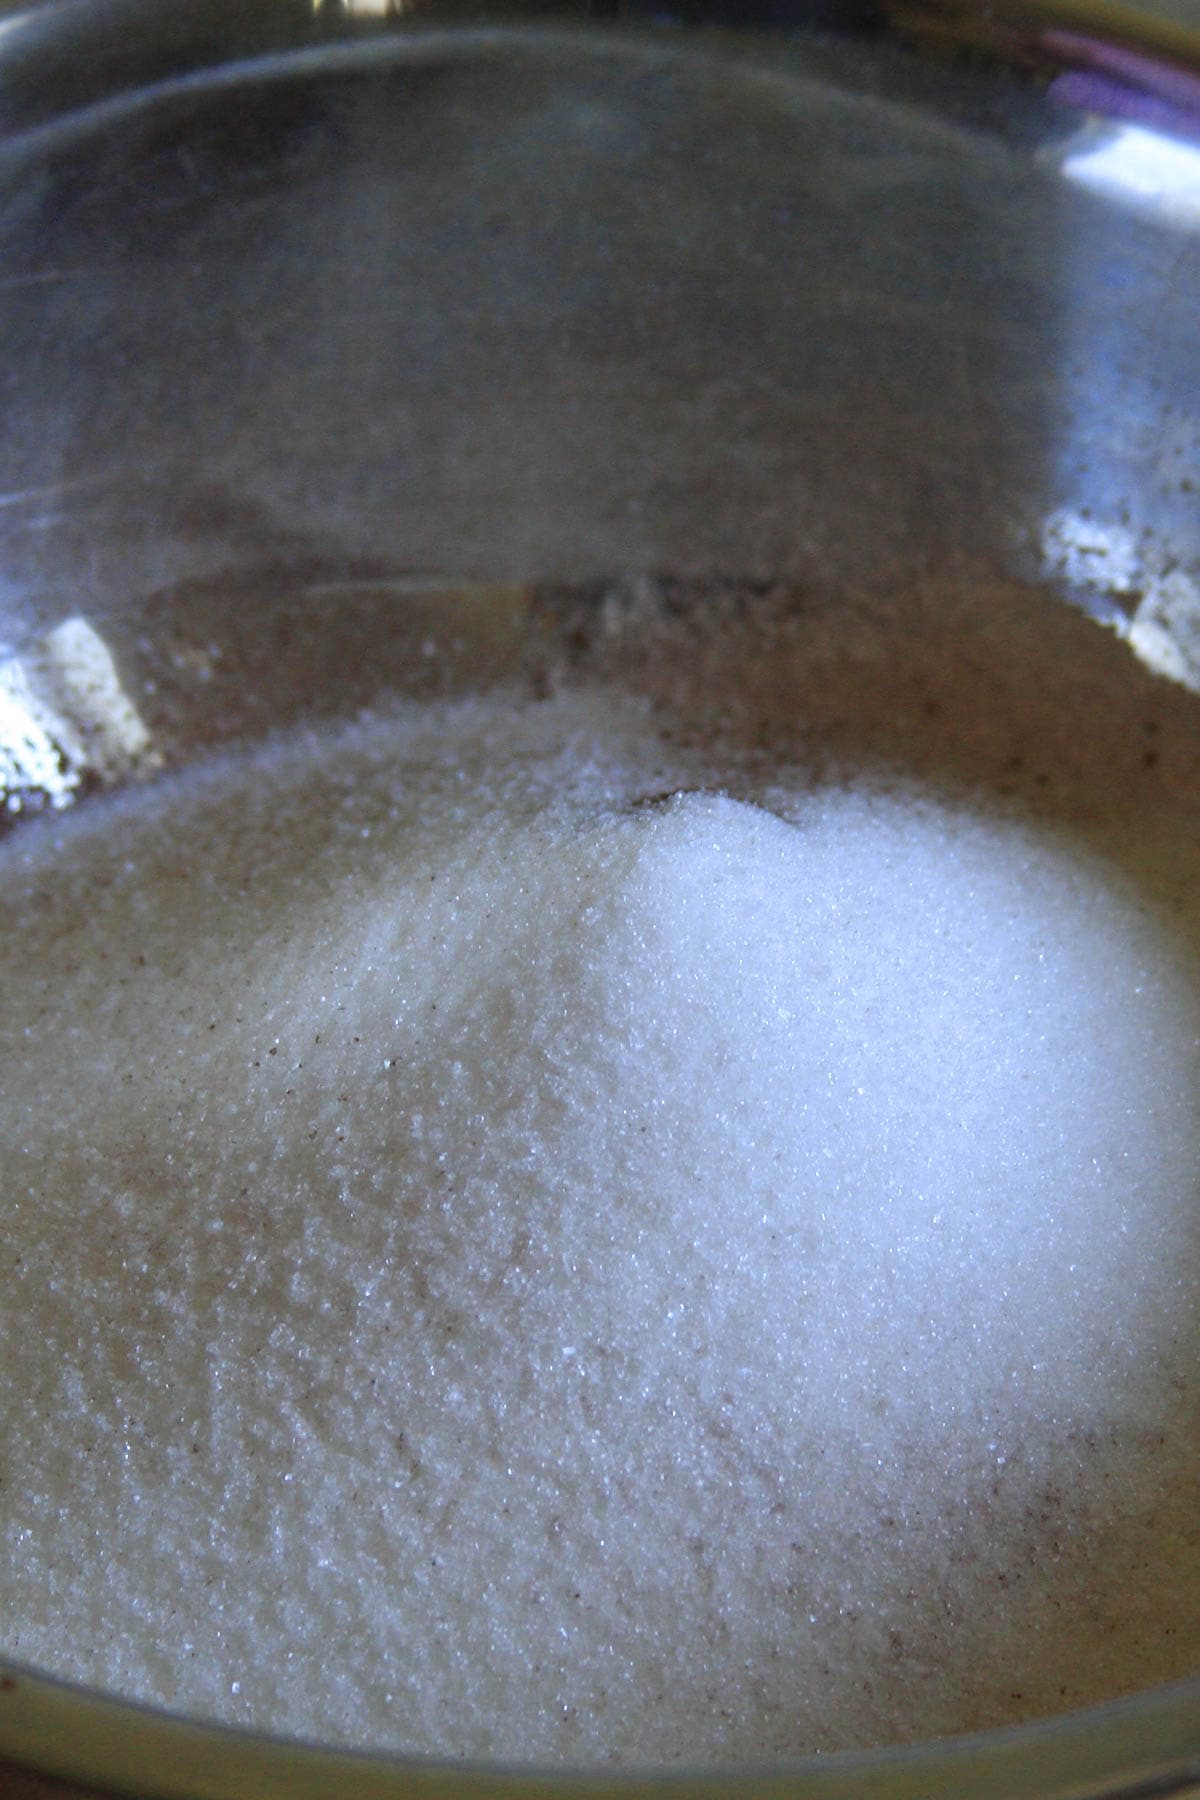
3. Add Sugar to the mix.
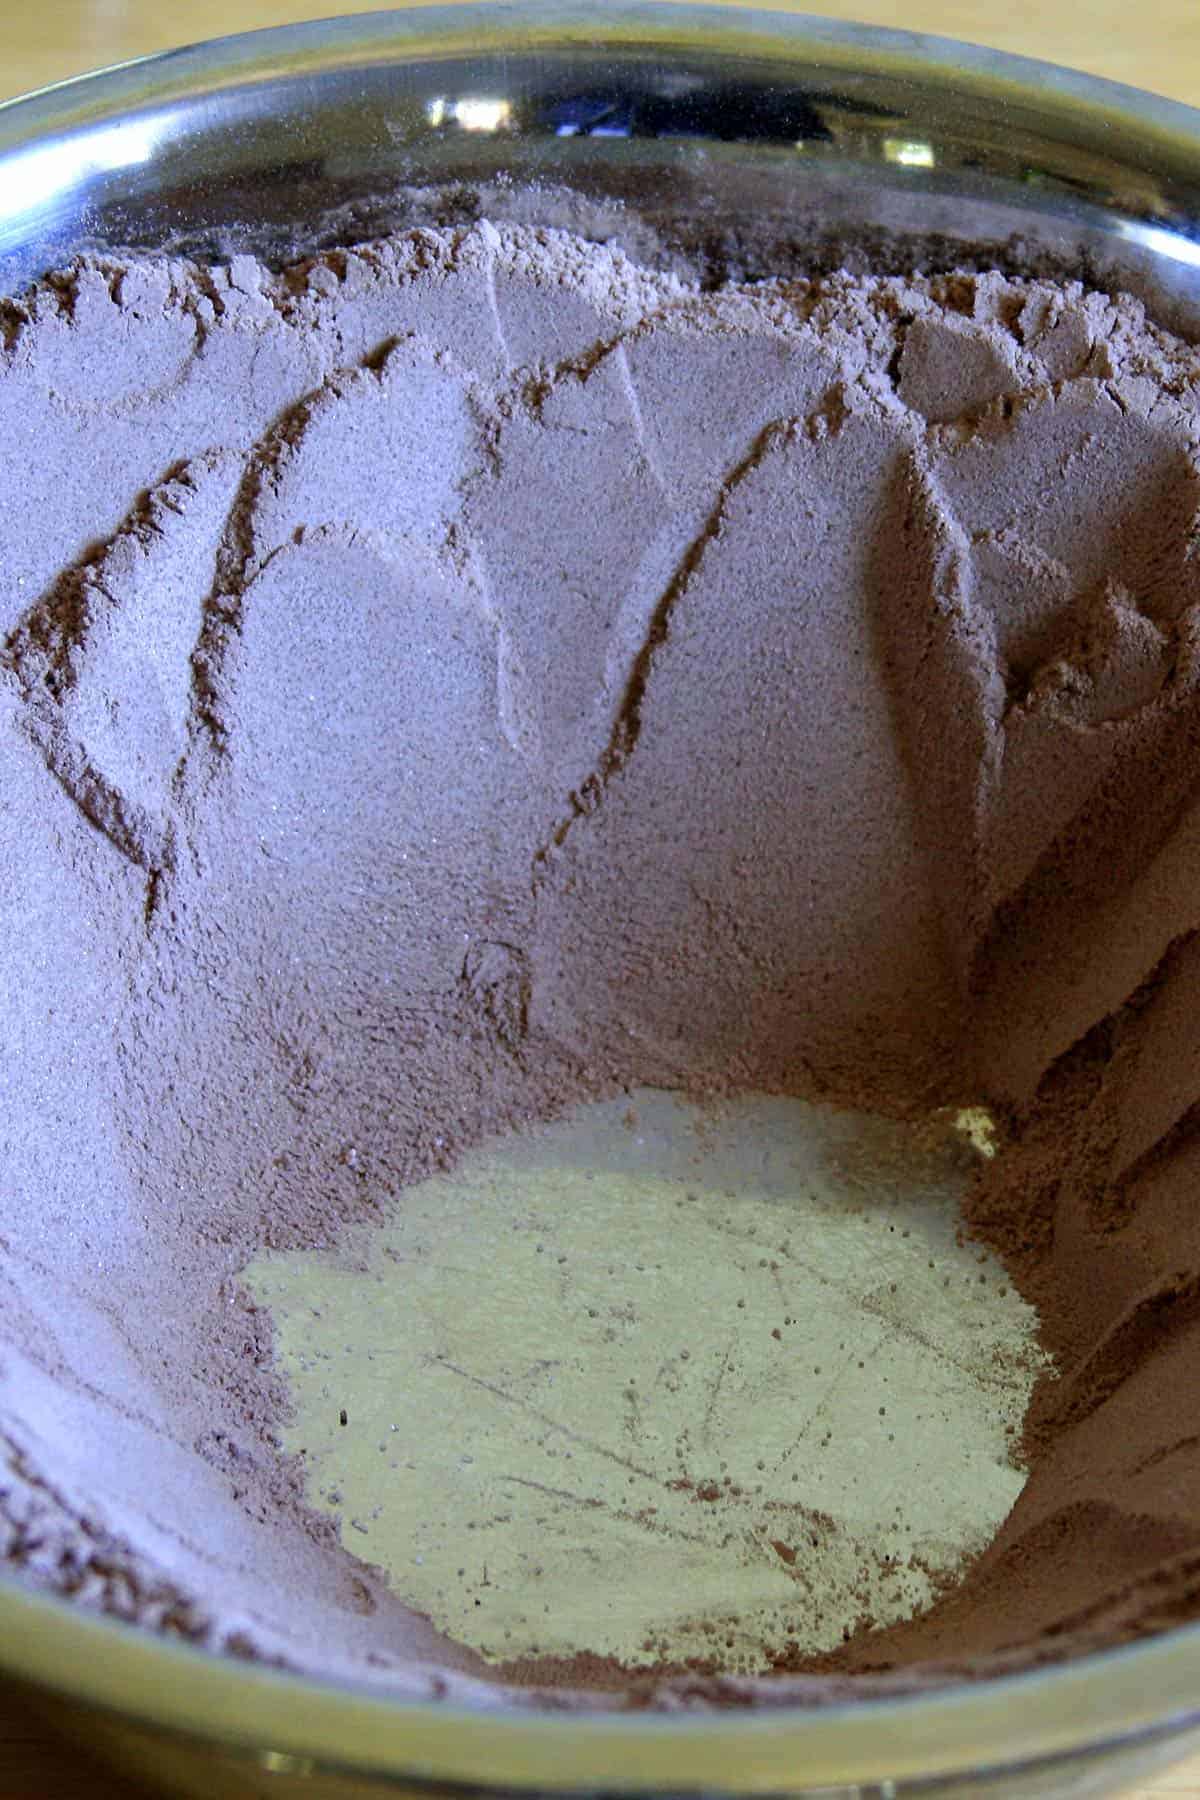
4. After mixing them, make a well.
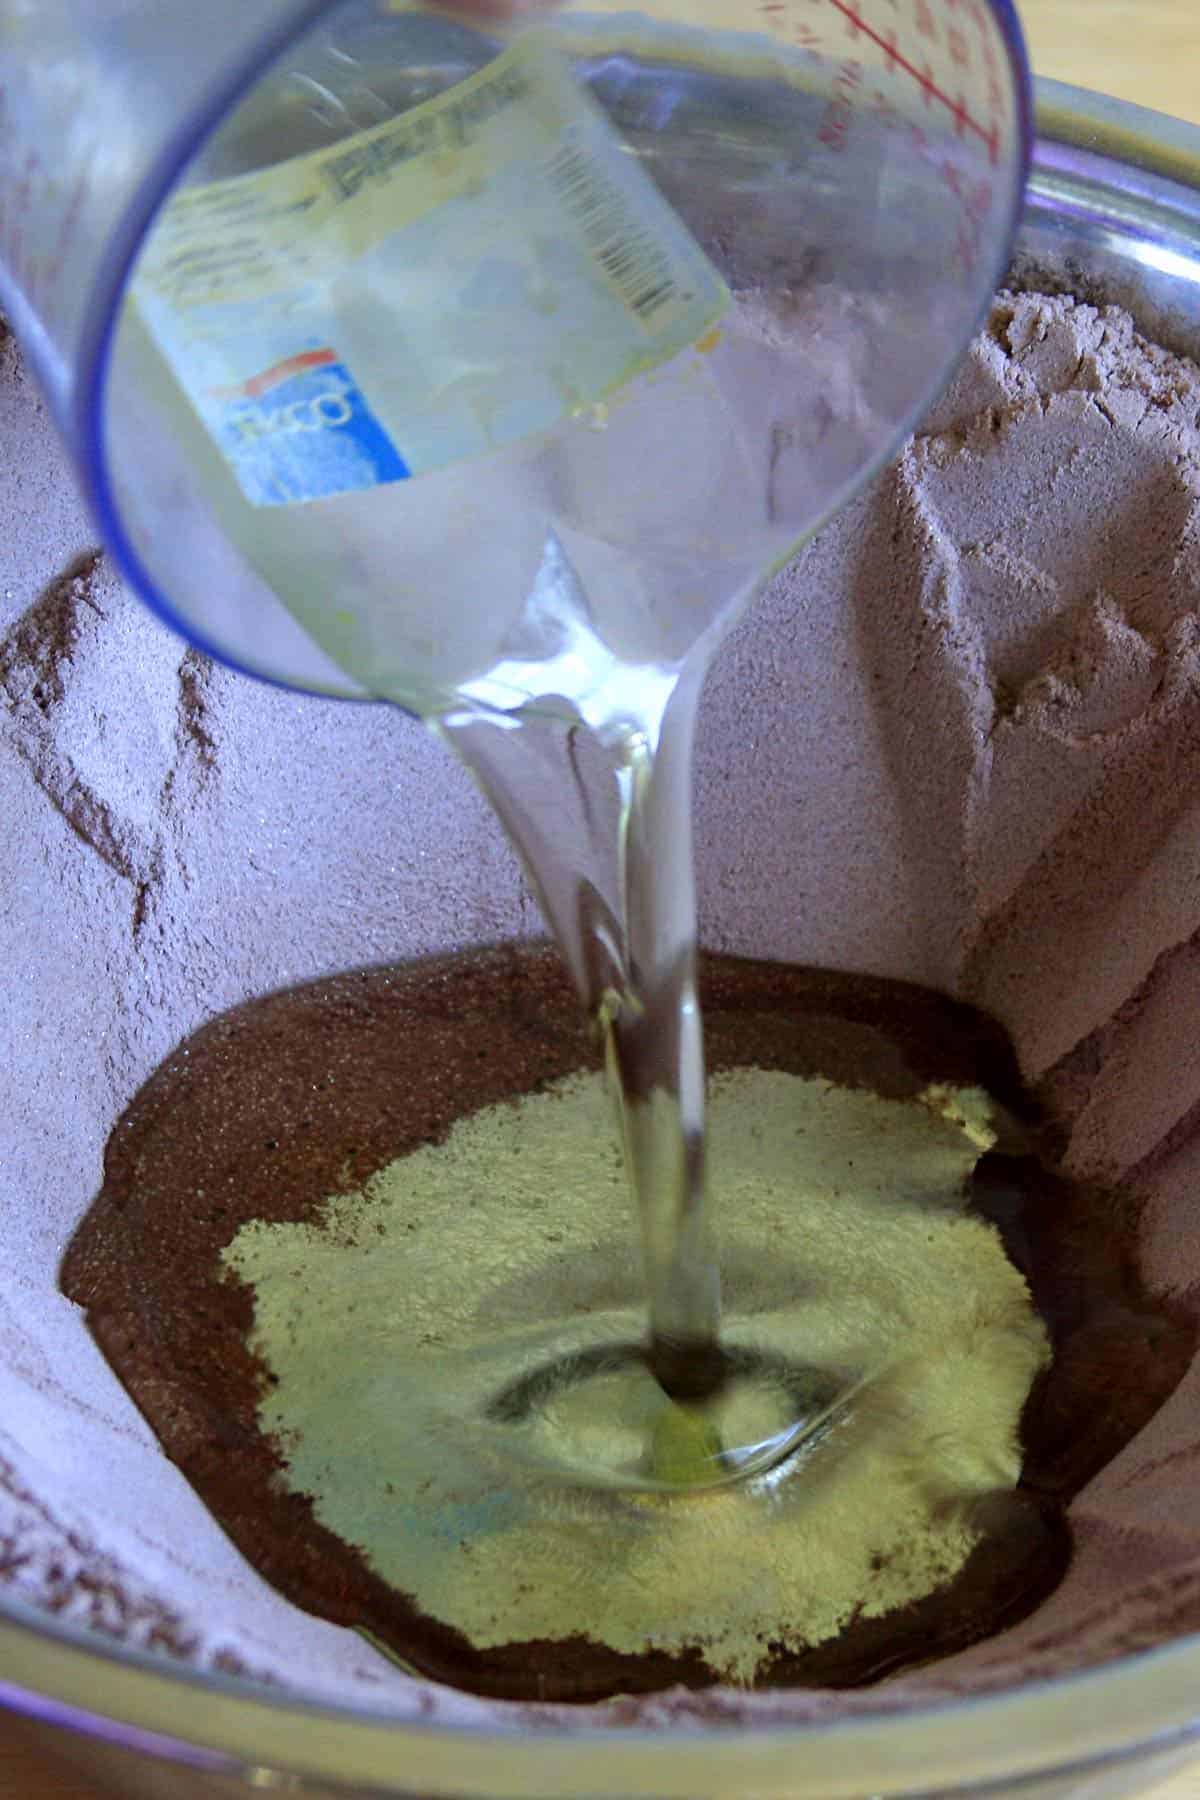
5. Add Canola oil into the well.
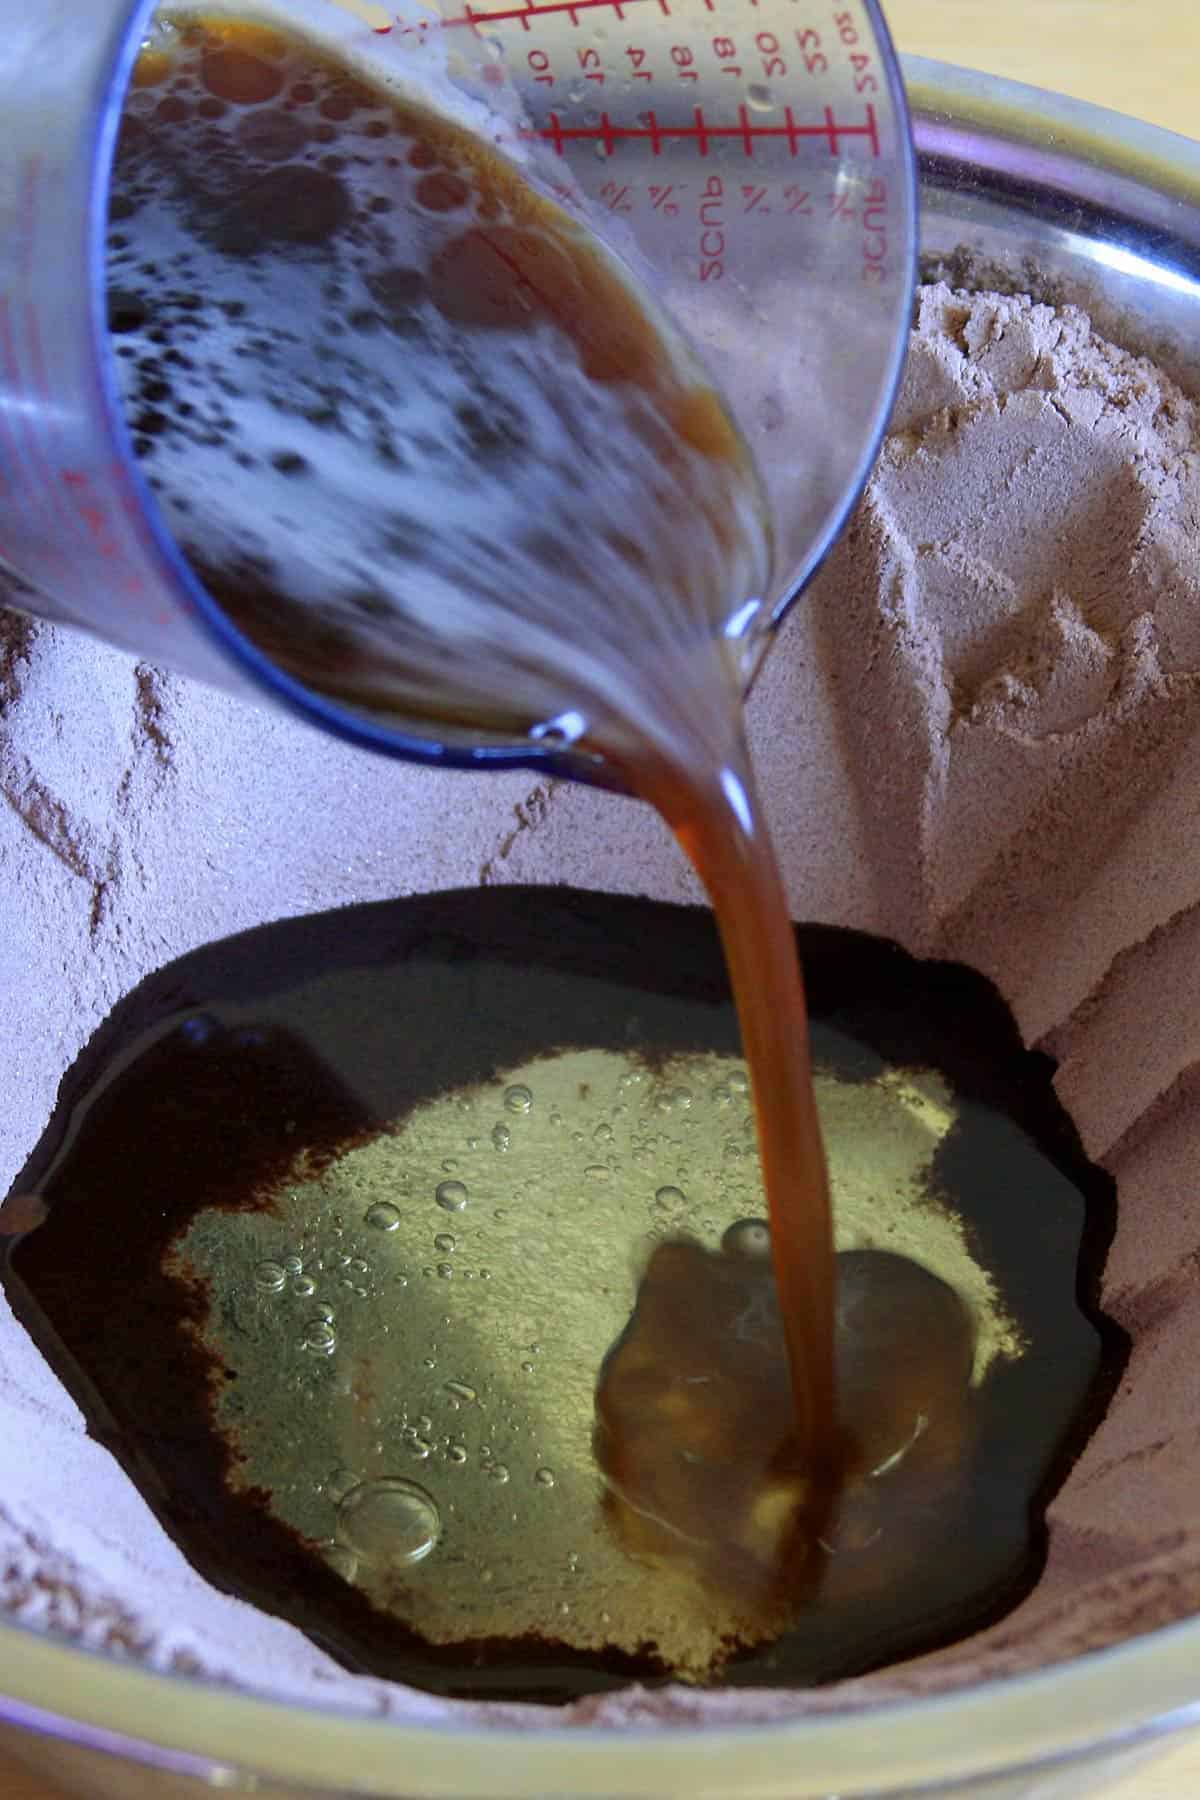
6. Add the hot coffee decoction.
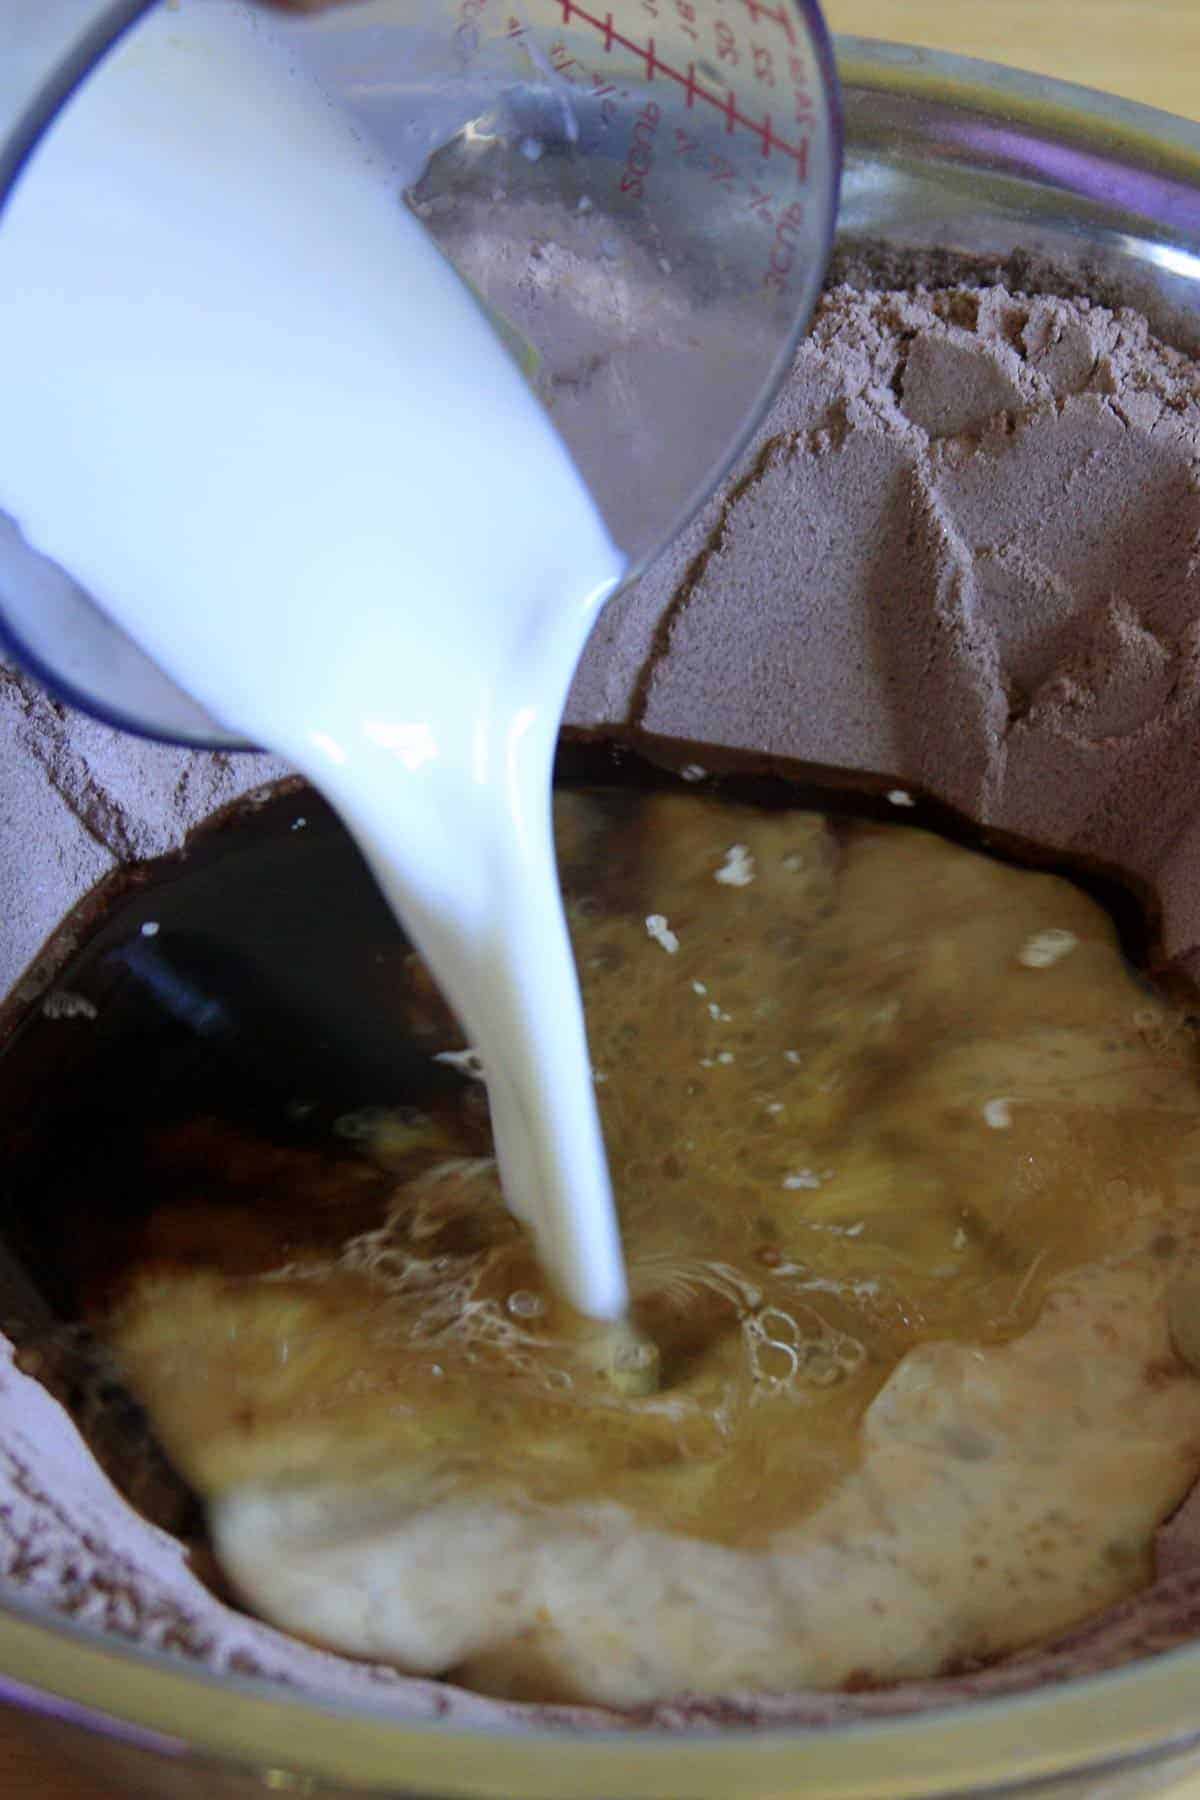
7. Add milk to the mix.
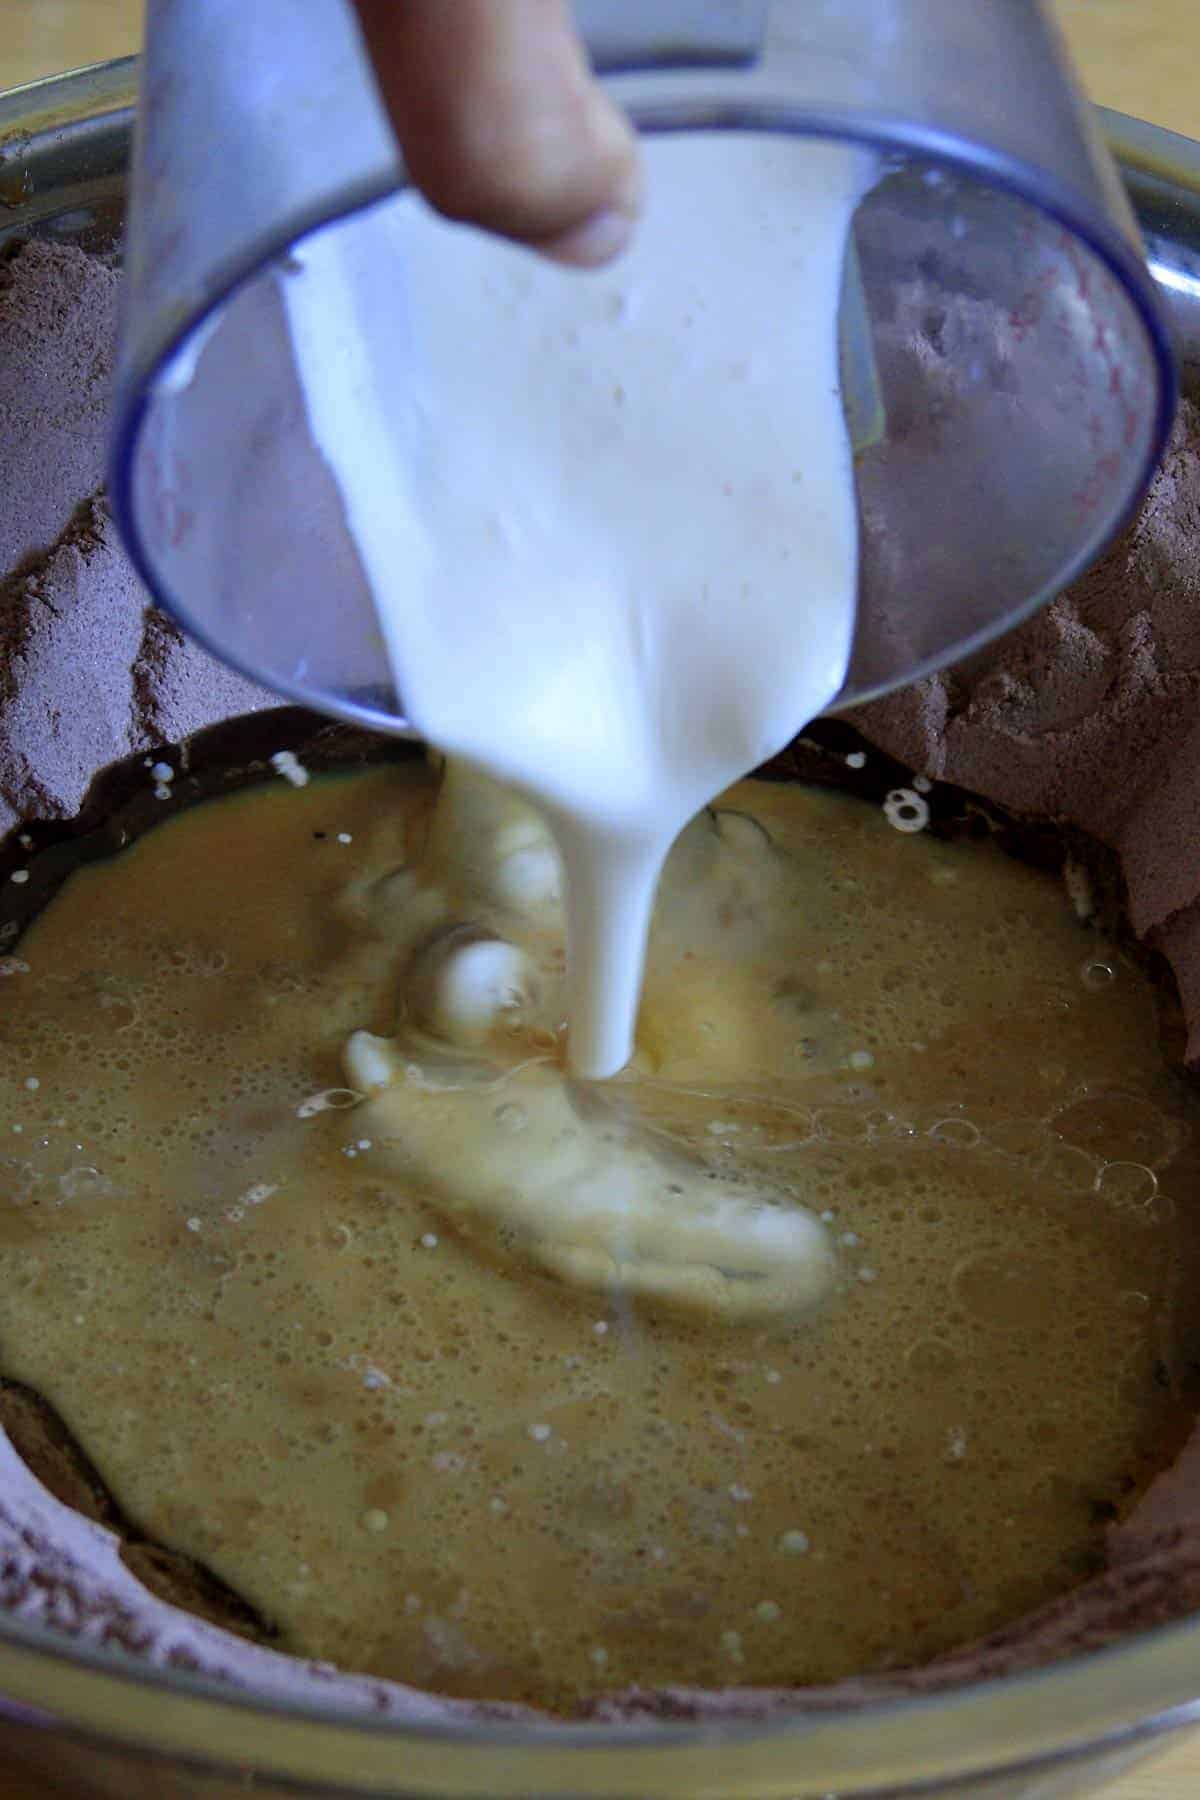
8. Add the pureed tofu. (Remove the silken tofu from the packet using a spoon, add it to the blender, and puree it to a creamy mixture)
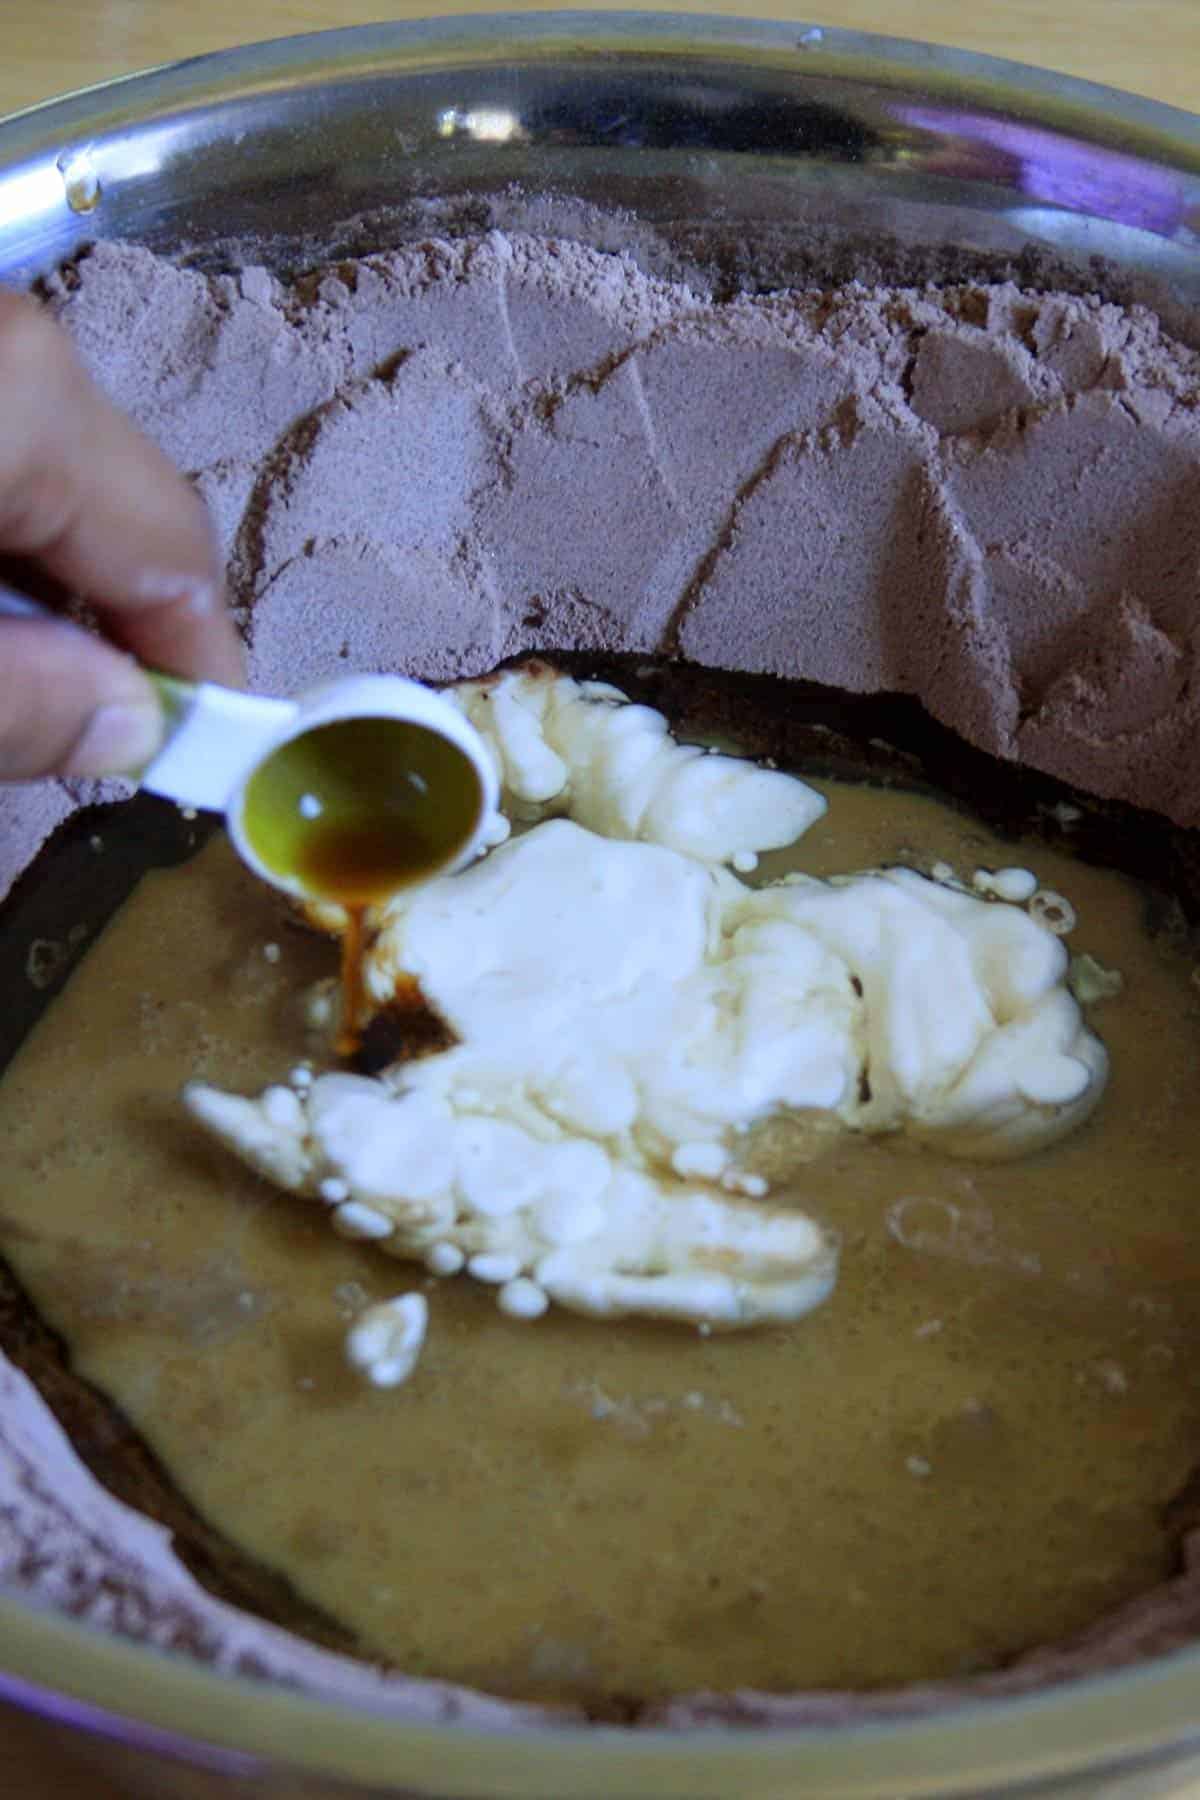
9. Add a few drops of Vanilla Essence.
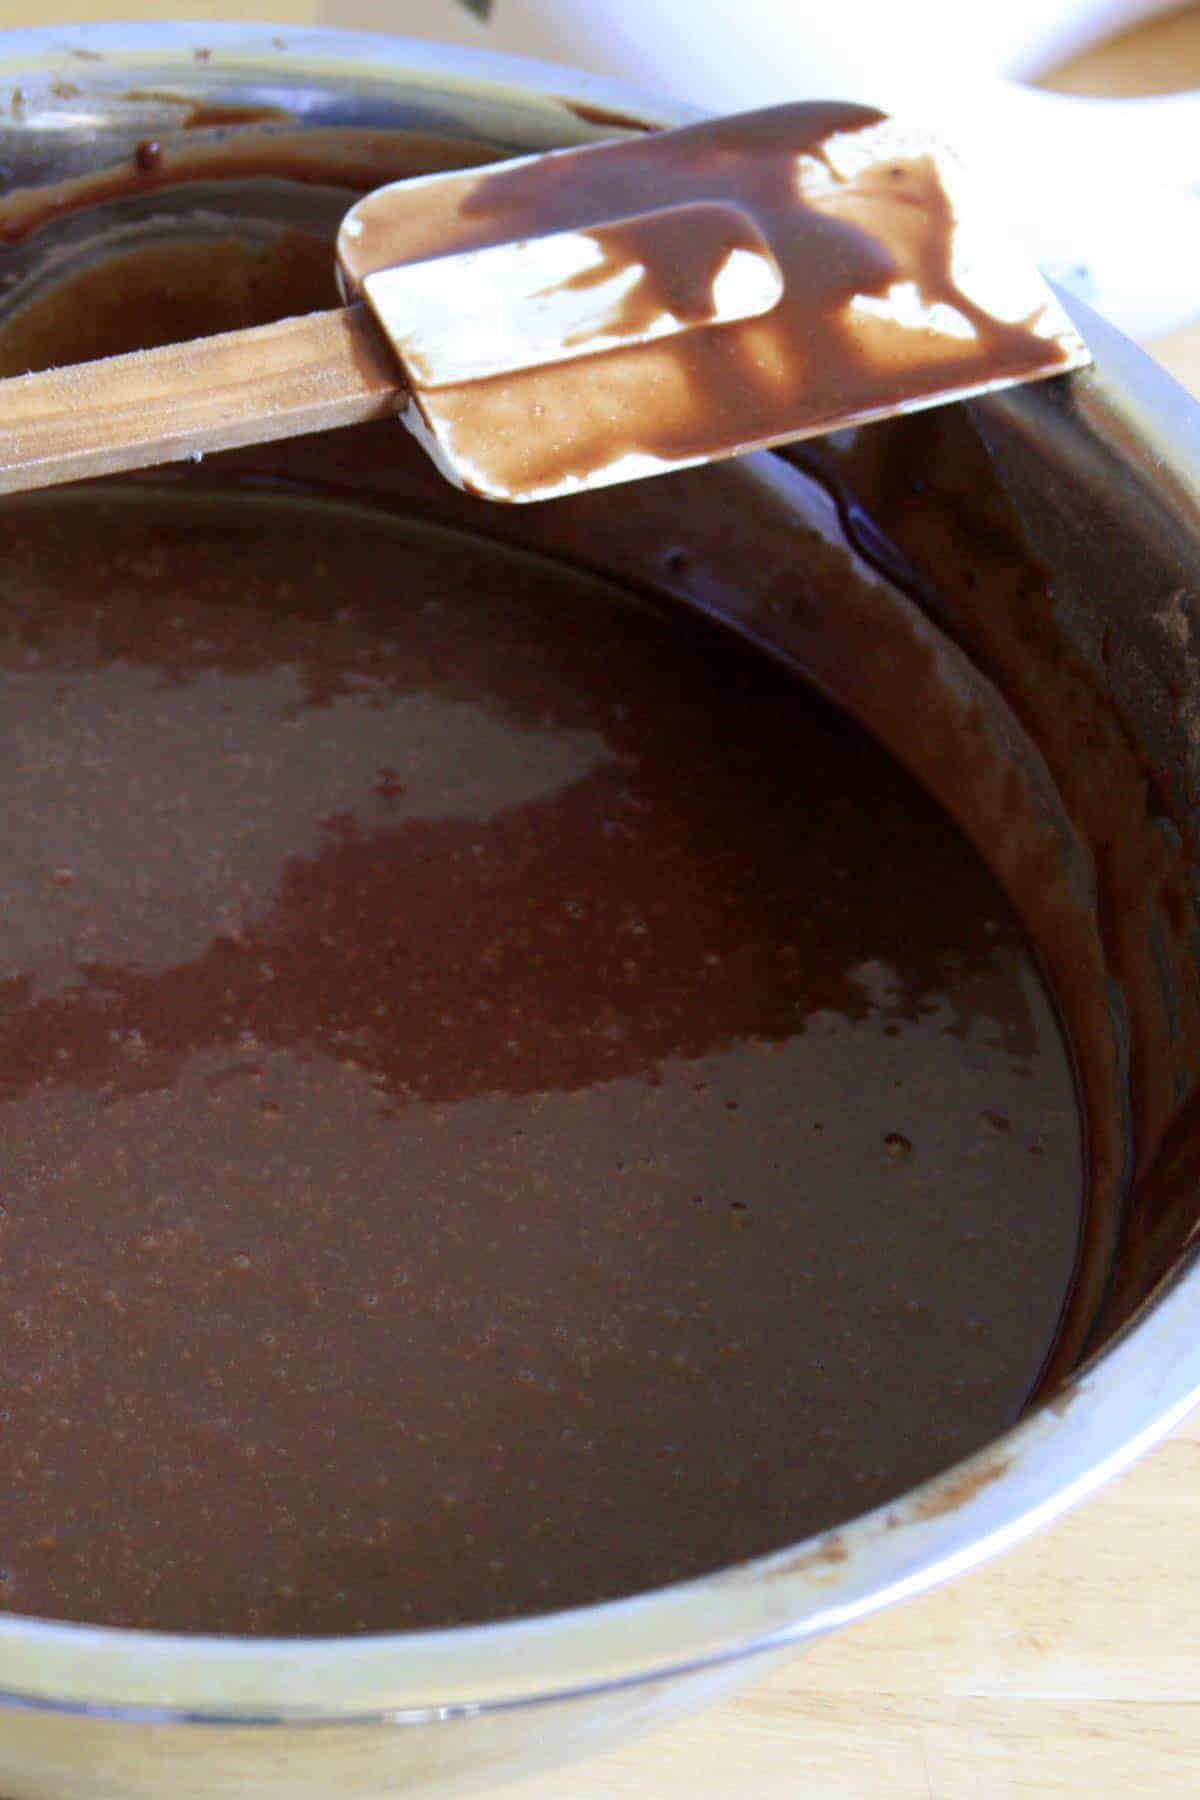
10. With an electric mixer, beat at medium speed for 2-3 minutes.
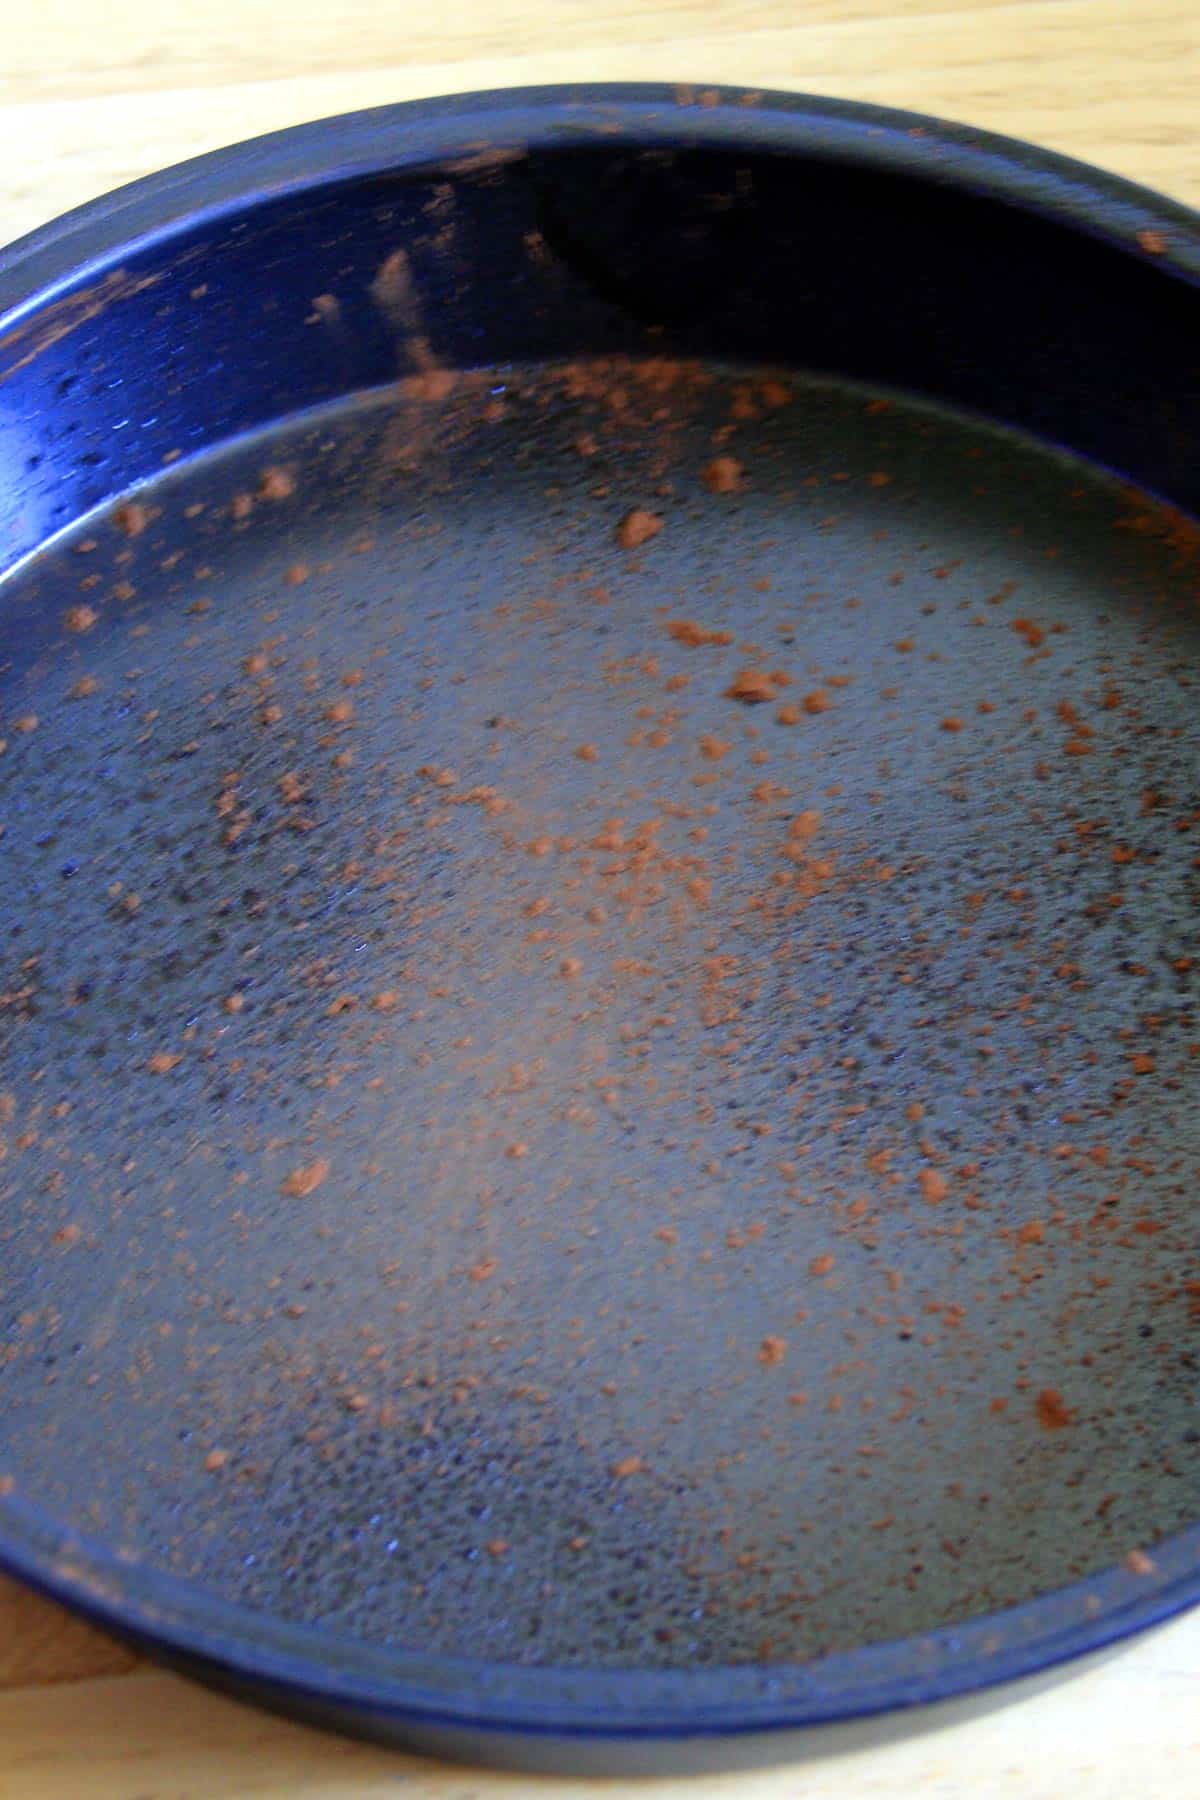
11. Sprinkle cocoa powder onto the cake pan.
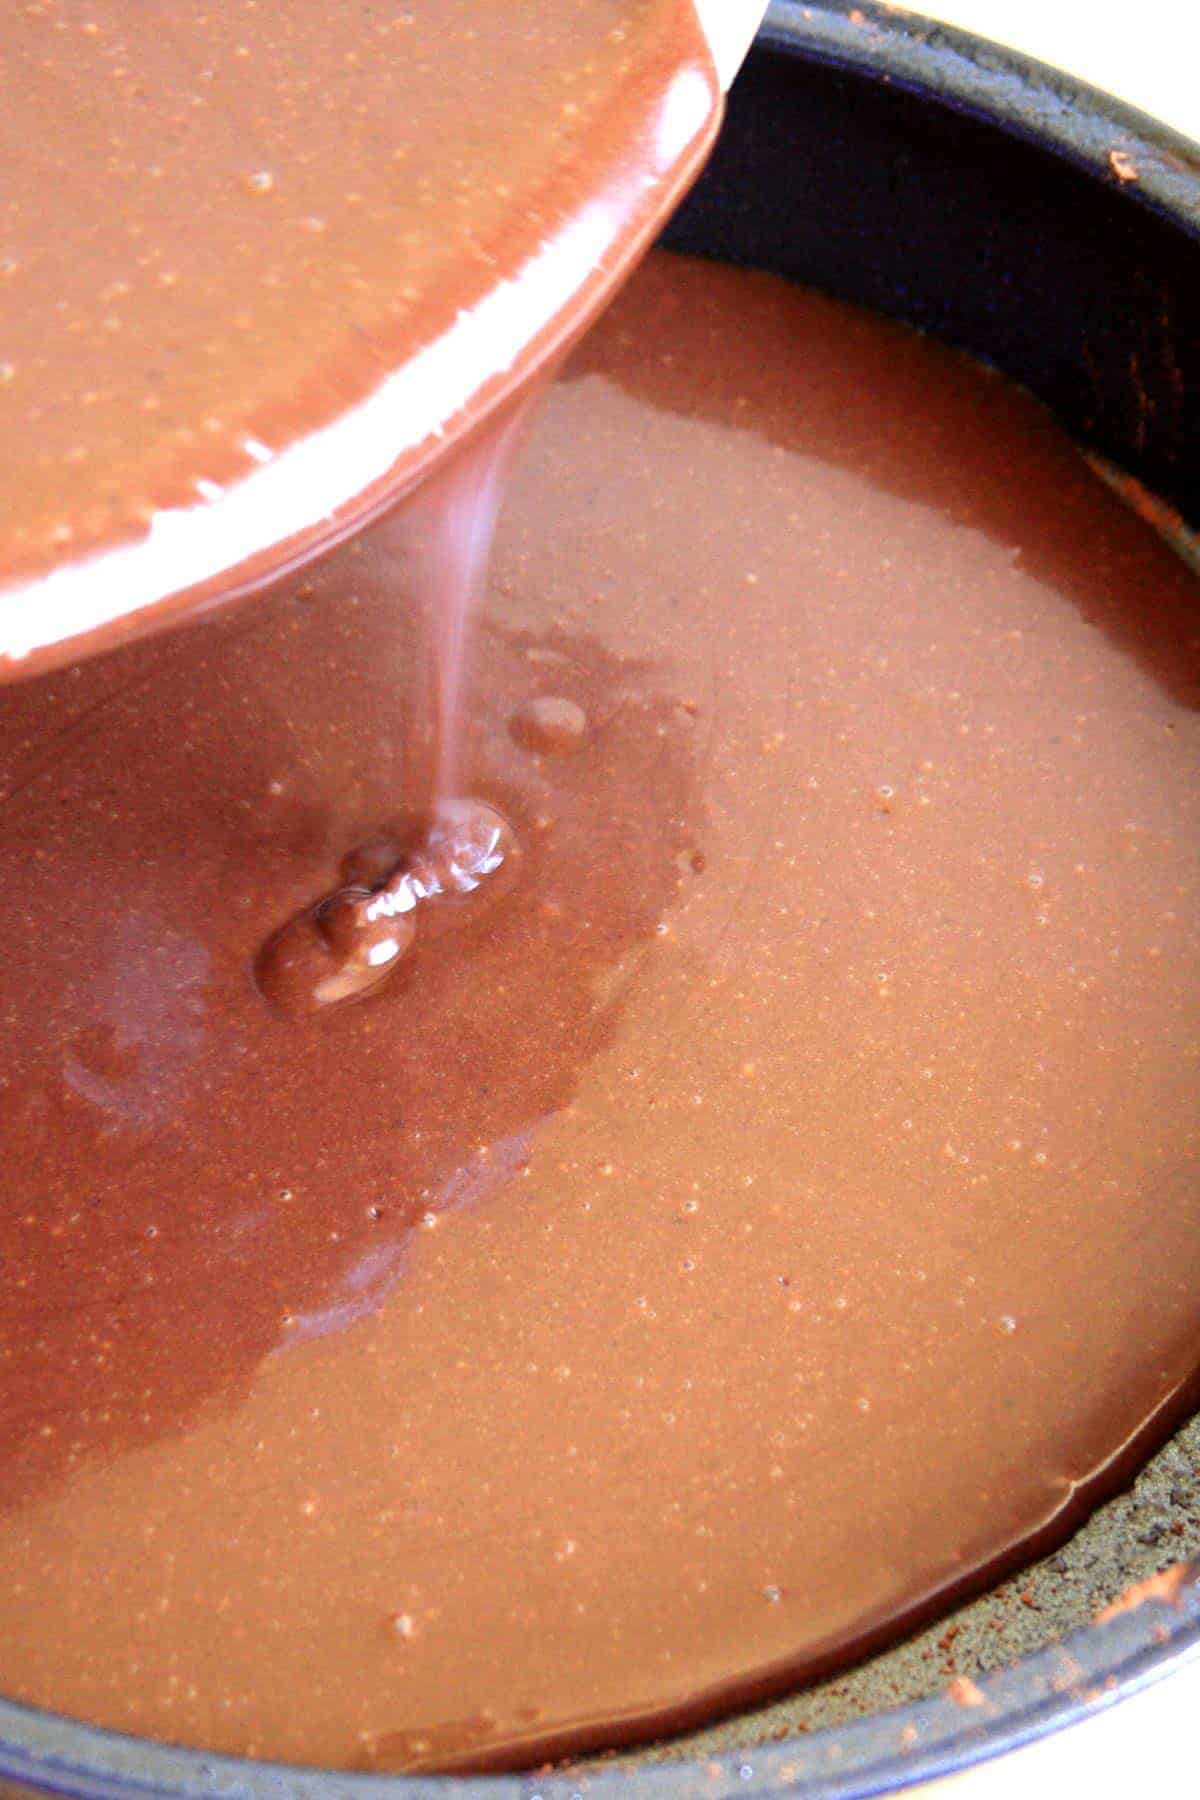
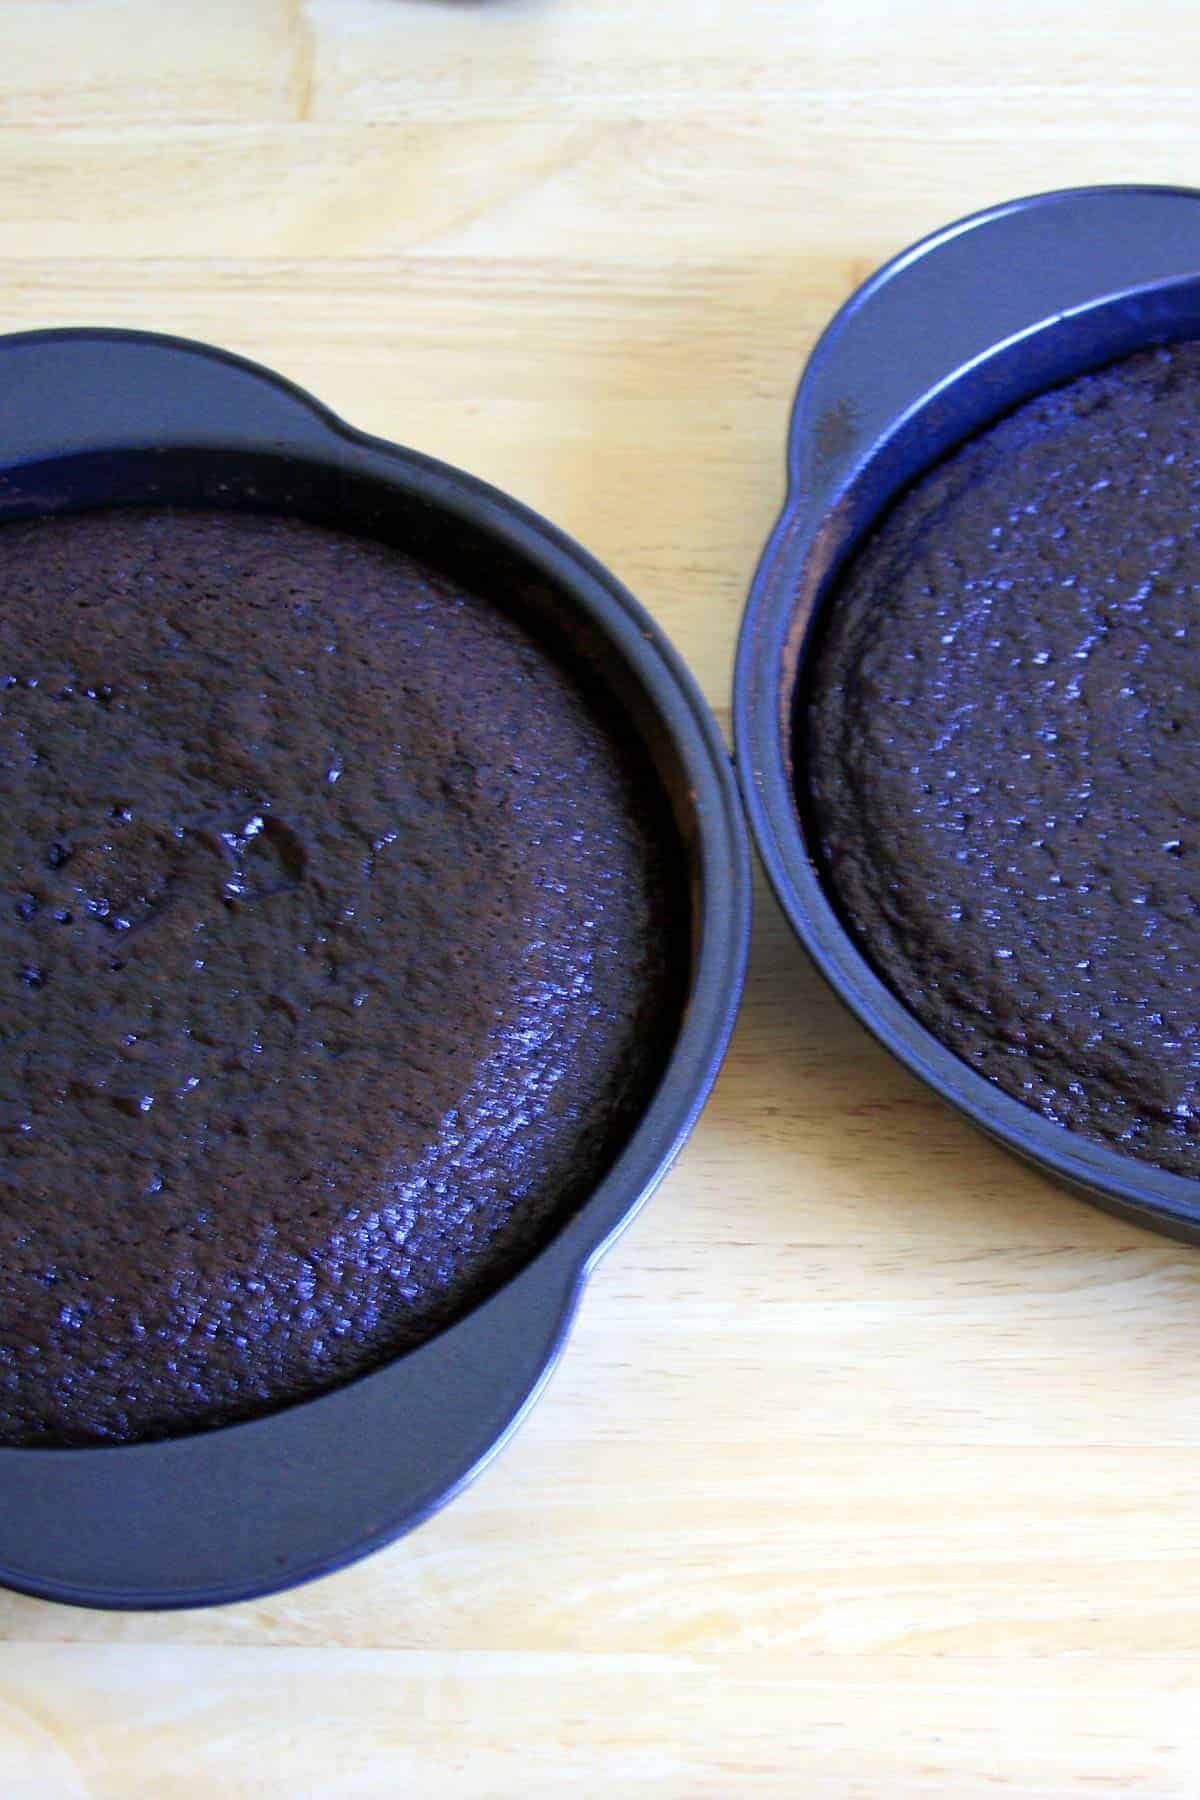
12. Pour the batter evenly into both 9-inch cake pans.
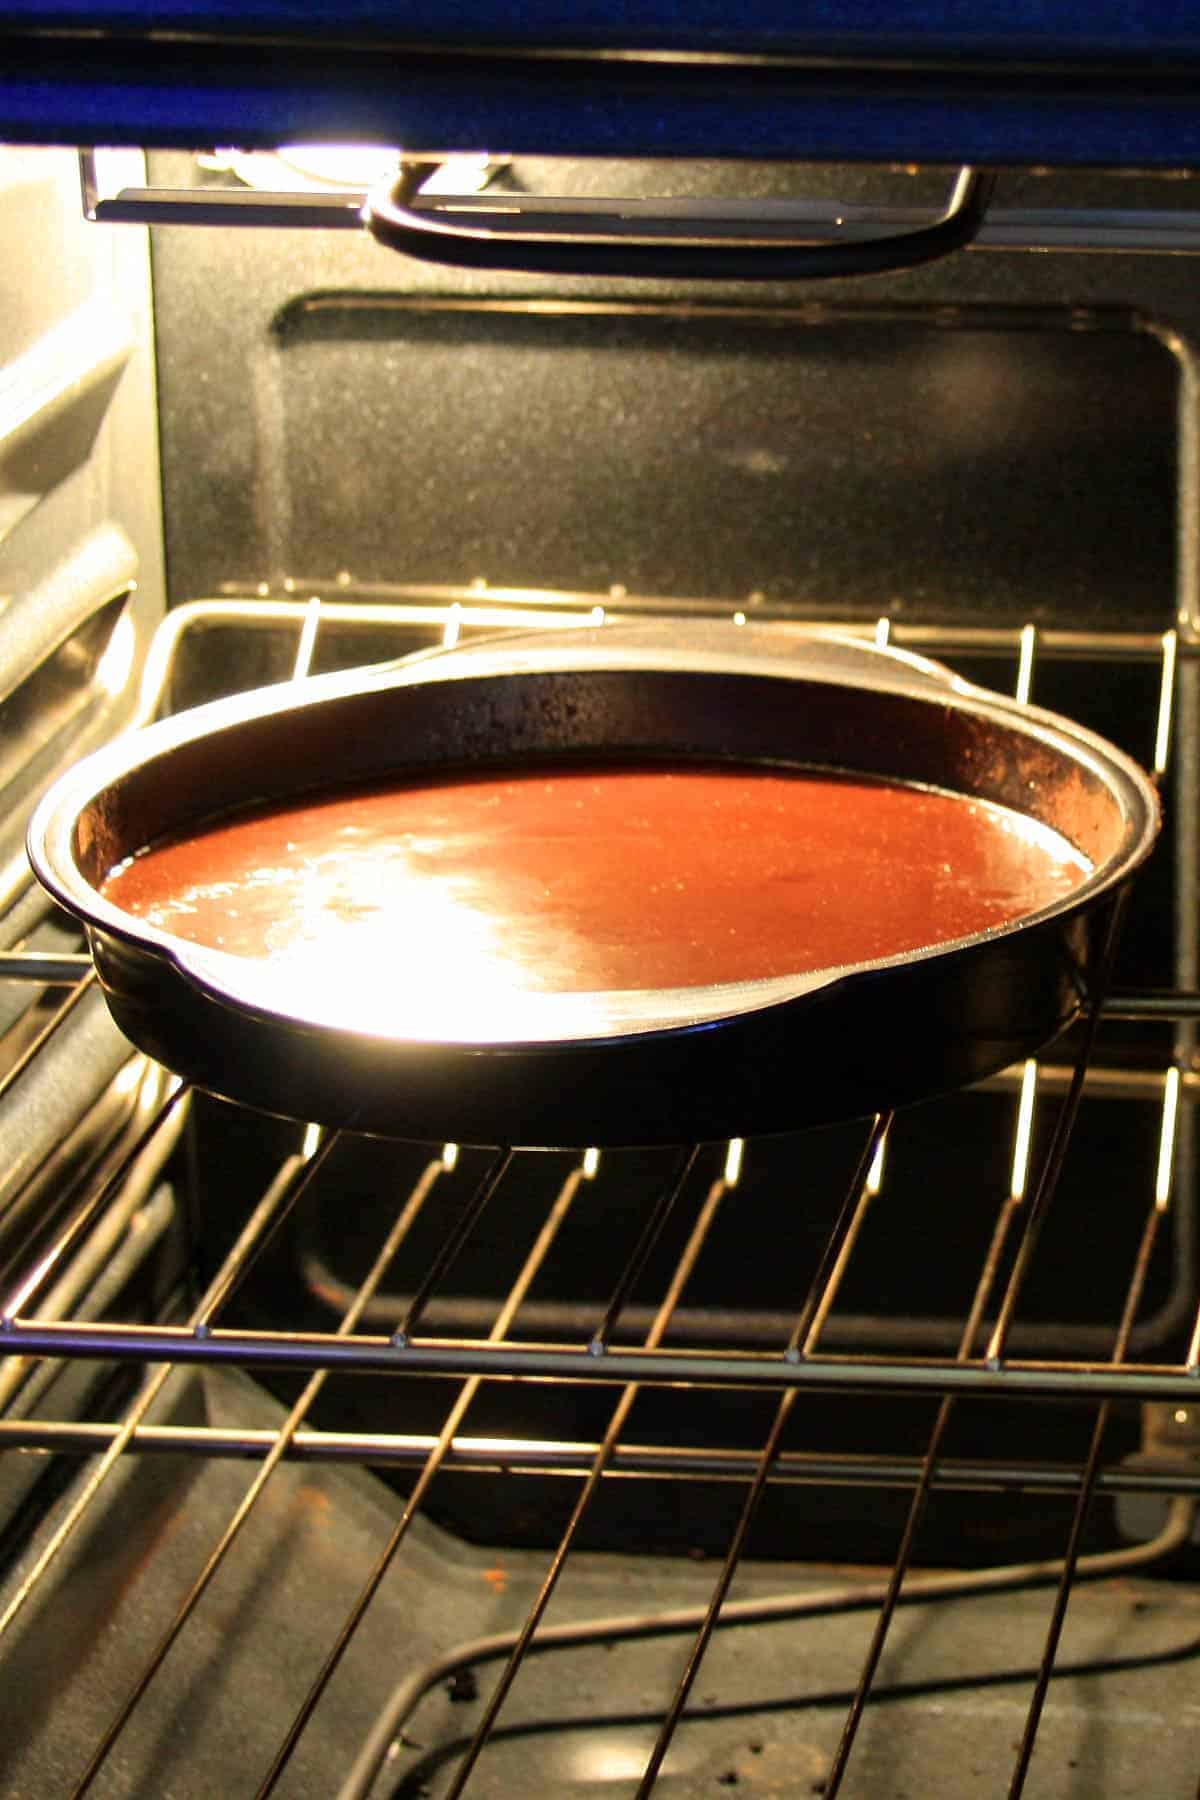
13. Bake this cake for 25 to 30 minutes until a wooden toothpick inserted into the center of the cake comes out clean.
14. Let the cakes cool completely before removing them from the pans.
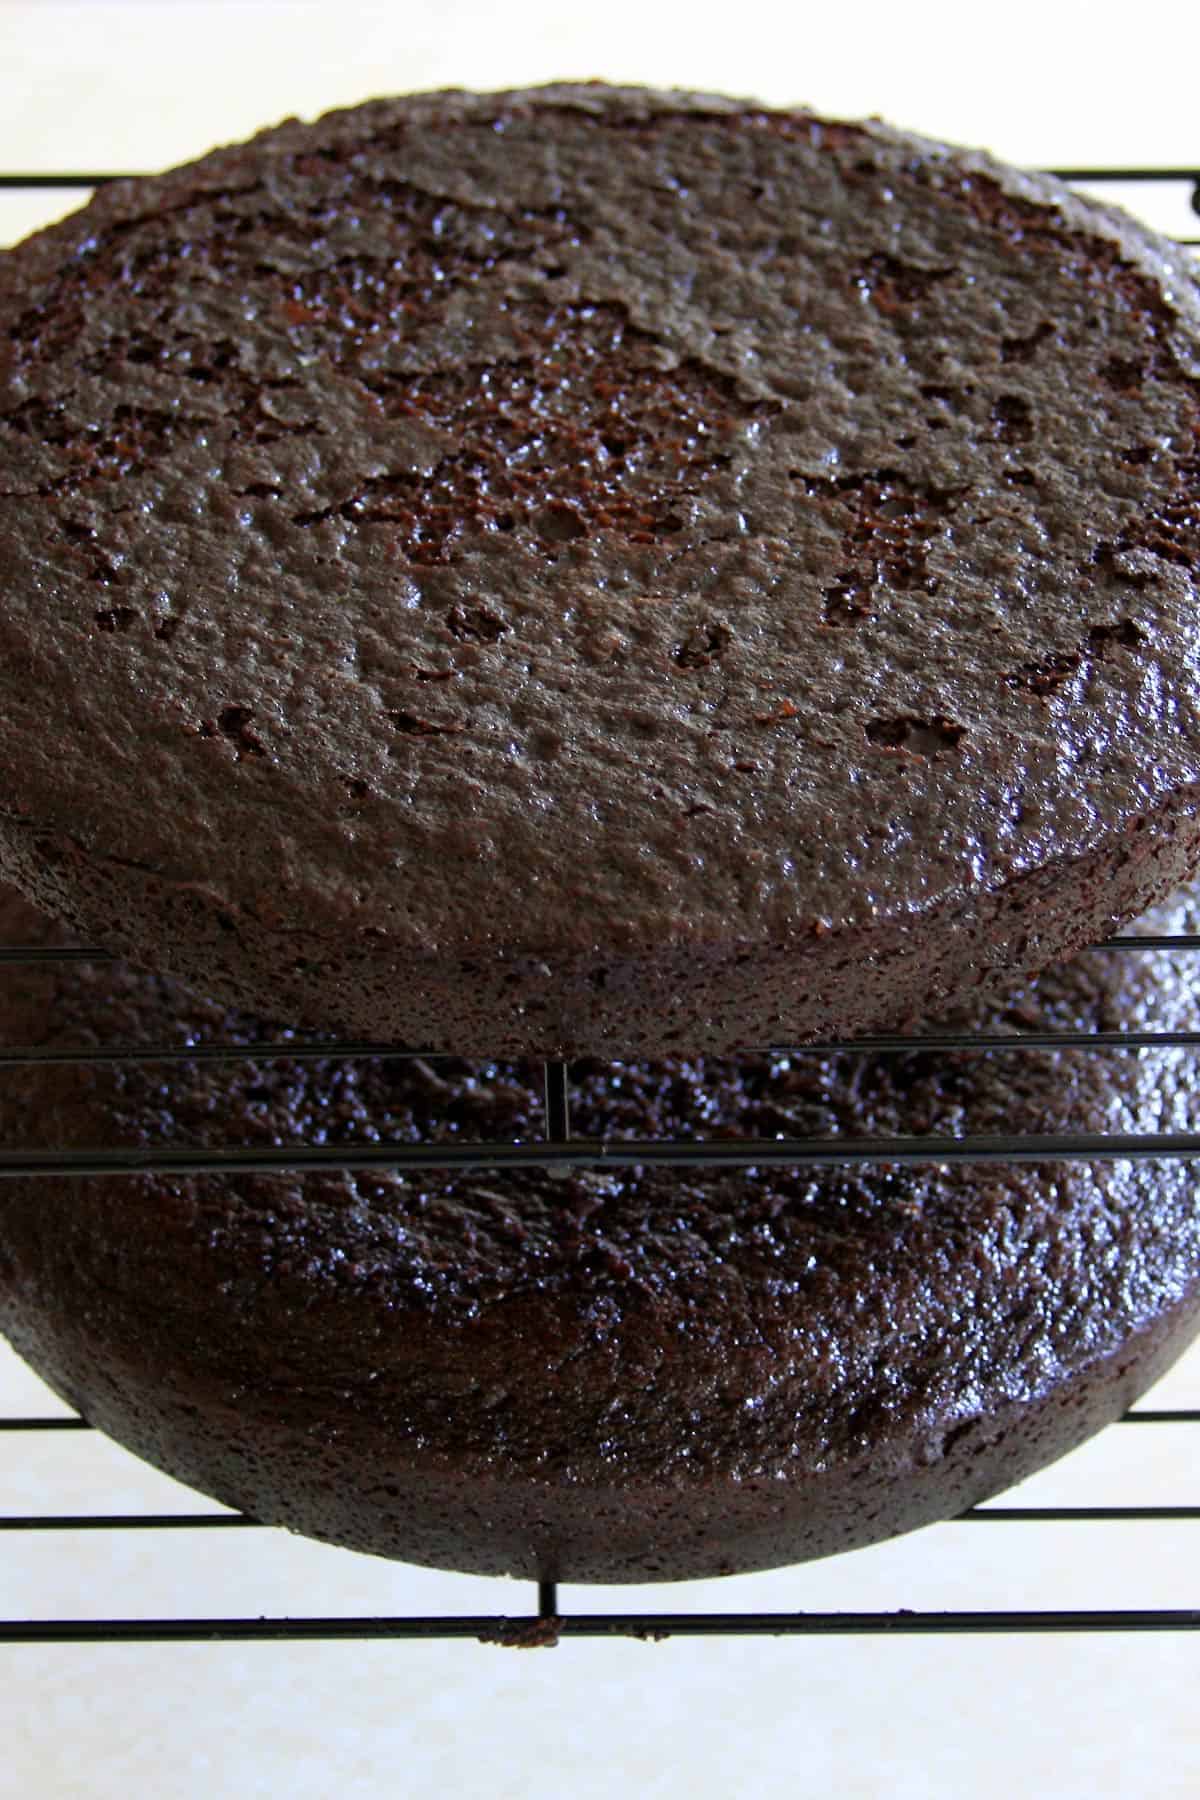
15. The cake should cool completely on the wire rack before frosting.
Frosting Recipe
Here are the step-by-step instructions on making the frosting from scratch and the cake decorations.

Sift the mix. Add the melted butter, hot milk, vanilla, and baking soda. (I read in the same book that adding a pinch of baking soda to icings prevents hardening and cracking, so icing stays moist)
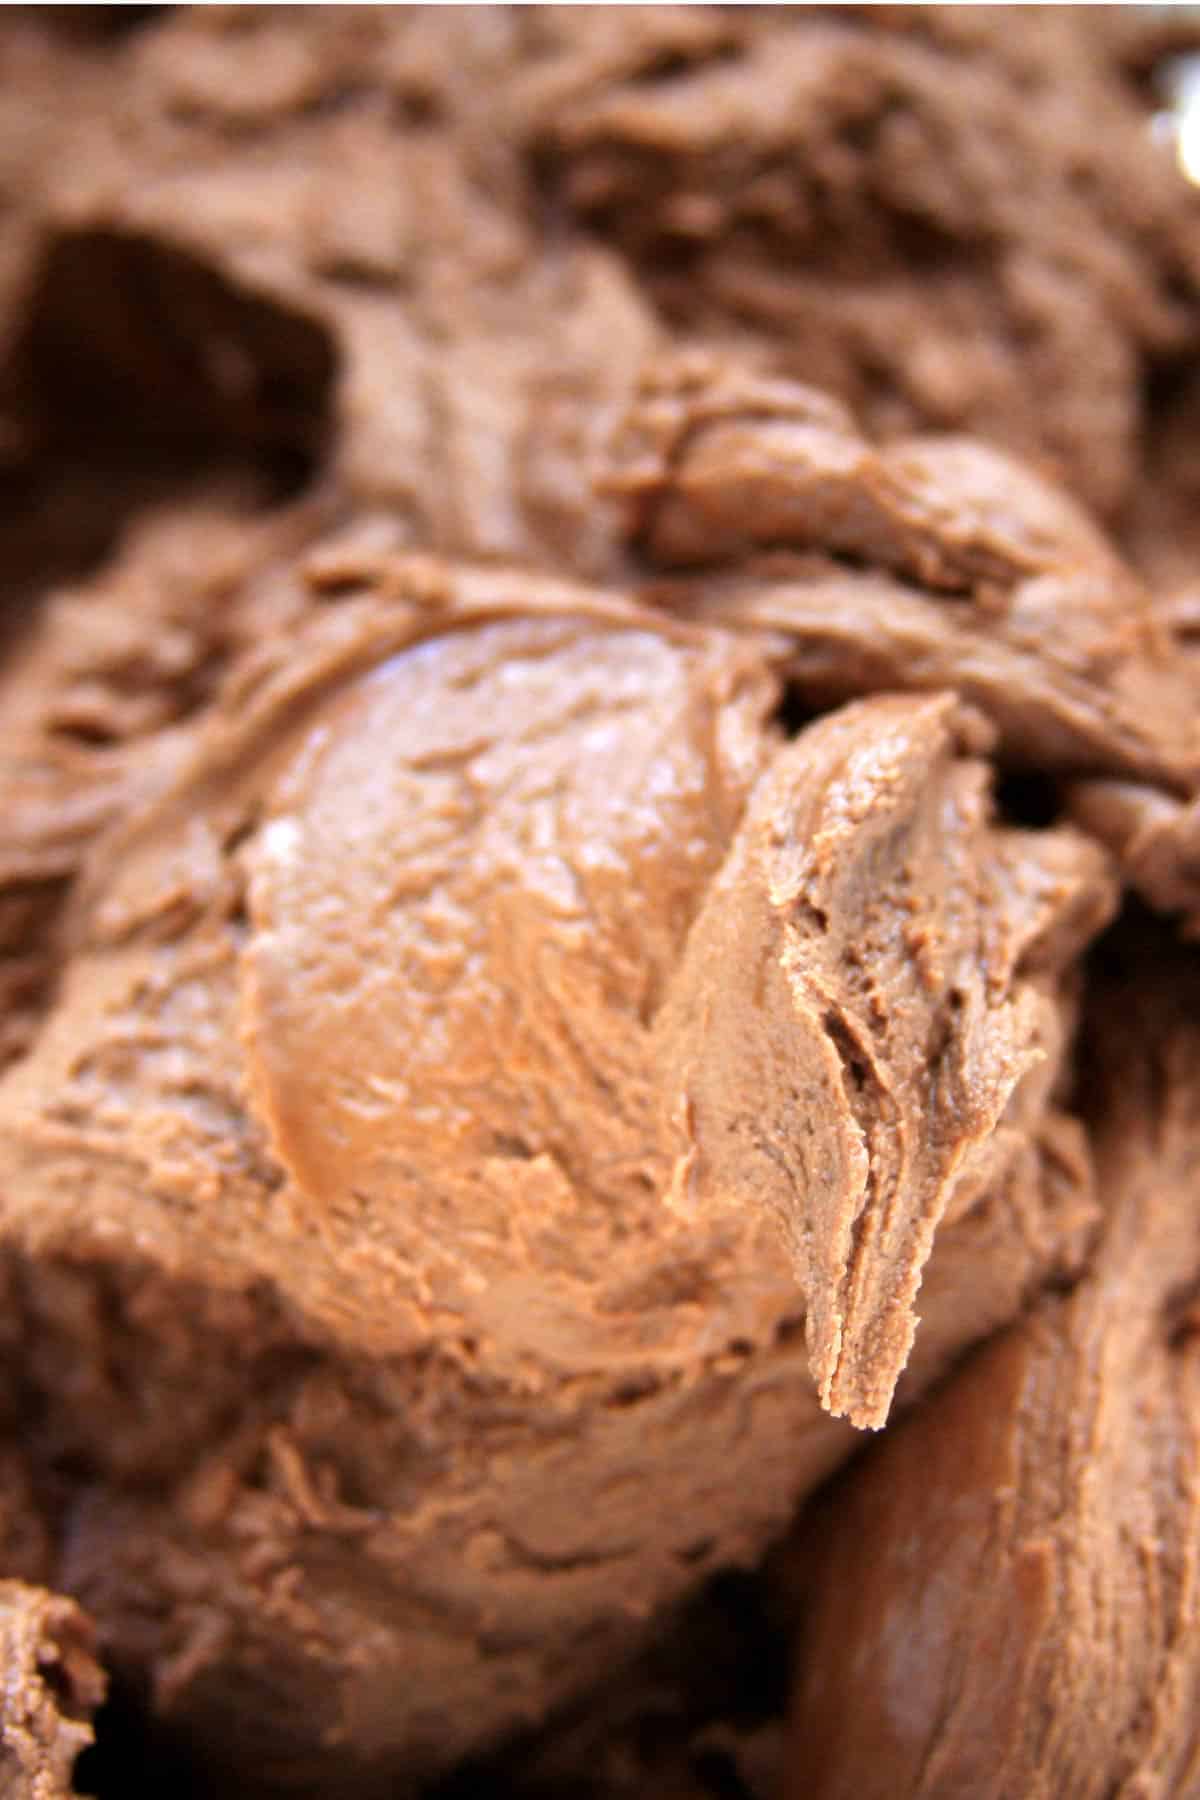
Beat the mix using a hand mixer at medium-high speed. Add a few drops of water/milk if required.
Frosting the Cake
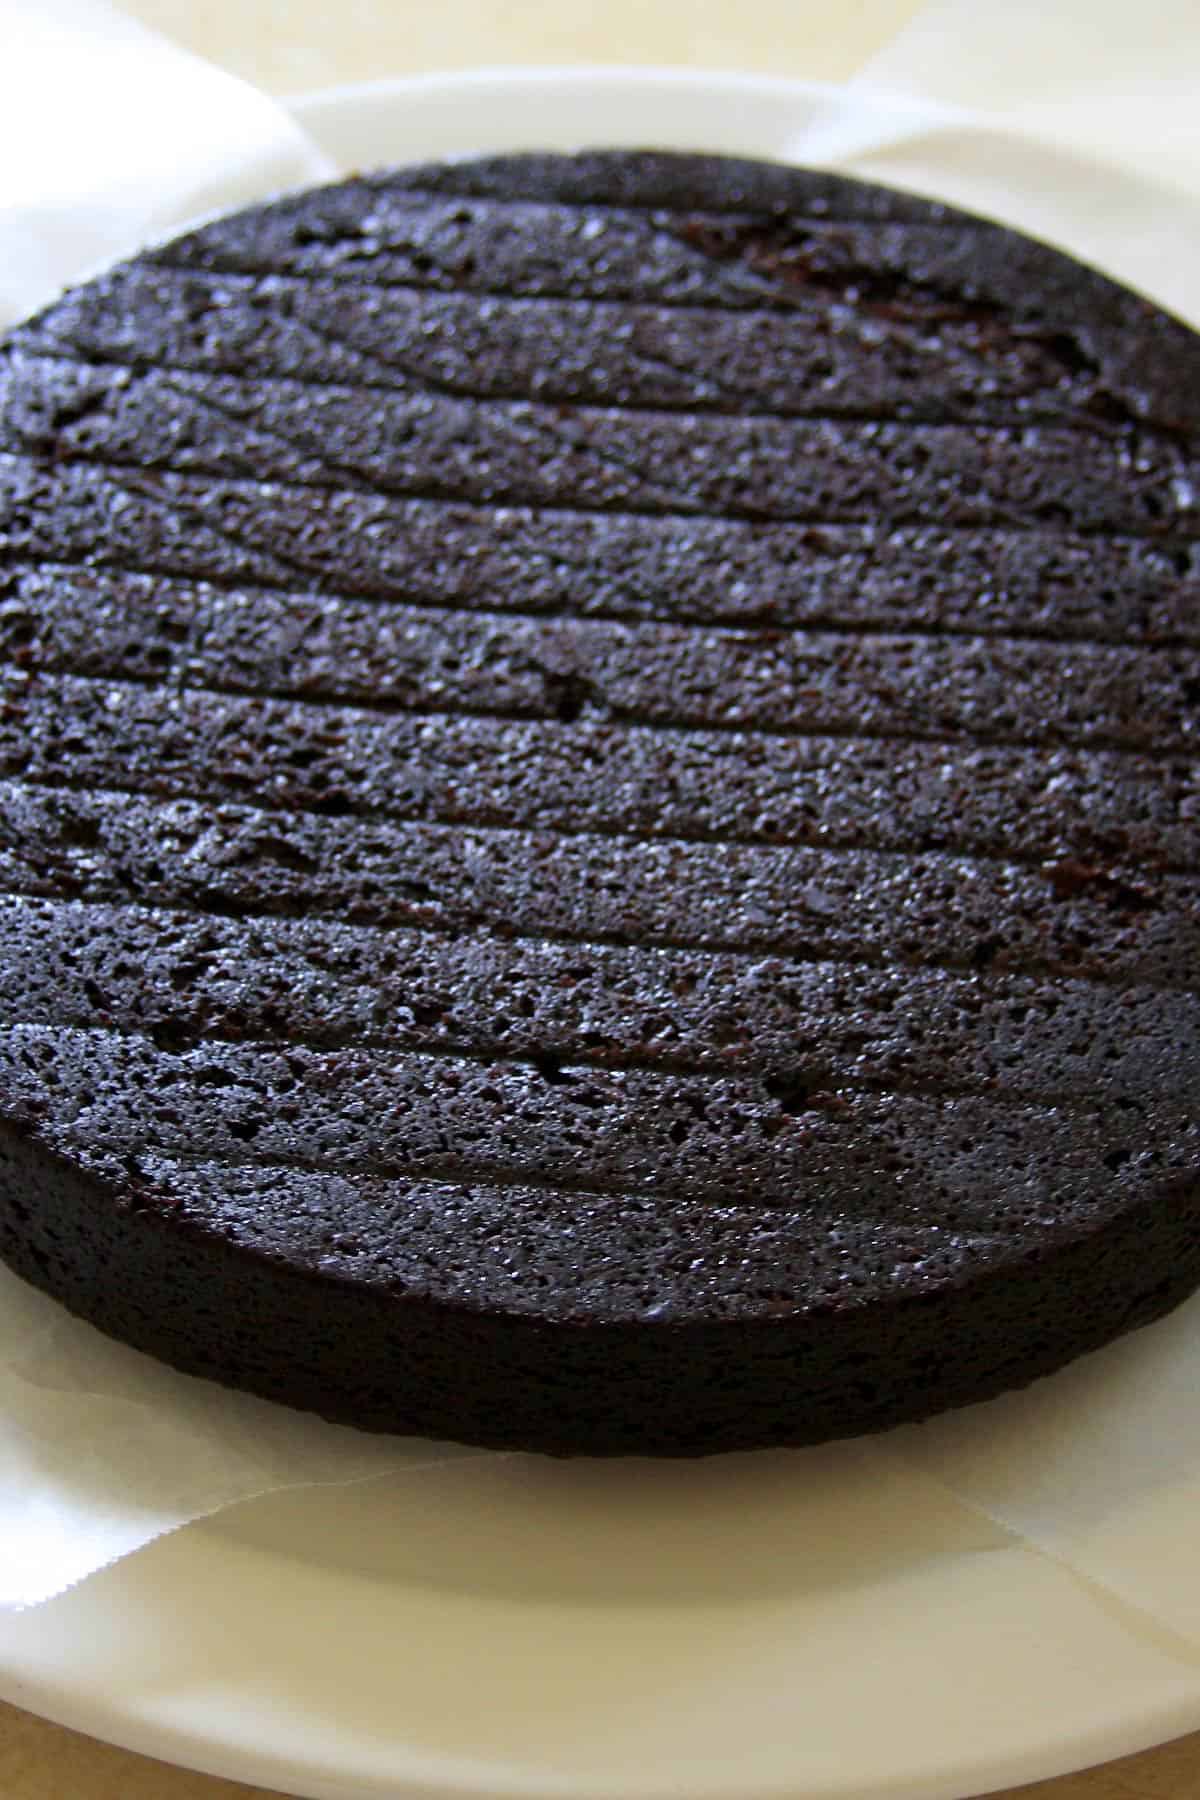
First, I placed the bottom layer upside down so the rounded side (top of the cake would be on the serving plate). If you have a dome top on the cake, even it out by slicing it with a serrated knife and then place it upside-down.
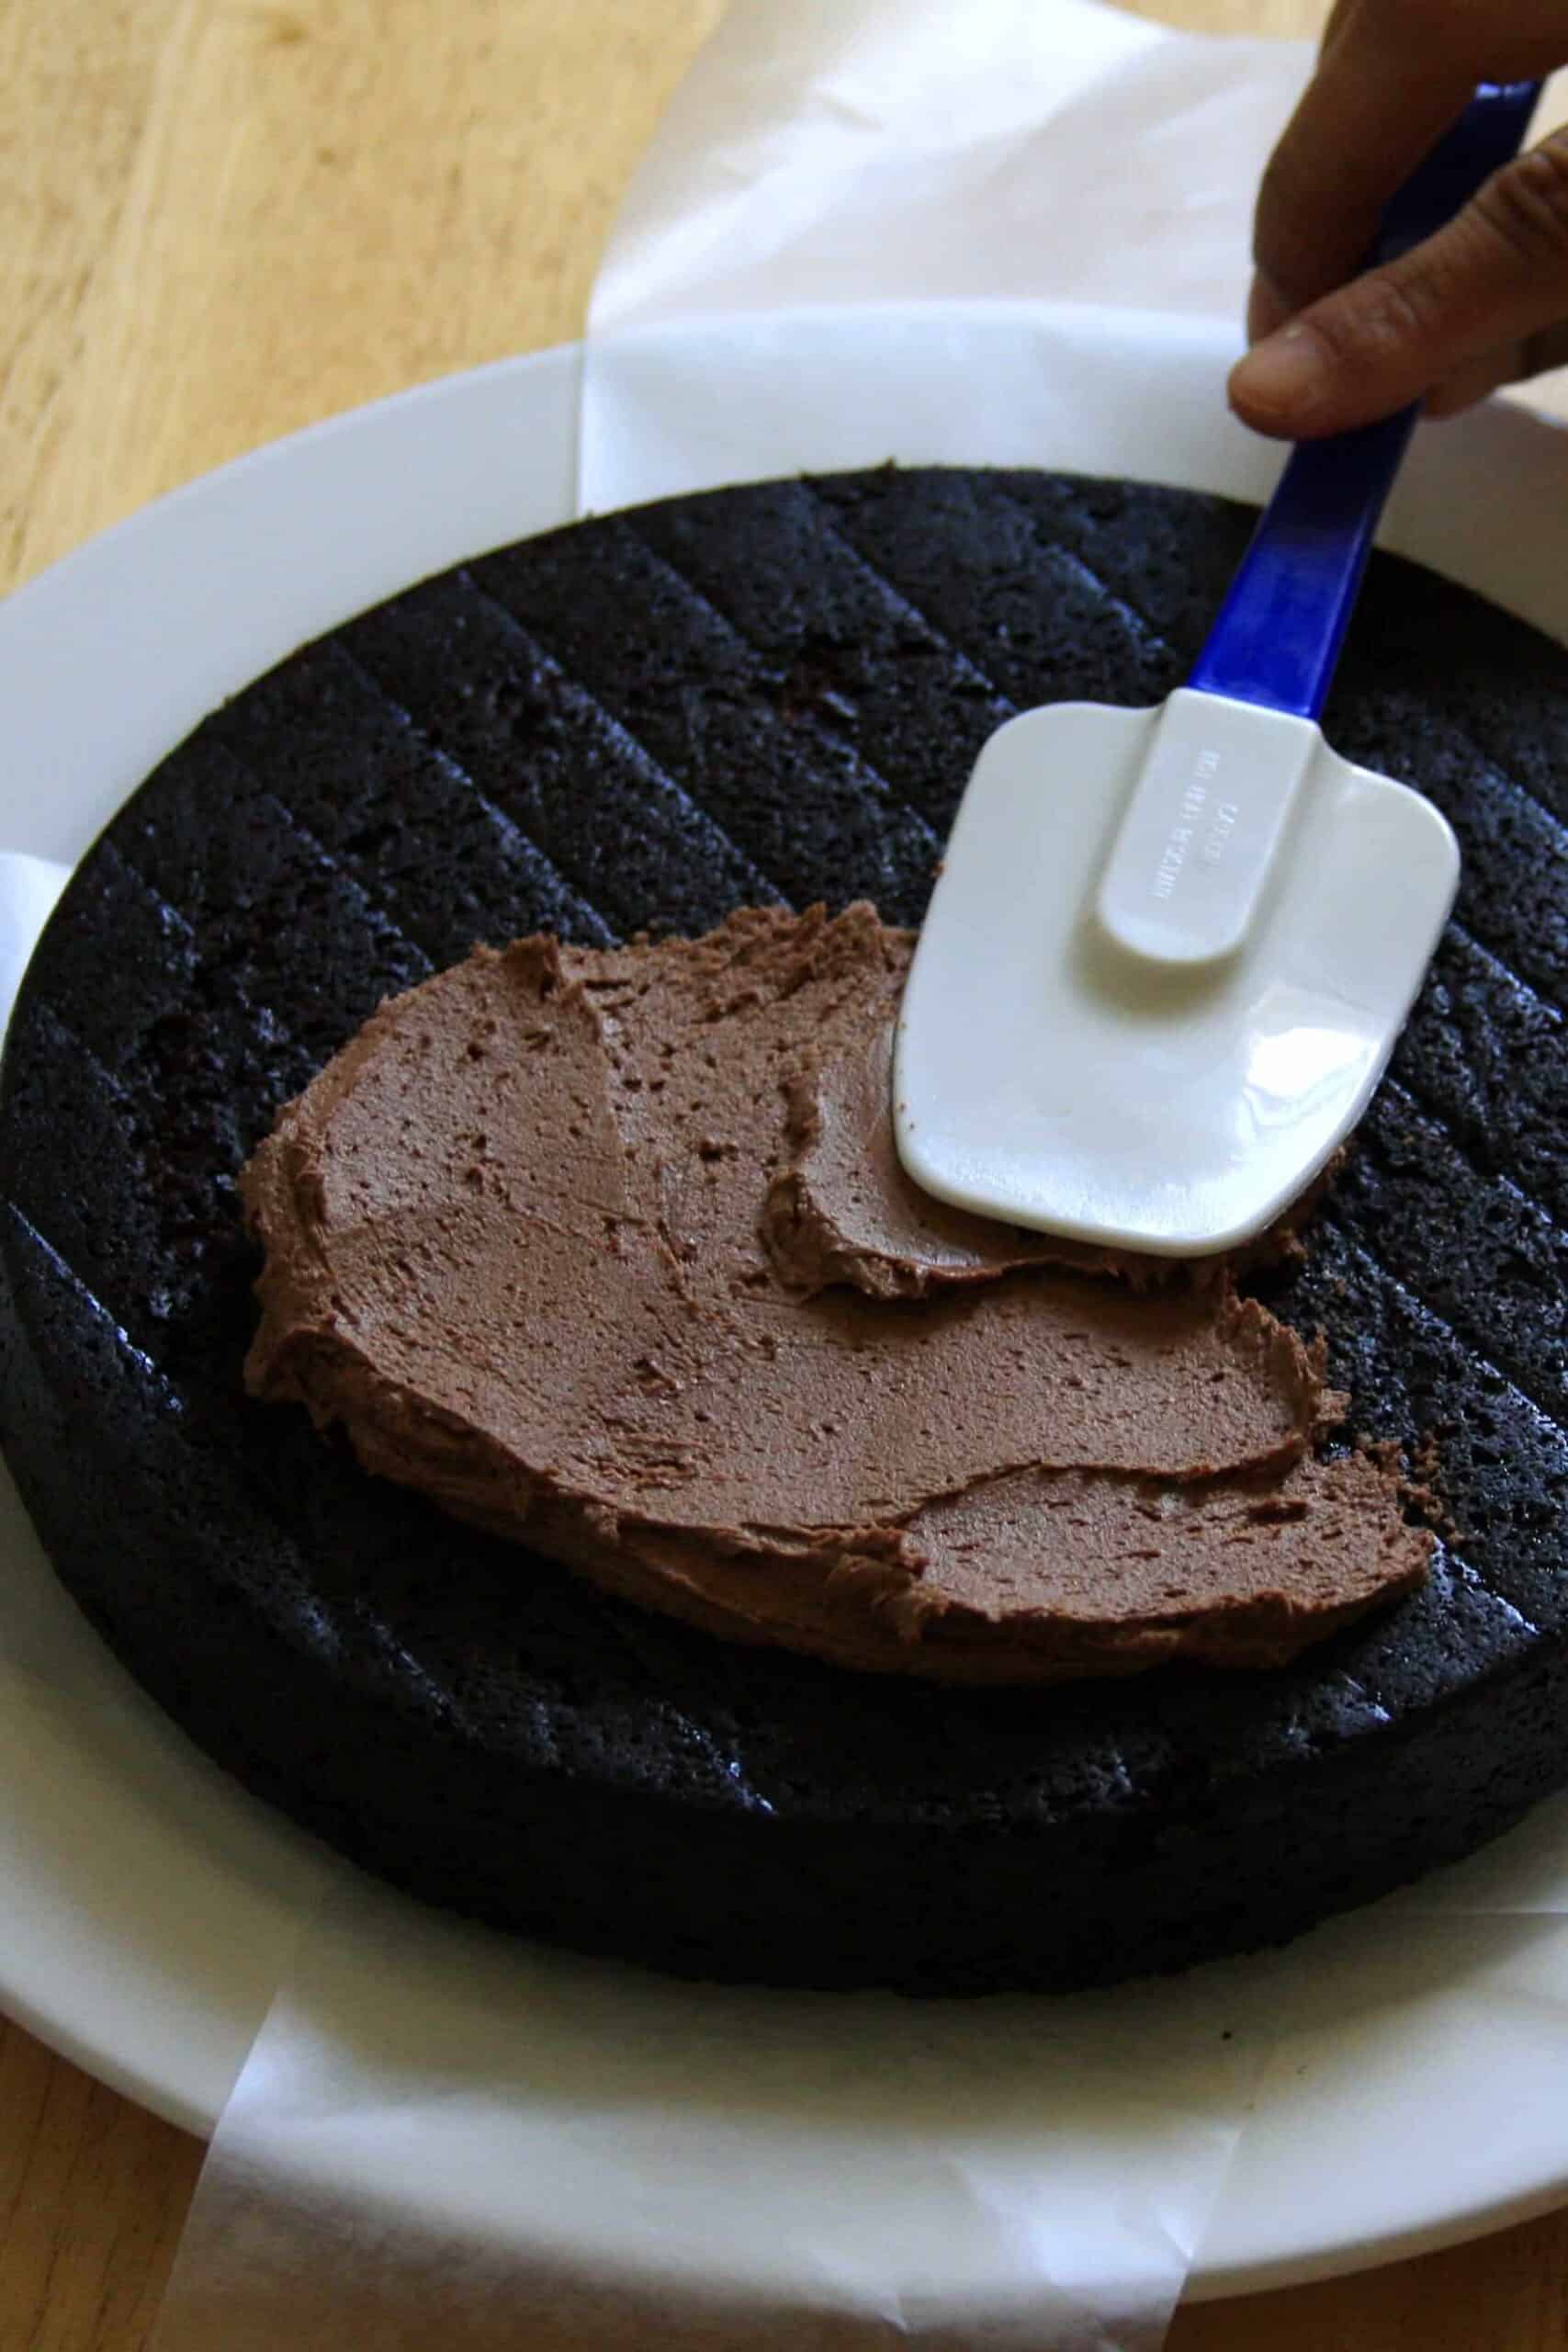
Spread about ½ cup to ¾ cup of frosting on top of the bottom layer. Don't use hard strokes; spread it gently using an offset metal spatula or plastic spatula.
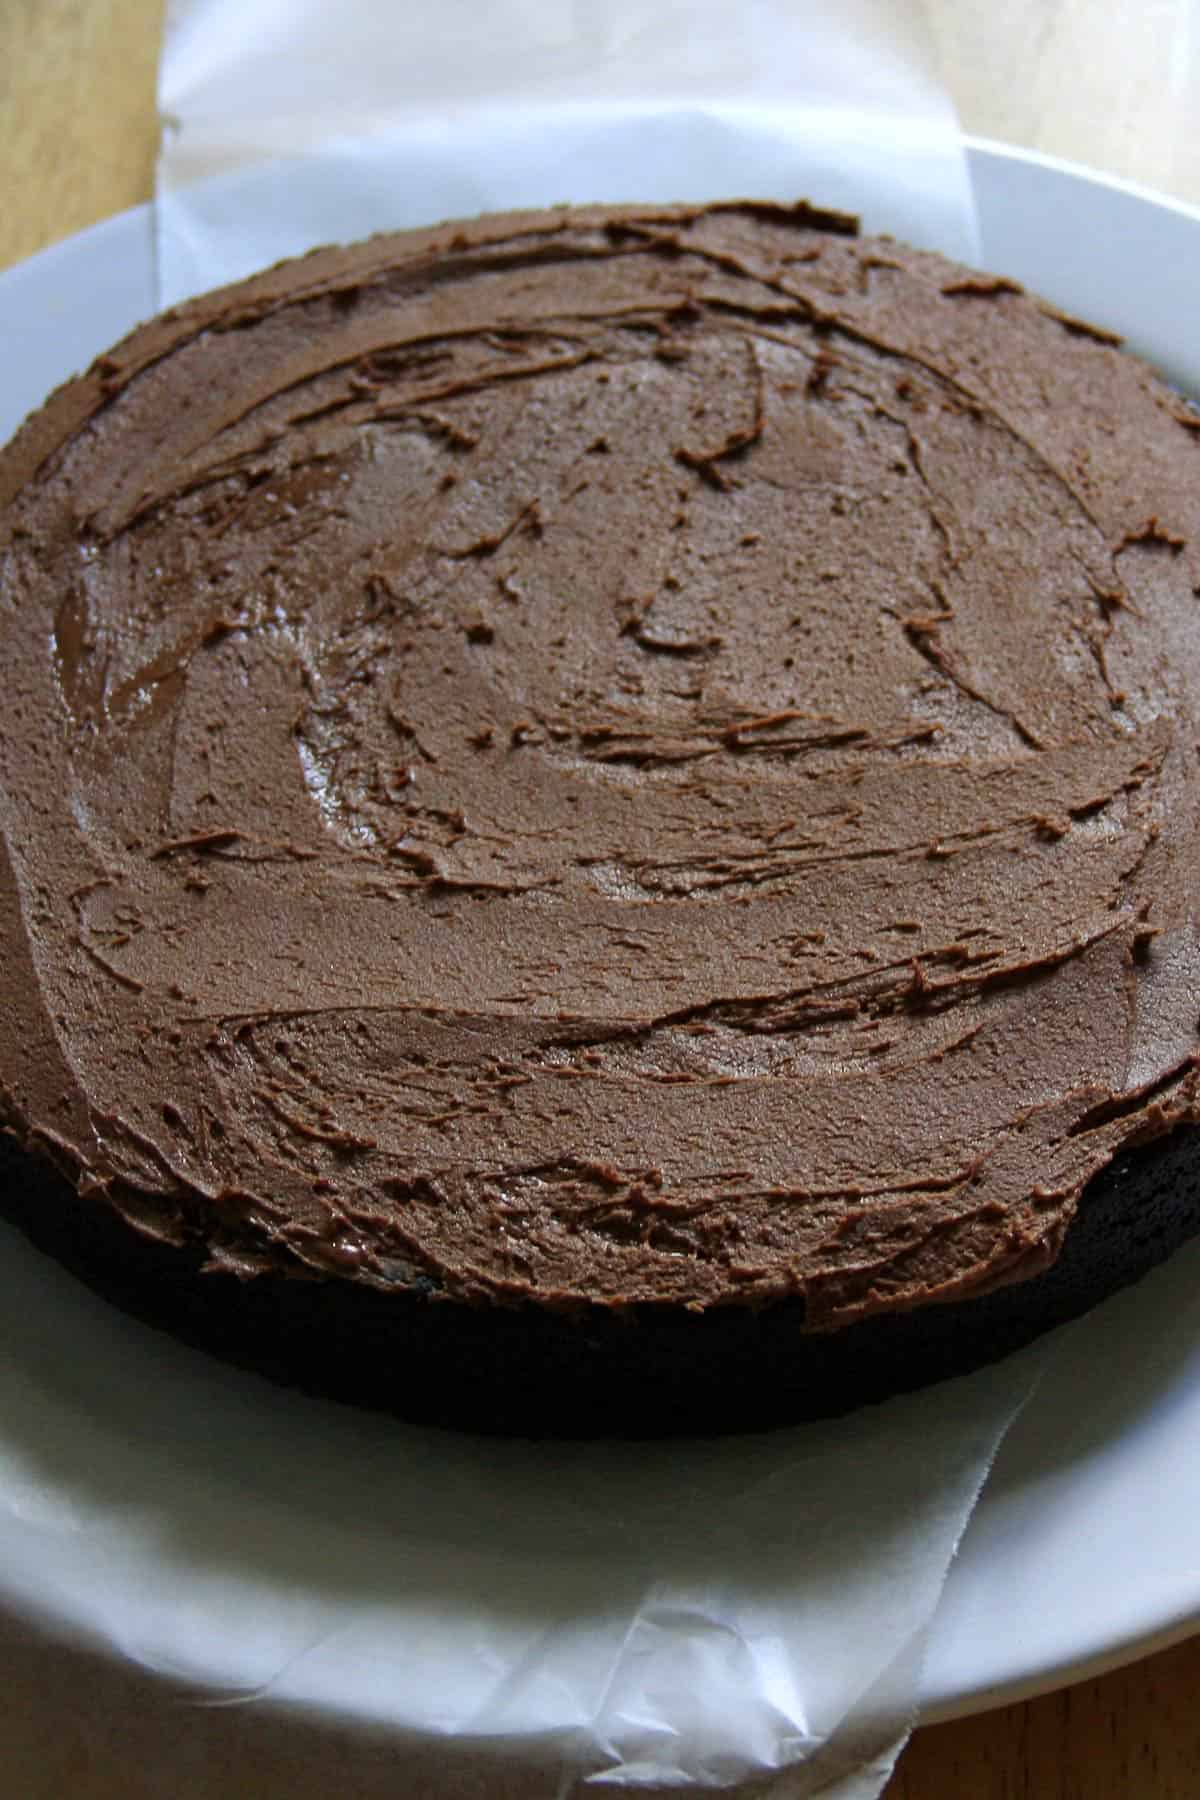
Complete the frosting of bottom layer on all sides.
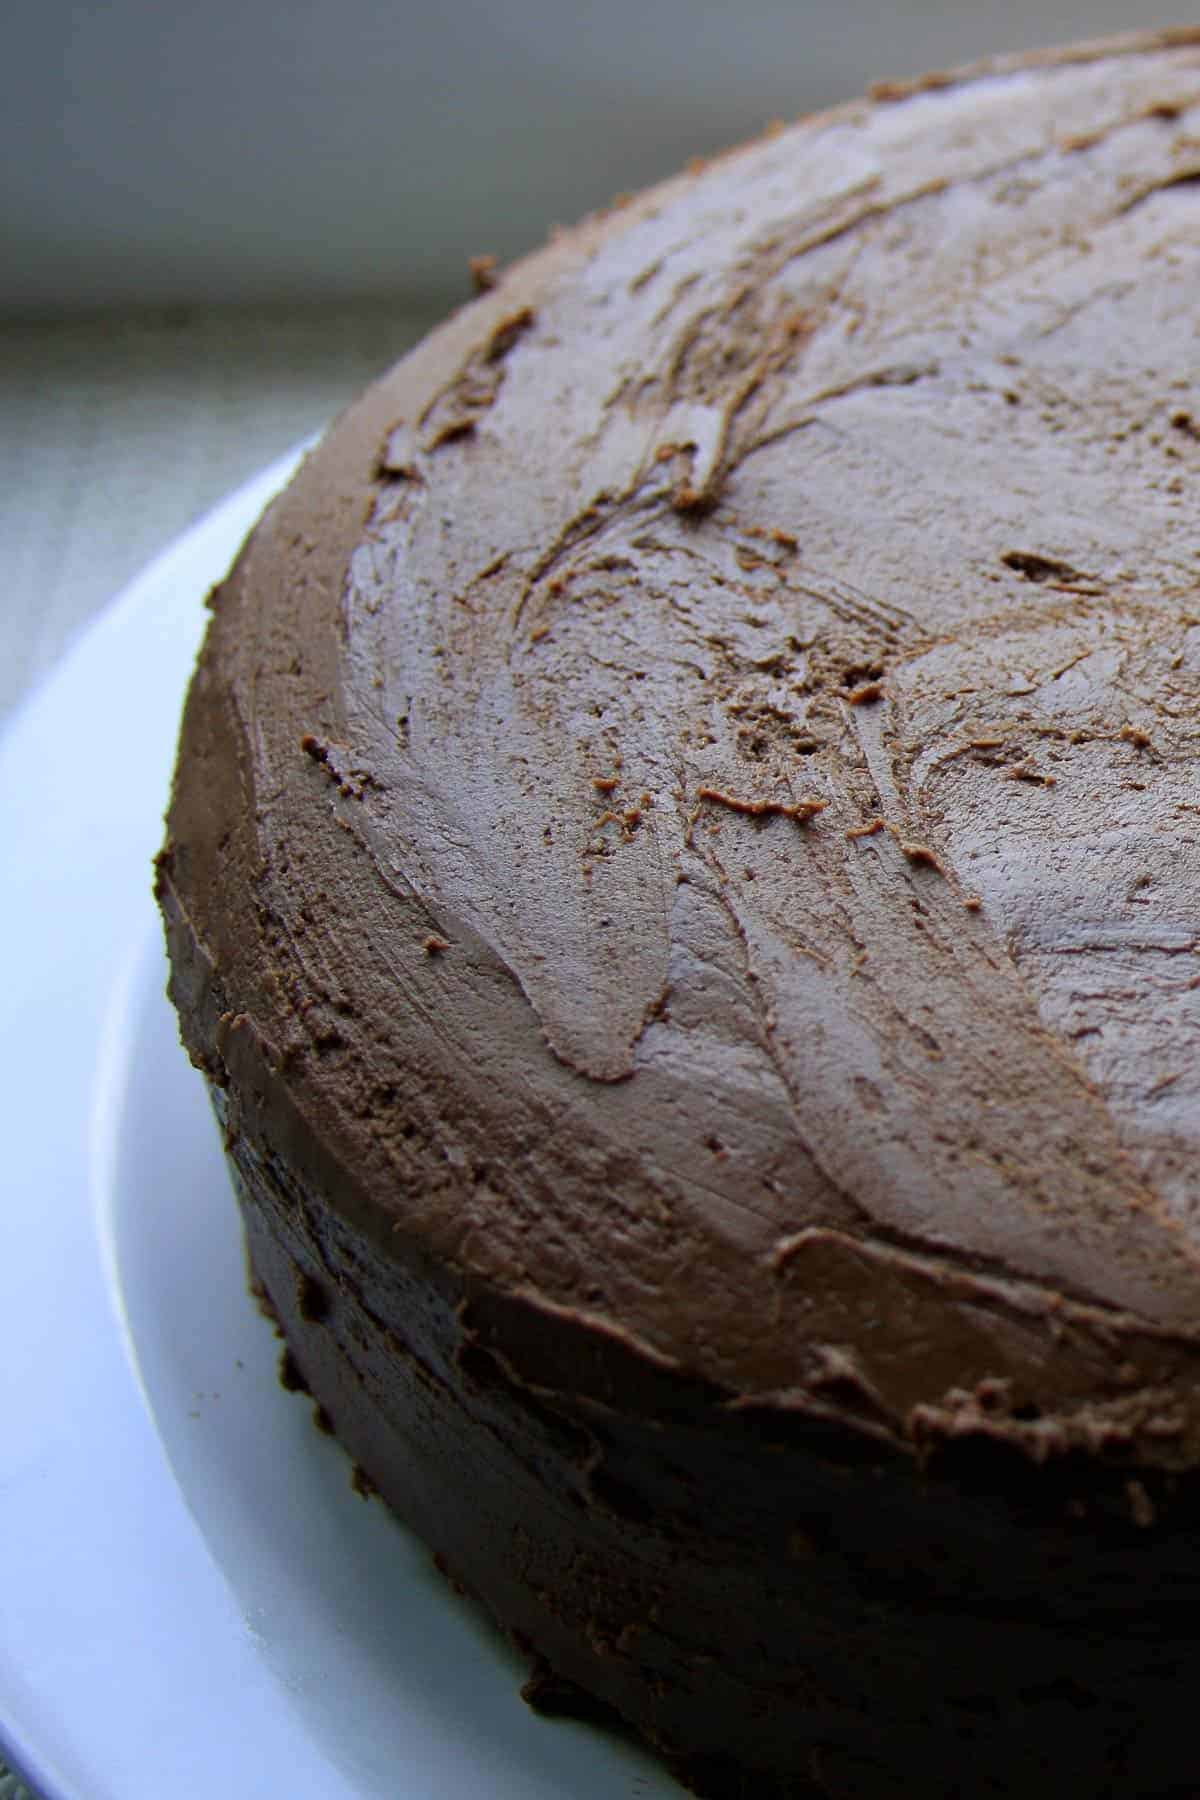
Place the second layer on the first, cut, or domed side up. Frost the sides of the cake first with another ½ cup of frosting. Finally, frost the top of the second layer.
Cake Decoration
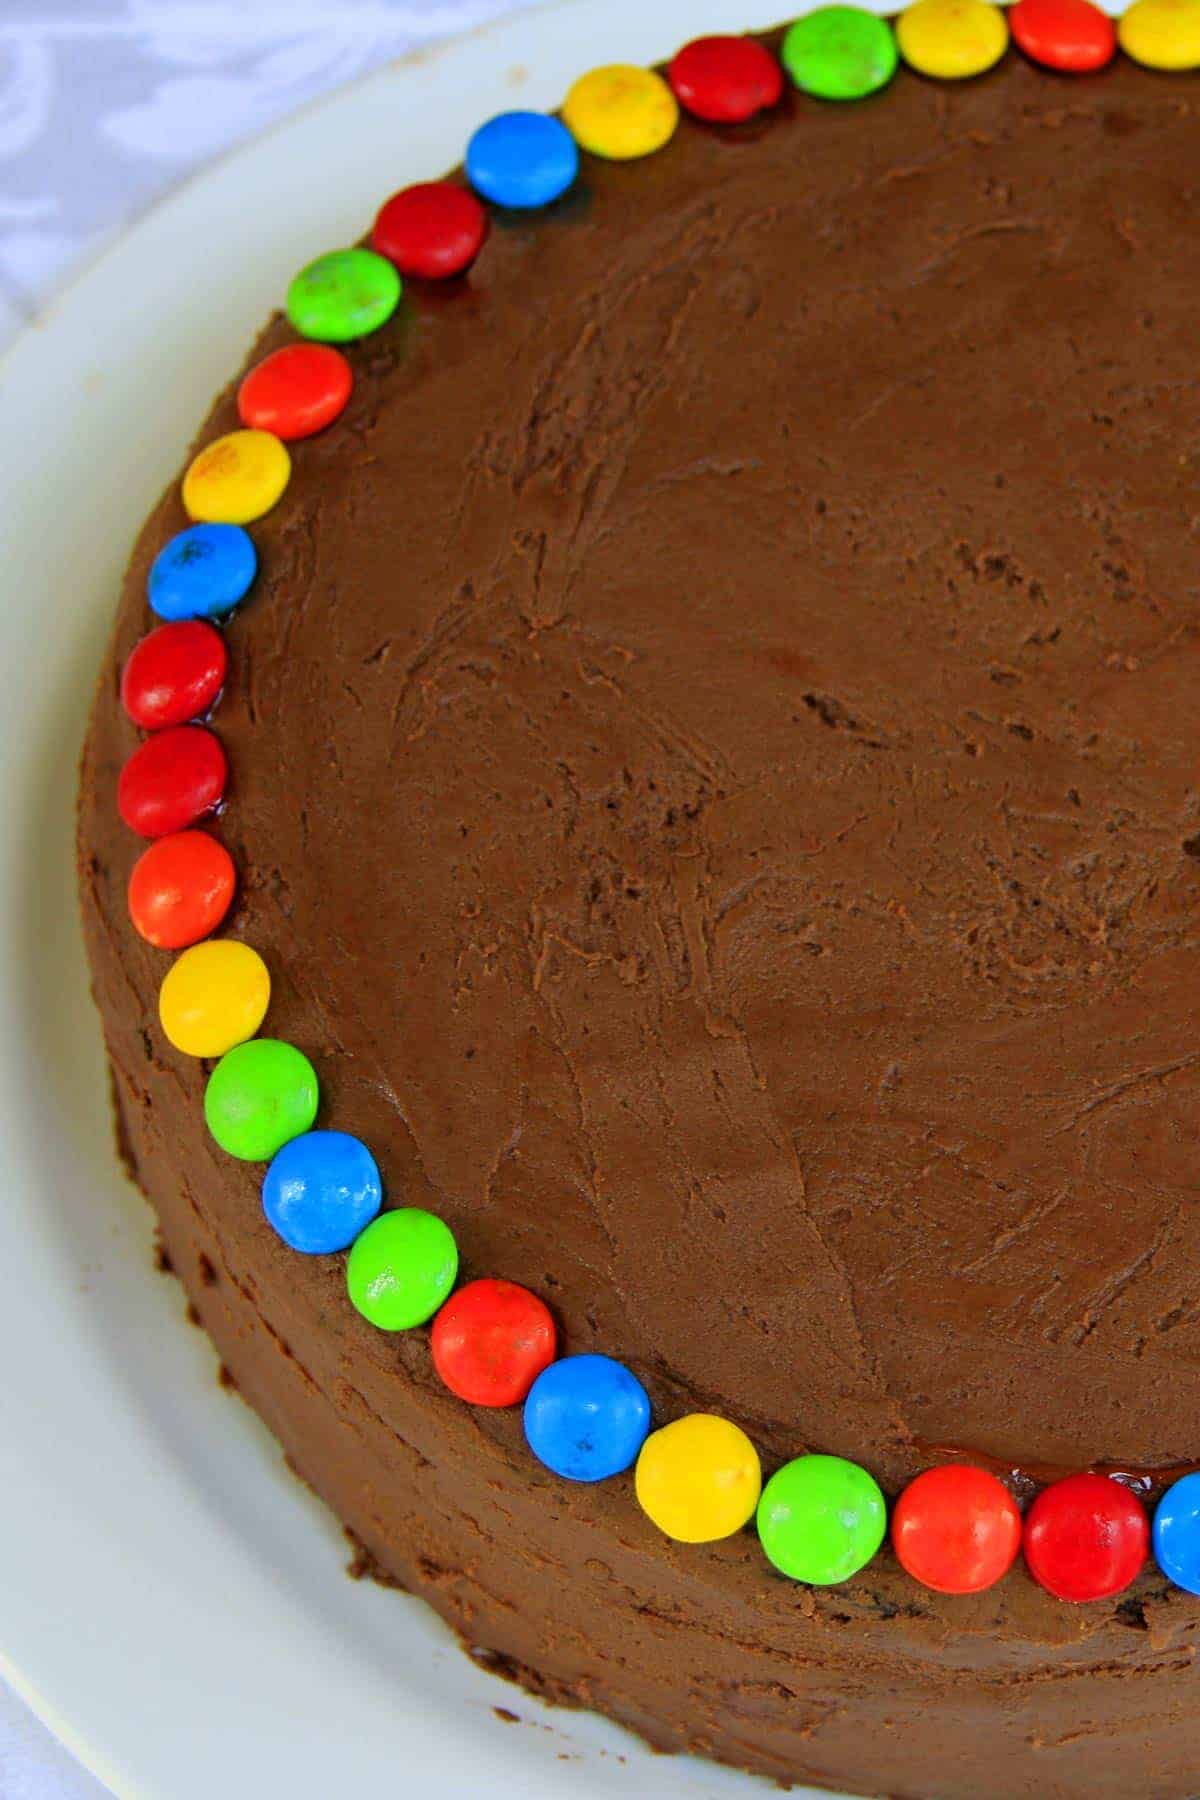
The options are endless. Because my son loves M&M's, I used them to line the cake.
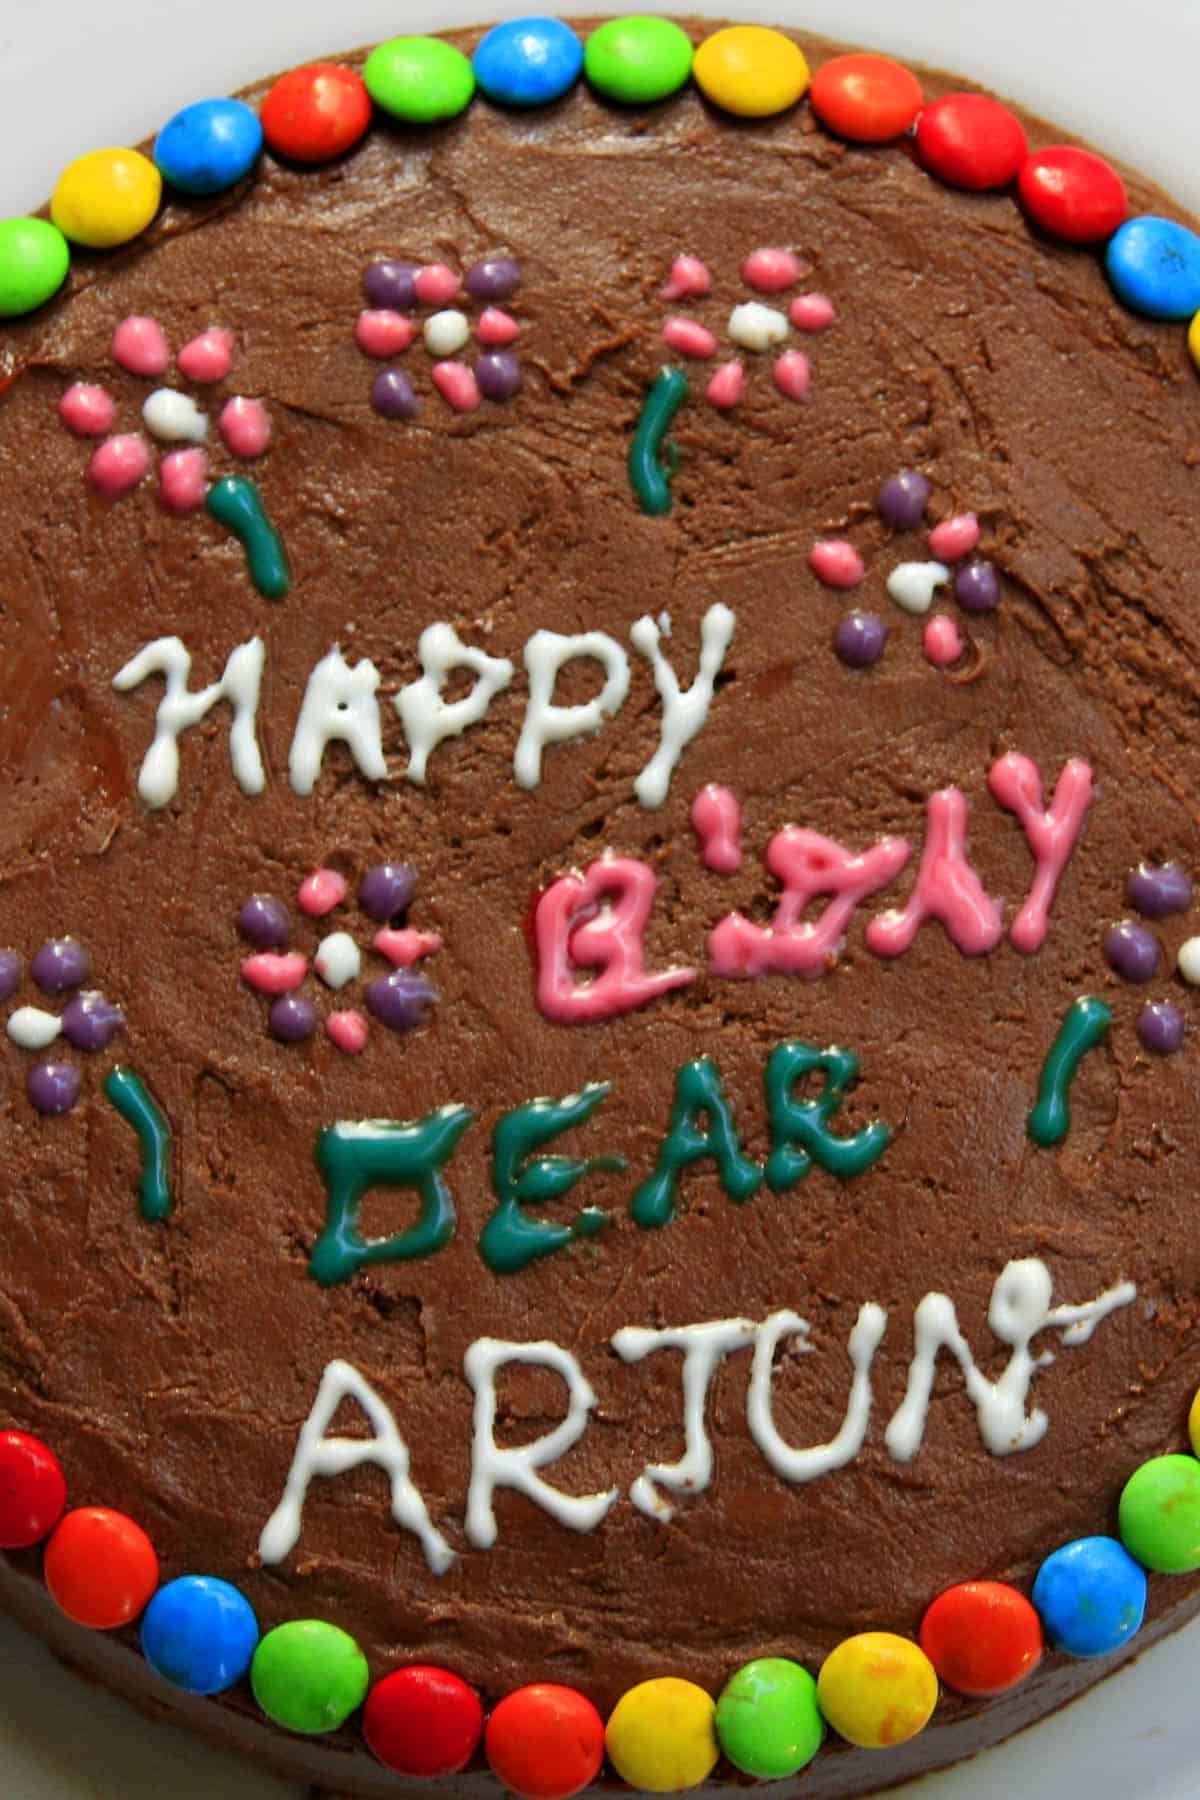
I also used the ready-made Cake Mate decorating pens in the grocery store in the baking aisle to write birthday messages and draw some flowers.
Readers Feedback
Giovanna says: ⭐⭐⭐⭐⭐
This recipe is amazing. I have been using this recipe for the last 7+ years for all my friends cakes/cupcakes. Her son has a ton of allergies including eggs, nuts, & soy. I replace the tofu with plain unsweetened apple sauce and use oat milk instead of regular milk and use canola oil. For icing I use just a basic buttercream icing recipe replacing the butter with the earth balance soy free butter. They absolutely love this cake when I make it. I make all of their birthday cakes and such since he has never had a reaction after making it the first time. (I did so much research on products i could use with out causing allergen risks)
Christine Renwick says: ⭐⭐⭐⭐⭐
This I started making when my friends daughter (who had an egg allergy), never had had a birthday cake. It was such a success. It has been my only chocolate cake recipe used ever since. My daughter (22) asked me to make this for her birthday next week. I could not find the recipe anywhere. You can imagine my delight in finding it again online after all this time.
I do find the cake a little fragile but letting it cool completely in fridge overnight and using slightly softer frosting does the trick.
Thankyou Madhuram for my go to chocolate cake recipe that I have used for the last 11 years.
AmaiMwana says: ⭐⭐⭐⭐⭐
Hello Madhuram, I have been using this recipe of your for more than5 years now, as I posted a comment on here 8n 2017. It is my go to recipe and the only cake my son wants even @ 19. Having an egg allergy I have tried different recipes but he has flat out told me the only cake he wants is your recipe. Whenever I am asked for a chocolate cake recipe, I share yours. Thank you once again. Absolutely love it.
Kathleen says: ⭐⭐⭐⭐⭐
Change the title to BEST CHOCOLATE CAKE RECIPE PERIOD
I tried this recipe because one of the kids in my son's class has an egg allergy. Thank you little Vincent. For years I have been proud of my chocolate cake. I would make it the night before so it would be super moist. Not necessary with this recipe. I was never satisfied with my cupcakes though. They were never moist enough. THESE CUPCAKES WERE AMAZING!!!!!
I used store brand firm tofu. I'm trading my Hershey's Perfect Chocolate Cake Recipe for this one. Sorry Hershey's, but you've been outdone.
Recipe FAQs
I first baked and blogged about this eggless chocolate cake in 2008. It’s been 16 years now, and over the years, I’ve received so many questions from readers. This FAQ section is a result of carefully curated reviews and feedback, providing an exhaustive list of questions to ensure your baking experience is as smooth as possible. Please feel free to leave a comment if you have any other questions, and I will try to answer to the best of my knowledge.
You can use cake flour if you’d like a lighter texture, but you may need to increase the amount slightly since cake flour is lighter than all-purpose. For self-rising flour, it's not recommended unless you adjust the other leavening agents in the recipe (baking soda and baking powder), as self-rising flour already contains leavening.
Yes, you can easily make this cake vegan! The only dairy ingredient in the cake is 1 cup of milk, which can be replaced with any non-dairy milk of your choice, such as almond, soy, or oat milk. For the frosting, simply swap the butter with a vegan butter alternative and double-check that your frosting mix doesn’t contain any dairy ingredients. You can also explore some of the vegan frosting recipes I’ve shared for a fully vegan cake!
Yes, you can! Simply substitute the regular flour with an all-purpose gluten-free baking mix, which works measure for measure. Although I haven’t tested it specifically with this cake recipe, I’ve had great success using gluten-free mixes in muffin and cookie recipes. To be sure, you could halve the recipe and bake a single-layer cake as a test. This way, you can see how it turns out and adjust as needed before baking the full recipe.
Yes, you can make this cake soy-free by using a different egg substitute in place of silken tofu. While I haven’t personally tried other substitutes in this recipe, many reviewers have had success using unsweetened applesauce. One reader even mentioned that they skipped the tofu entirely, and the cake still turned out great! Another option could be to use an equal measure of yogurt, which should also work well.
I’ve only tested this recipe with granulated white sugar, but brown sugar should work just as well, adding a slightly richer flavor. I haven’t experimented with artificial sweeteners, but if you’re using a liquid sweetener like maple syrup, you’ll need to adjust the amount of other liquids in the recipe to maintain the right consistency. Start by reducing the liquid ingredients slightly to balance it out.
Yes, you can! The coffee isn't mandatory. Simply replace it with a cup of water. Coffee is typically used to enhance the chocolate flavor, but I haven’t done a side-by-side comparison to see how much of a difference it makes. Either way, your cake will still turn out delicious!
Yes, you can! Feel free to add up to a cup of chocolate chips, nuts, or other mix-ins to the batter. There’s no need to adjust the measurements for the other ingredients—just stir them in and bake as usual for a delicious twist!
Yes, of course! Line a muffin tin with paper liners and lightly grease them with non-stick cooking spray. Spoon about ⅓ cup of batter into each liner and bake for 15-18 minutes, or until a toothpick inserted into the center comes out clean. Enjoy your eggless chocolate cupcakes!
No worries! You can use any other frosting mix of your choice. Alternatively, you can try one of the homemade frosting recipes from the blog for a delicious, from-scratch option.
Yes, this cake tastes great even without frosting! You can simply dust it with powdered sugar or top it with fresh fruits like berries for a lighter option. A slice of this cake with some whipped topping and fresh fruits also makes for a delicious, simple dessert. The rich chocolate flavor and moist texture stand on their own, making it perfect as a snack or quick treat.
You can bake this cake a day or two in advance. Once cooled, wrap it tightly in plastic wrap to keep it fresh. If you're planning to frost it later, store the unfrosted cake layers at room temperature for up to two days. For longer storage, refrigerate for up to 5 days or freeze it for up to 3 months—just be sure to thaw it completely before frosting or serving. While I haven’t personally frozen this cake, this is the general procedure for freezing cakes.
If you tried this Eggless Chocolate Cake recipe, please leave a 🌟 star rating and let me know how it went in the 📝 comments below!
💌 Save This Recipe!
We will also add you to our email list. Unsubscribe at any time.
Recipe
Eggless Chocolate Cake
Ingredients
Cake Ingredients:
- 2 Cups All Purpose Flour
- 1 Teaspoon Salt
- 1 Teaspoon Baking Powder
- 2 Teaspoons Baking Soda
- ¾ Cup Unsweetened Cocoa Powder
- 2 Cups Granulated Sugar (See My Notes)
- 1 Cup Vegetable Oil (I Used Canola Oil)
- 1 Cup Hot Coffee (I Mixed 1.25 Teaspoons Of Instant Coffee Powder With 1 Cup Of Hot Water)
- 1 Cup Milk (I Used 2% Milk)
- ½ Cup Silken Tofu Pureed (I Used Nasoya Brand Silken Tofu)
- 1 Teaspoon Vanilla Extract
Frosting Ingredients:
- 1 Packet Dr Oetker's Organic Chocolate Icing Mix
- ¼ Cup Hot Milk/Hot Water (Heat It In The Microwave Oven For 15 Seconds)
- ⅓ Cup Soft Butter At Room Temperature (Which Is 5 Tablespoons + 1 Teaspoon)
- ¼ Teaspoon Vanilla Extract
- A Pinch Baking Soda
Instructions
Cake Preparation:
- Preheat the oven to 325F (160C) for 15 minutes.
- Grease and flour (I used cocoa powder to flour the base of the pan because it's a chocolate cake) two 9-inch cake pans.
- Sift the flour, salt, baking powder, baking soda, cocoa, and sugar into a large mixing bowl. Make a well.
- Add the canola oil. Then add the hot coffee decoction. Add milk.
- Add the pureed tofu. (Remove the silken tofu from the packet using a spoon, add it to the blender, and puree it to a creamy mixture)
- And a few drops of vanilla essence.
- With an electric mixer, beat at medium speed for 2-3 minutes. (At first, I did not use the hand mixer to combine the batter because I remembered reading somewhere that while using egg substitutes, in this case, tofu, beating the batter is not recommended, and I was so worried to see such a diluted batter and it was also having a lot of small lumps. So anyhow, I decided to use my hand mixer to get rid of the lumps, but still, the batter was considerably thin).
- Pour the batter evenly into both 9-inch cake pans. (or fill the 6 muffin cups halfway with batter and divide the remaining batter between both 8-inch pans).
- Bake this cake for 25 to 30 minutes until a wooden toothpick inserted into the center of the cake comes out clean. (Check the cupcakes after 15 minutes). I placed 1 pan on the middle shelf and then another on the bottom shelf set the timer for 25 minutes, and switched the pans around 12 minutes. Switching the pan means moving the pan from the middle shelf to the bottom and the bottom shelf pan to the top. This is done to ensure the even baking of both cakes. One of my make was done exactly at 25 minutes, and the other one took 30 minutes.
- Let the cakes cool completely before removing them from the pans. The time mentioned in the original recipe was 15 minutes, so I tried to transfer the cake to a wire rack after 20 minutes, which was a little messy. So I left the other cake in the pan for quite some time. Maybe after an hour, I touched the bottom of that pan and found that it had cooled completely, so I transferred it to the wire rack.
- The cake should cool completely on the wire rack before frosting. I baked the cakes on Saturday and frosted them on Sunday. I left it on the kitchen counter and covered it with a bamboo basket. You could also refrigerate the cake to cool it off.
Frosting Procedure:
- Sift the mix.
- Add the melted butter, hot milk, vanilla, and baking soda. (I read in the same book that adding a pinch of baking soda to icings prevents hardening and cracking, so icing stays moist)
- Beat the mix using a hand mixer at medium-high speed. Add a few drops of water/milk if required.
Frosting the cake:
- This was my first experience frosting an eggless chocolate cake, so I followed the steps in the book.
- First, I placed the bottom layer upside down so the rounded side (top of the cake would be on the serving plate). If you have a dome top on the cake, even it out by slicing it with a serrated knife and then place it upside-down.
- Spread about ½ cup to ¾ cup of frosting on top of the bottom layer. Don't use hard strokes; spread it gently using an offset metal spatula or plastic spatula.
- Place the second layer on the first, cut, or domed side up.
- Frost the sides of the cake first with another ½ cup of frosting.
- Finally, frost the top of the second layer.
Decorating the Eggless Chocolate Cake:
- As you all know, the options are endless. Being the rookie I am, and because my son loves M&M's, I used them to line the cake. I also used the ready-made Cake Mate decorating pens in the grocery store in the baking aisle to write birthday messages and draw some flowers.
Pragna Patel says
Hello can you replace the tofu with full fat sour cream. That’s all I had at hand ..
Madhuram says
I'm thinking it should work, Pragna since I have another recipe which uses buttermilk and it gives a nice texture to the chocolate cake.
Laura says
It is the best eggless chocolate cake that I have ever made!!! It is rich chocolate cake as it was enhanced with the coffee. I adjusted the sugar by adding 1.5 cups instead of 2 cups. THANK YOU FOR SHARING YOUR EGGLESS RECIPE WITH THE WORLD
Madhuram says
You're most welcome, Laura. This is the first eggless chocolate cake that I baked in 2008 for my son's 3rd birthday. It holds a special place in my heart. I'm so glad that you liked it too. I sincerely appreciate your feedback. You have made my day!
Laura says
You are most welcome! I am once more using your yummy eggless chocolate cake recipe to make my son's 5th birthday cake! He specially requested that I make his favourite chocolate cake to celebrate his birthday with his friends at his kindergarten!!!
Giovanna says
This recipe is amazing. I have been using this recipe for the last 7+ years for all my friends cakes/cupcakes. Her son has a ton of allergies including eggs, nuts, & soy. I replace the tofu with plain unsweetened apple sauce and use oat milk instead of regular milk and use canola oil. For icing I use just a basic buttercream icing recipe replacing the butter with the earth balance soy free butter. They absolutely love this cake when I make it. I make all of their birthday cakes and such since he has never had a reaction after making it the first time. (I did so much research on products i could use with out causing allergen risks).
Madhuram says
Your comment made my day, Giovana. Thank you for trying the recipe and also taking the time to leave your feedback. It's great to know that applesauce works well in this recipe. Thanks for that tip.
Naomi says
You don't need the tofu, it's great without it. I bake the cake as a whole though. Add about 10 mins to cooking time and I bake it at a slightly higher temp about 180c
Madhuram says
That's great to know, Naomi.
Bhagya says
Hi is the 1 cup =250ml or 200ml
Madhuram says
Please check the baking measurements page.
Christine Renwick says
This I started making when my friends daughter (who had an egg allergy), never had had a birthday cake. It was such a success. It has been my only chocolate cake recipe used ever since. My daughter (22) asked me to make this for her birthday next week. I could not find the recipe anywhere. You can imagine my delight in finding it again online after all this time.
I do find the cake a little fragile but letting it cool.completely in fridge overnight and using slightly softer frosting does the trick.
Thankyou Madhuram for my go to chocolate cake recipe that I have used for the last 11 years
Madhuram says
Wow! Thank you so much, Christine, for your kind feedback.
Morgan Gregory says
WONDERFUL RECIPE!!! So good!!!
Madhuram says
Thank you very much, Morgan.
AmaiMwana says
Hello Madhuram,
I have been using this recipe of your for more than5 years now, as I posted a comment on here 8n 2017. It is my go to recipe and the only cake he wants even @ 19. Having an egg allergy I have tried different recipes but he has flat out told me the only cake he wants is your recipe. Whenever I am asked for a chocolate cake recipe, I share yours. Thank you once again. Absolutely love it.
Madhuram says
Wow! Thank you so much, AmaiMwana.
Maddy says
Loved this chocolate cake. Can this be made without the cocoa as a vanilla eggless cake?
Madhuram says
Yes, you can try Maddy, but there are so many other vanilla cake recipes in the blog like this easy eggless vanilla cake recipe.
Tina says
Hi,
I never tried tofu in cake.
Will it come out good.
Please advise
Madhuram says
I bet it will be great. Trust me, Tina.
Karen says
What could you use in place of tofu, applesauce?
Madhuram says
Yes, it could work, Karen.
Shivani says
Hi Madhura
Thanx for the amazing cake recipes. My family loves them. I’ve baked this cake four times and it came out perfect every time!
My today’s question is, can I use the same recipe for red velvet cake? Will I have to change anything? Also, can I make an 8 inch double layered cake with same measurements? Awaiting your reply.
Madhuram says
Thanks for trying this recipe many times, Shivani. This cake recipe is not suitable for red velvet cake because it uses a lot of cocoa powder, whereas red velvet cake uses only a small quantity. Try these vegan red velvet cupcake recipe but use round pans instead.
reshma says
thank you so much for reply madhu love your recipes always
i really want you to makem tiramishu cake please.
Madhuram says
You're welcome, Reshma. Tiramisu cake is in my "to-do" list as well. Will make it. Thank you for the suggestion.