
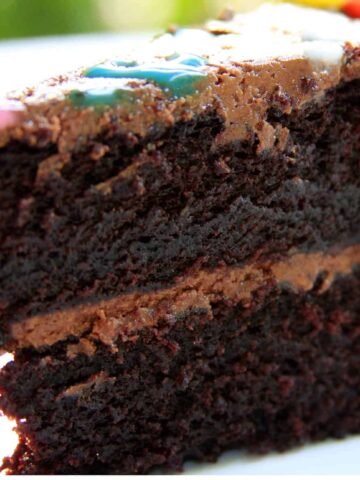
Hey there, my lovely readers! So, you know how every year, my son asks for a red velvet cake for his birthday? Well, this year, I decided to shake things up a bit and make something extraordinary. I fused his all-time favorite red velvet cake with the beloved Oreo cookies, and the result was nothing short of magic.
Jump to:

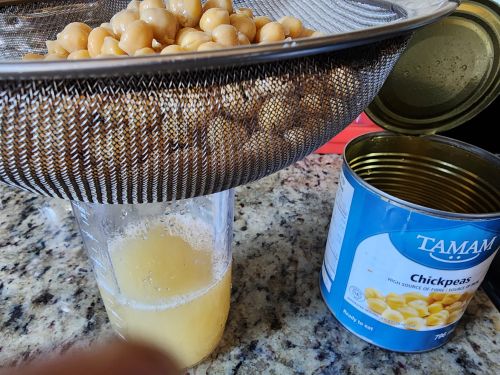
Oh, and here's the best part – I used a secret ingredient, aquafaba, as my egg substitute.

Now, here's the interesting bit. You might remember that I already have an eggless red velvet cake recipe on the blog. In that recipe, I used yogurt and silken tofu as my egg substitutes. But, you know me—I love experimenting in the kitchen. So, this year, I decided to take a different route and see what aquafaba could do for my beloved red velvet cake.

Last year I made this donut hole red velvet cake. I didn't blog about it because I was not completely satisfied with the texture even though the taste was phenomenal.

One of the years I convinced my son that this beet chocolate cake is nature's red velvet cake without having to add a ton of red food coloring. Boy, am I cruel or creative? Nevertheless it was super moist and tasted great, so it's a win-win.

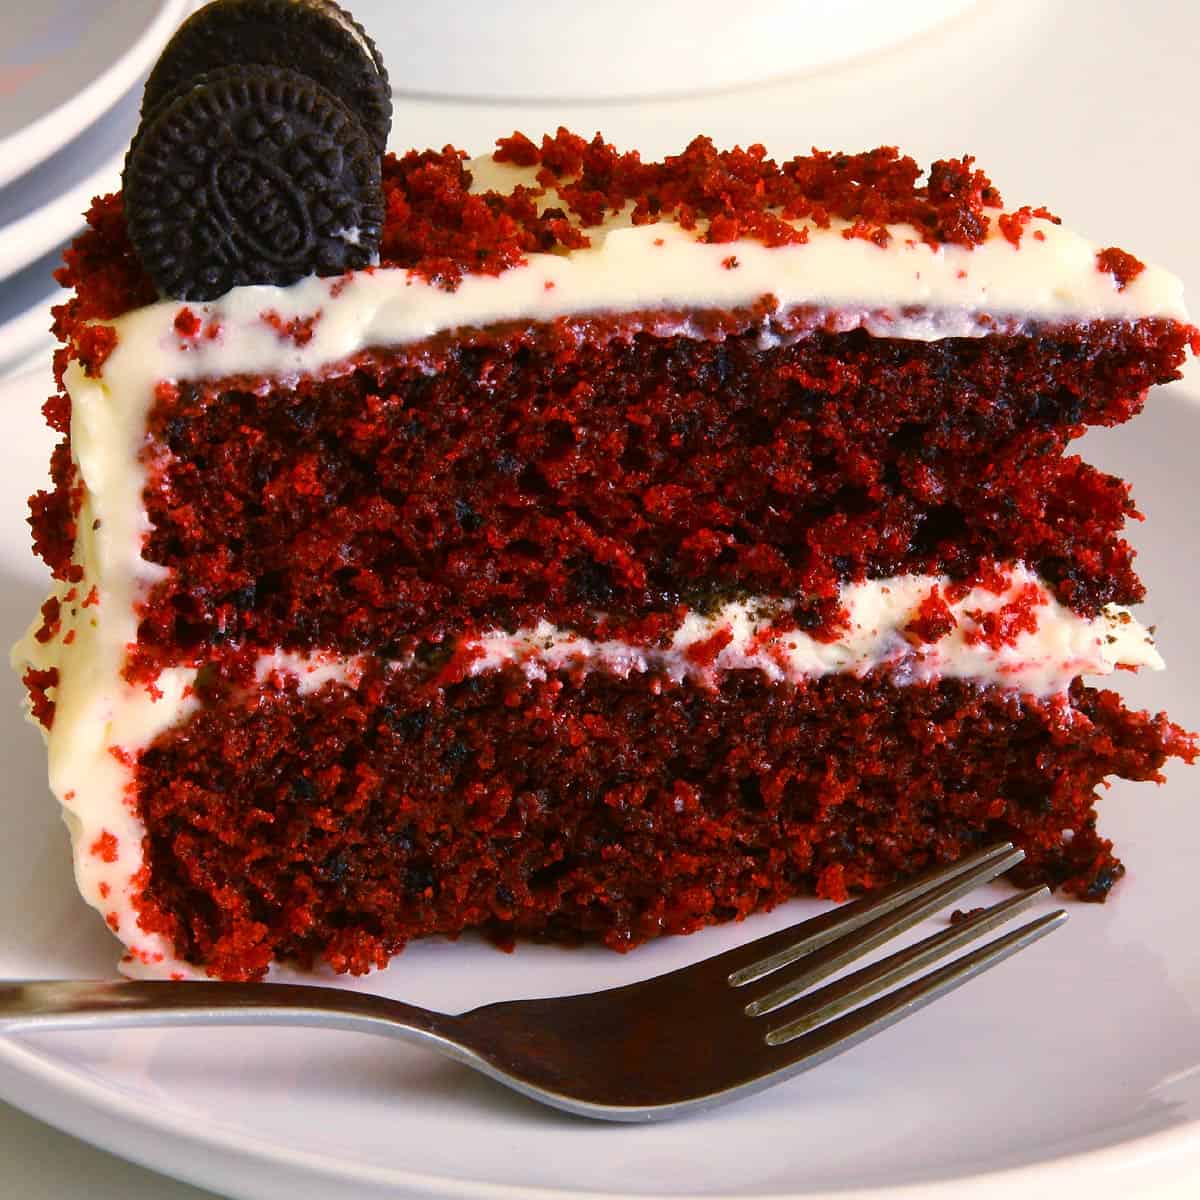
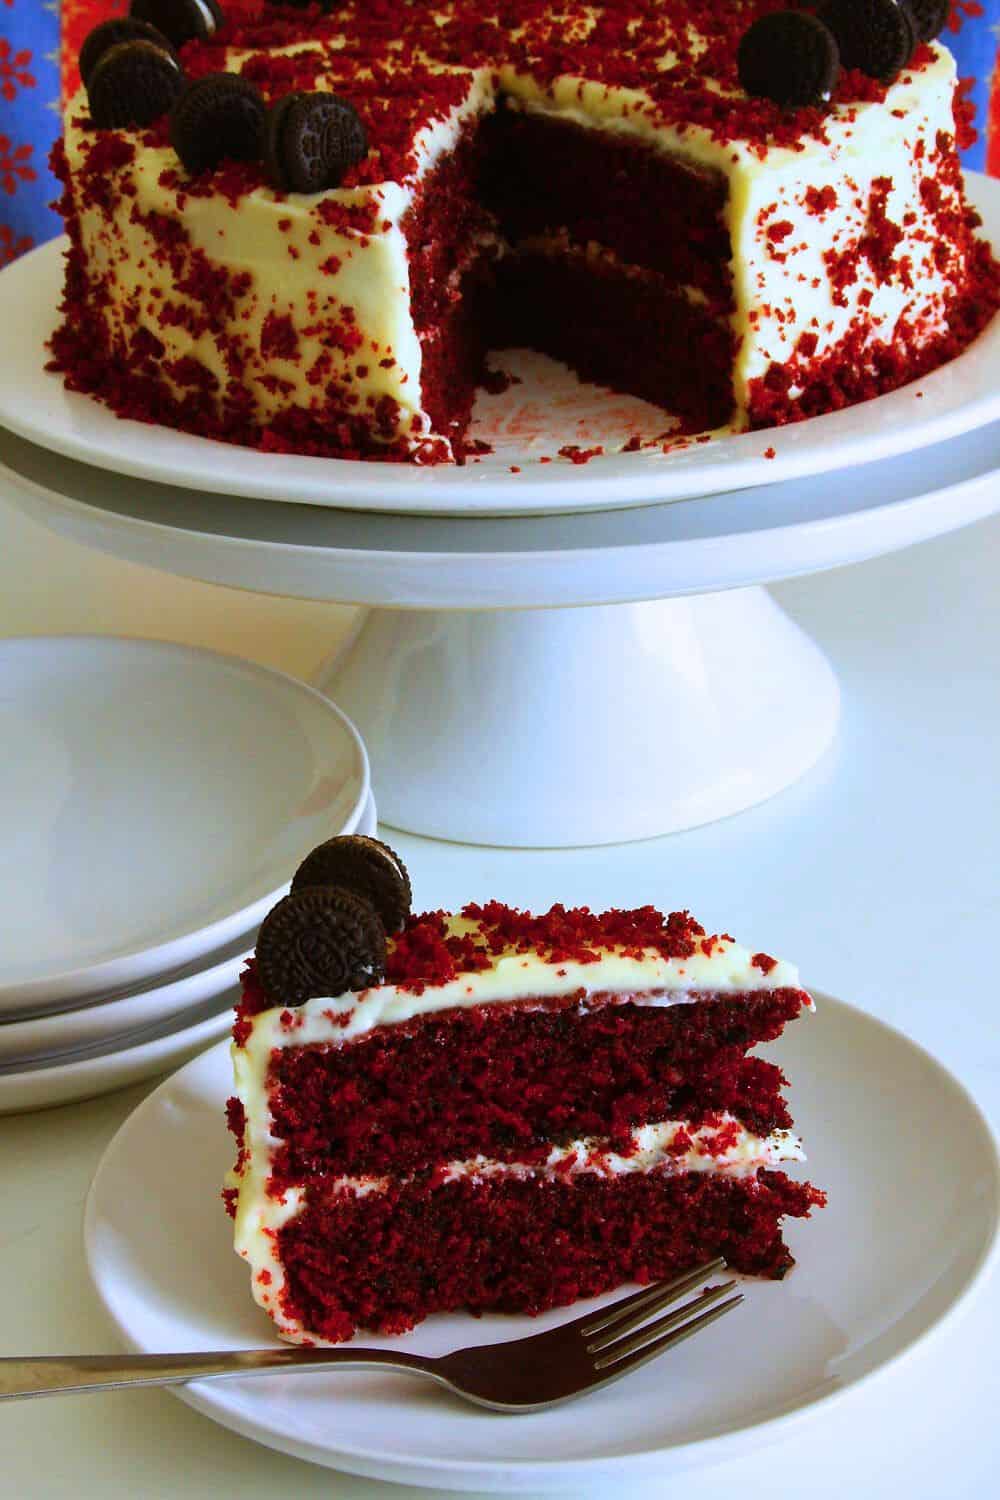
This time, it was all about taking the classic red velvet and giving it a surprise makeover with the wonderful world of Oreos. Two of my son's favorites!

Now, let's talk about the real star of the show: aquafaba. If you've never heard of it, don't worry, you're not alone. It's basically the liquid you find in a can of chickpeas or the leftover water from cooking dried chickpeas. What's amazing about this stuff is that it can work its magic as an egg substitute in vegan and eggless baking.

Check this blogpost to know all about aquafaba for the complete break down. For this year's cake, I decided to dive into the aquafaba adventure to create a cake that's not just eggless but incredibly moist and tender.
I took inspiration from this red velvet cake making some changes to bake the best red velvet Oreo cake.
Why Red Velvet Oreo Cake?

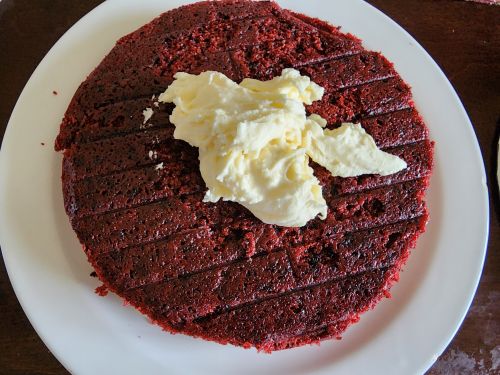
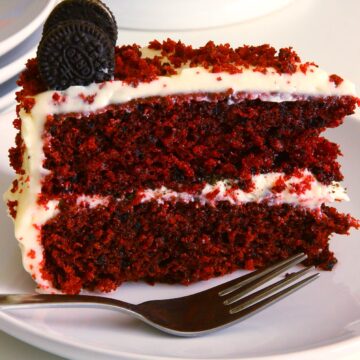
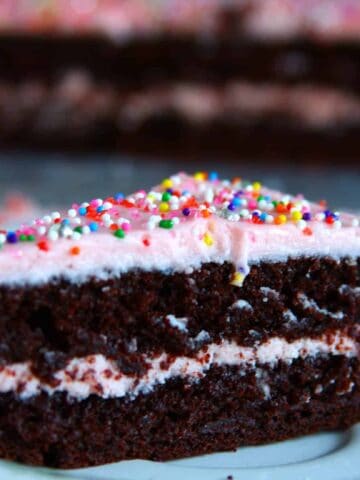
This cake? It's not just a treat; it's a vibe. The kids at my son's birthday party were all excited just after hearing that it was a red velvet Oreo cake, a combination that is unheard of but sounds delicious. Imagine a cake that's crazy soft, kinda airy, and Oreos jump in for some extra fun—texture and cool looks guaranteed. It's not just dessert; it's an upgrade to the whole sweet experience.
How To Make Red Velvet Oreo Cake?
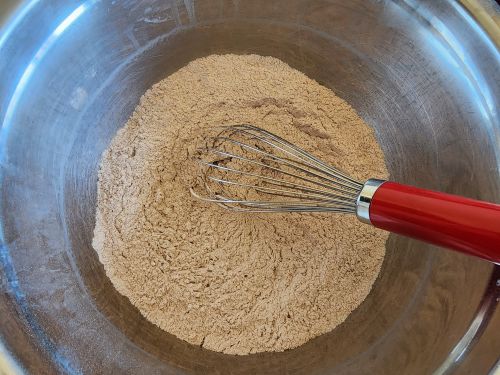
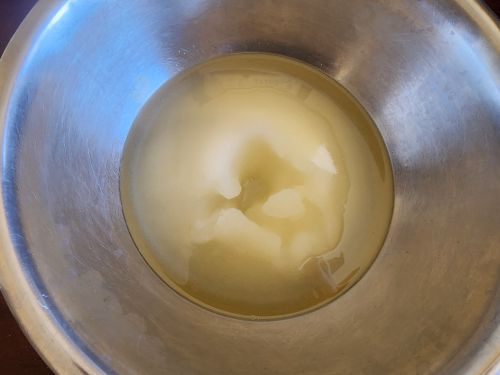
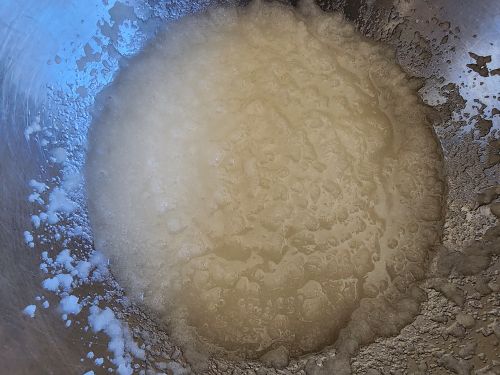
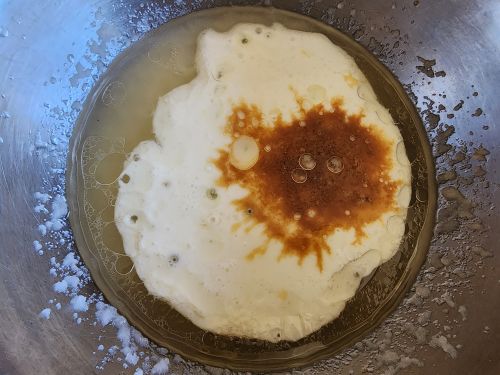
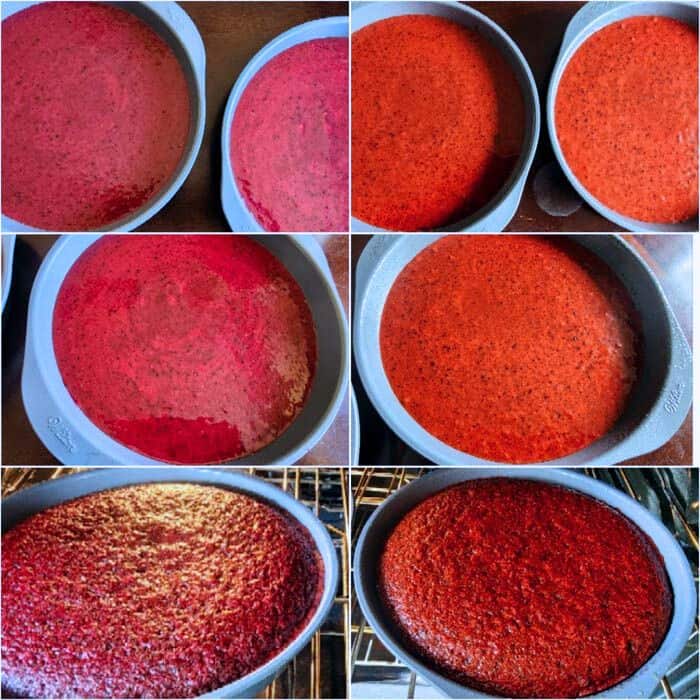
Here is step-by-step pictorial instructions on how to make delicious egg-free Red Velvet Oreo Cake from scratch using Aquafaba as an egg replacement:

If you tried this Eggless Red Velvet Oreo Cake recipe, please leave a 🌟 star rating and let me know how it went in the 📝 comments below!
💌 Save This Recipe!
We will also add you to our email list. Unsubscribe at any time.
Recipe
Eggless Red Velvet Oreo Cake
Ingredients
DRY MIX:
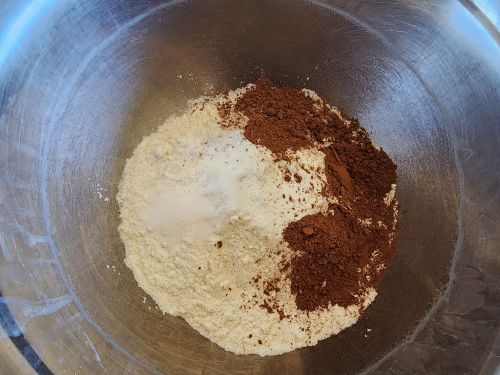
- 2 cups all-purpose flour
- 3 tablespoons unsweetened cocoa powder
- 1 teaspoon baking soda
- 1 teaspoon baking powder
- ½ teaspoon salt
WET MIX:
- 2 cups granulated sugar
- 1 cup vegetable oil
- 6 tablespoons aquafaba for 2 eggs
- 1 cup buttermilk
- 2 teaspoons vanilla extract
- 2.5 tablespoons red food coloring
- ½ cup hot coffee See Notes
- 1 teaspoon apple cider vinegar
ADD ONS:
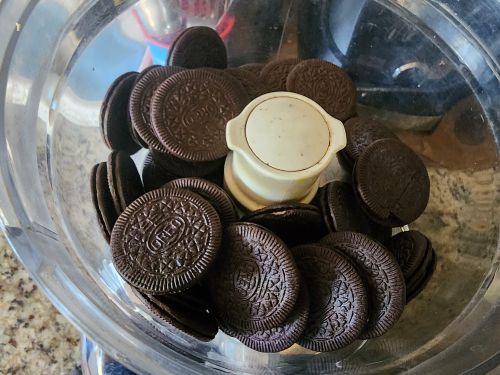
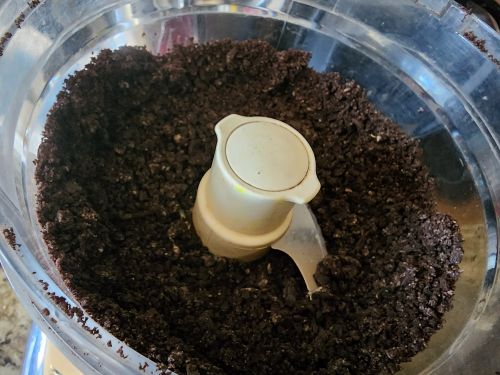
- 1 and ½ cups Oreo crushed/chopped
- As needed few mini Oreos
CREAM CHEESE FROSTING INGREDIENTS:
- ½ cup butter unsalted, softened
- 4 oz cream cheese, softened
- 1 teaspoons vanilla extract
- 2 to 2 and ¼ cups confectioner's sugar
- ¼ to ½ cup crushed Oreo (optional)
Instructions
CAKE PROCEDURE:
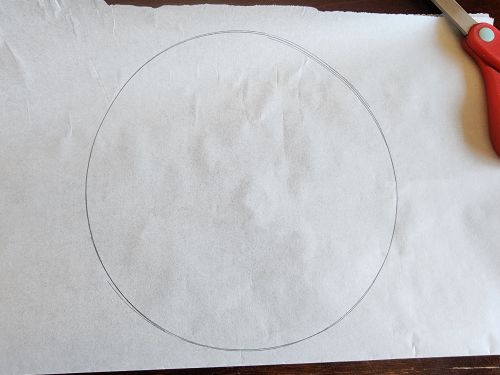
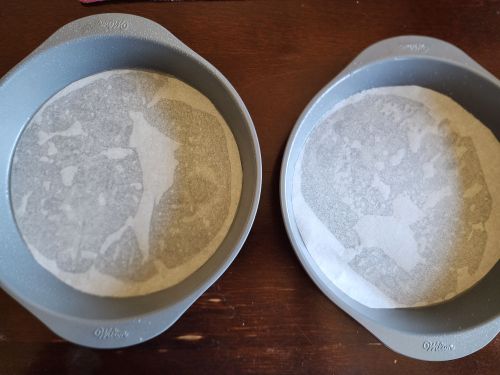
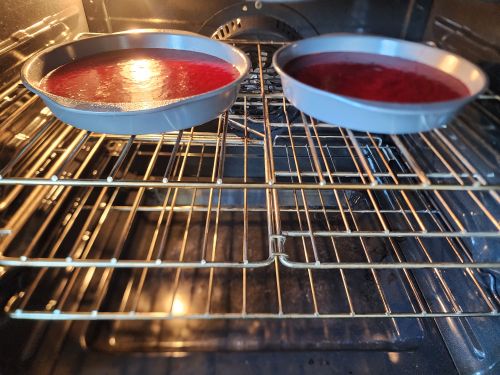
- Preheat oven to 325F/200C. Line two 9-inch pans with parchment paper and lightly grease it non-stick cooking spray.
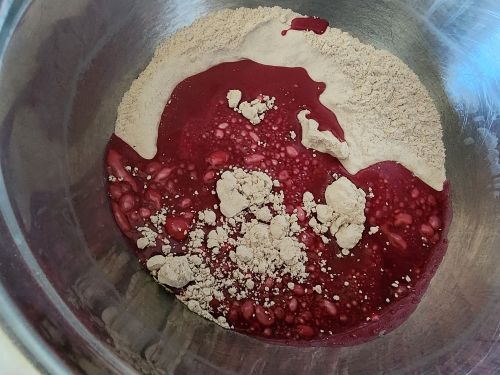
- In a large bowl mix together all the ingredients listed under Dry Mix and set aside.
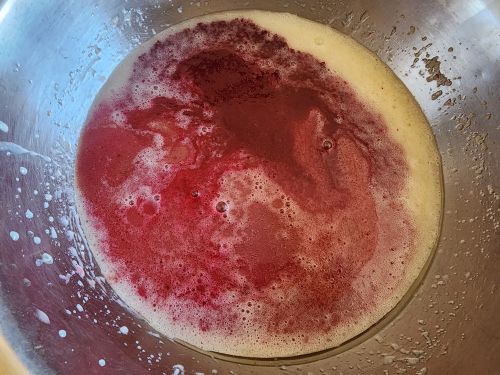
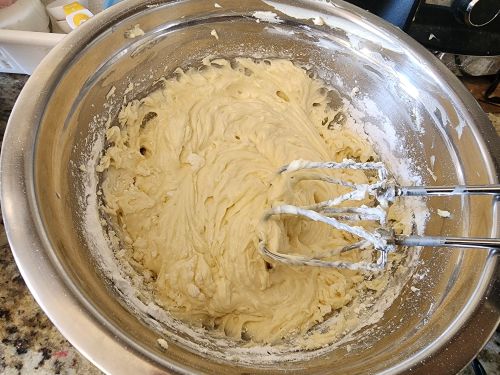
- In another large bowl add the oil and sugar and beat together well.
- To the creamed sugar mixture add the aquafaba, buttermilk, vanilla extract and red food coloring (as needed) and mix well.
- To this add the hot coffee and vinegar. Now the liquid ingredients are ready to be added to the dry flour mix.
- Slowly pour the wet mix into the flour mix little by little beating after each addition. You can simply mix it with a wooden spoon or whisk.
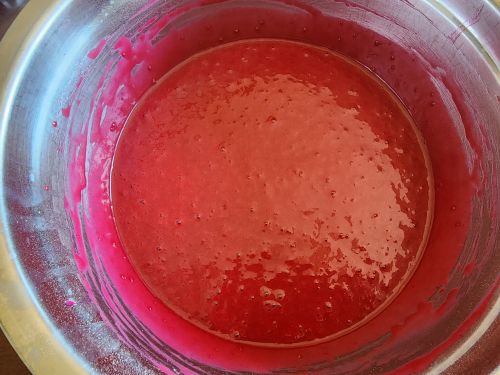
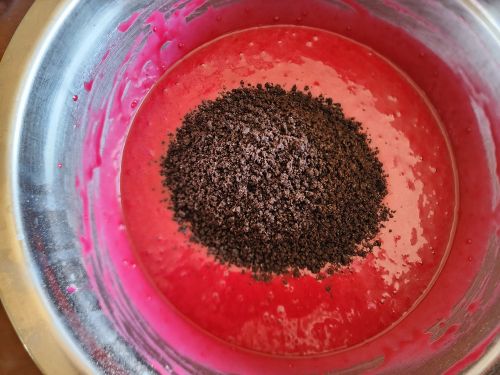
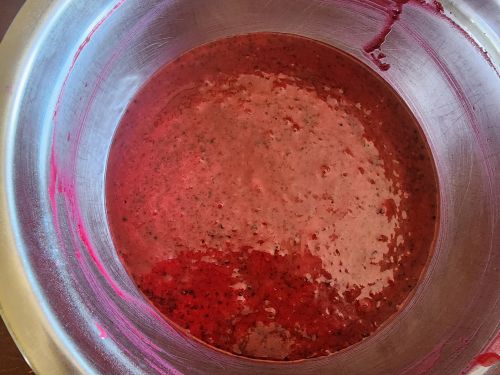
- Once both the wet mix and dry mix is fully incorporated stir in the crushed Oreos and mix well. It's a runny batter so don't panic.
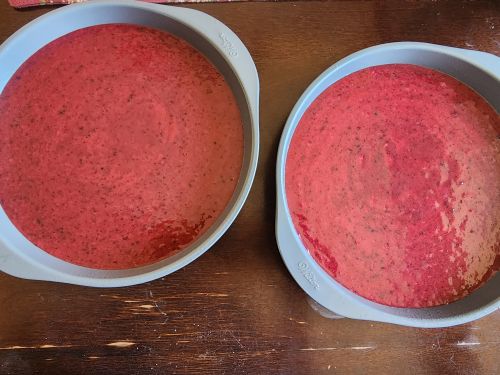
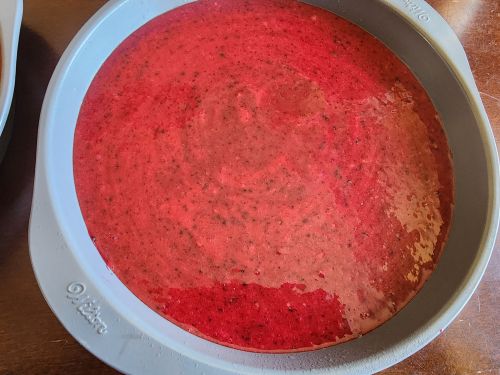
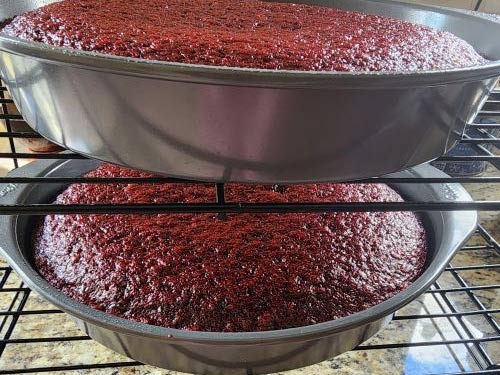
- Pour the batter equally among the two prepared pans and tap it on the table to break any air bubbles, if any.
- Place the pans in the oven and bake it for 35-40 minutes or until a toothpick inserted in the middle of the cake comes out clean. Mine was done in 38 minutes.
- Remove the pans from the oven and place it on wire cooling racks to cool completely before frosting.
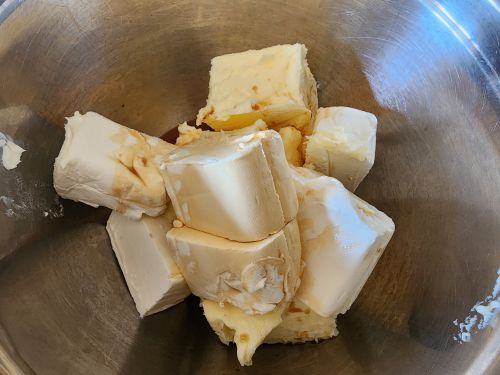
CREAM CHEESE FROSTING PROCEDURE:
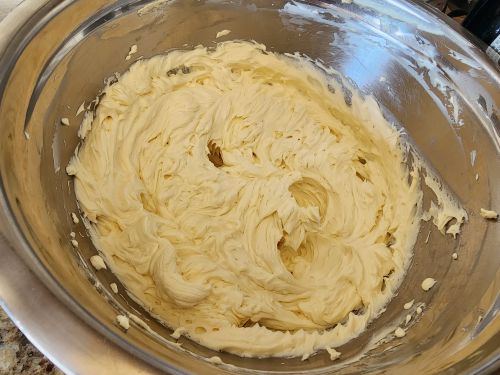
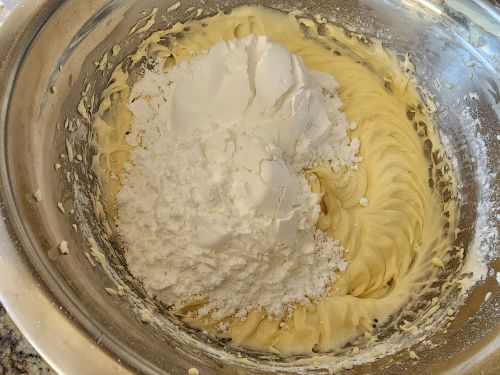
- In a large bowl beat together the butter and sugar, until light and creamy.
- Mix in the vanilla extract and beat well.
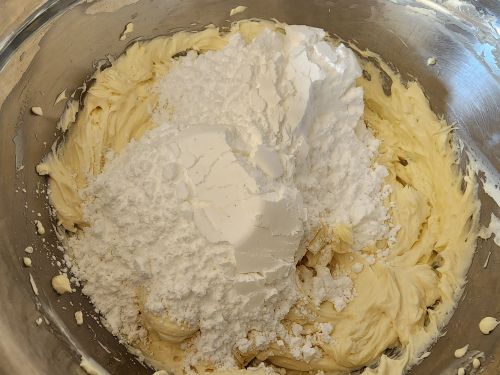
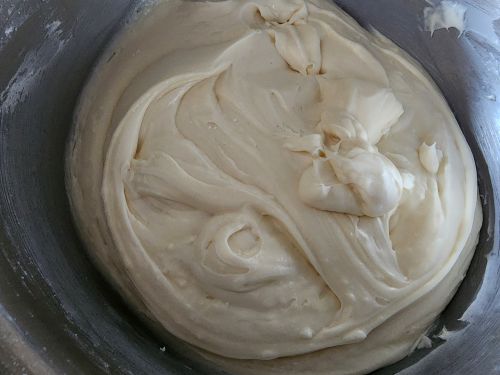
- Add the confectioner's sugar one cup at a time and beat well after each addition until you incorporate all the sugar and the frosting is smooth and creamy.
- You may choose to stir in some powdered Oreo mixture into the frosting for an unique twist. Be careful that you don't overmix or else you might end up with a grey color frosting.
- Store the frosting in an air-tight container and refrigerate it for a few hours to firm up a bit before frosting.
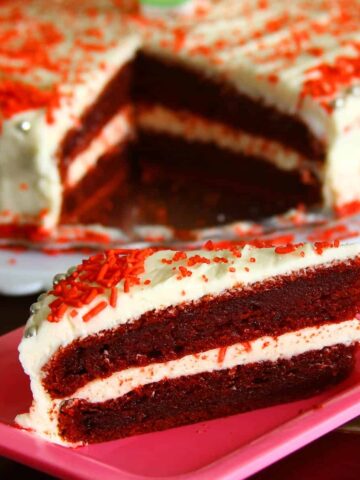
FROSTING THE CAKE:
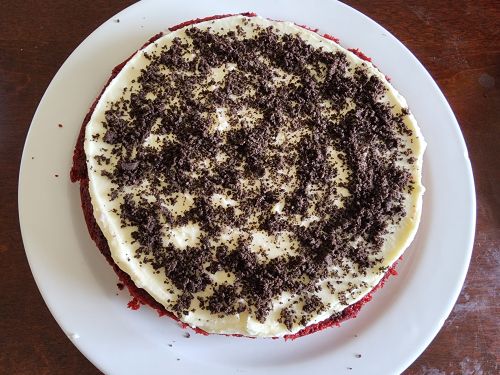
- Level the cake layers if you have to. Mine were pretty flat so I didn't have to. But I did shave off the sides of the cake to crumble it for garnishing the cake later.
- Place one layer of the red velvet Oreo cake on a plate or cake board. Use a spatula to take some frosting and spread it on the cake.
- Evenly sprinkle some powdered Oreos on top of the frosting.
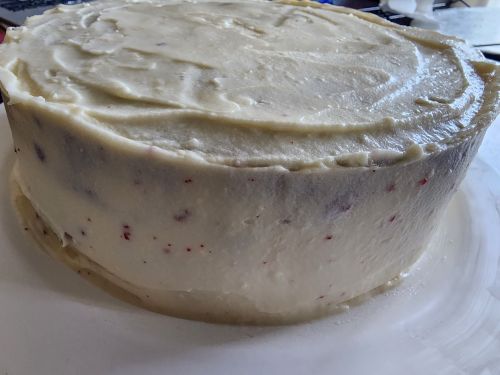
- Place the 2nd layer of the cake on top of the bottom layer and frost the entire cake. Preferably do a crumb coating of the cake and put it in the fridge for about 10-15 minutes and then complete the frosting so that you don't pull pieces of the cake while frosting.
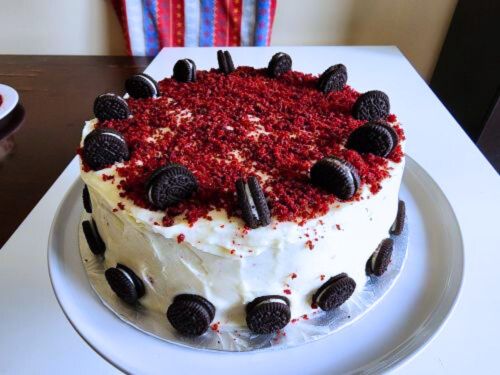
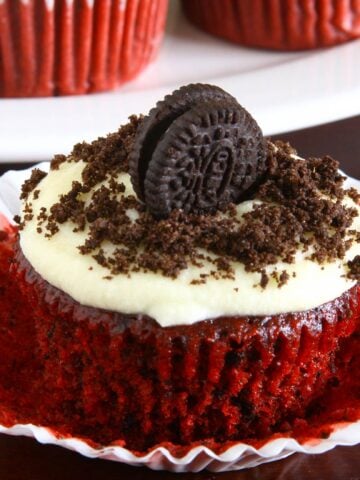
- Decorate it as you please. I used the reserved cake crumbs and mini Oreos to decorate it.
My Notes
- For hot coffee I mixed a teaspoon of instant coffee powder with ½ cup of hot water.
- I was very tempted to reduce the quantity of oil and sugar while baking this cake but didn't want to take a chance as it was for my son's birthday party. But the baking bug wouldn't leave me alone and I did those changes and baked moist red velvet Oreo cupcakes the very next day and it works and tasted as great as the cake. I replaced some of the oil with unsweetened applesauce. More about the measurements in the red velvet cupcake post soon.
- Next time when I bake this cake/cupcake I would want to add coarsely chopped Oreos instead of powdering it finely, that way you will get to actually taste the Oreo.
- While preparing the frosting I had followed the recipe from here and ended up having a lot of frosting. It was more than enough to frost two 9 inch layer cakes and some cupcakes too. So I have halved the measurement.
- Make sure to check the FAQ section before proceeding to bake this gorgeous red velvet Oreo cake.
- Please note that the provided nutrition information for this recipe is an approximation. It's advisable to recalculate based on the specific ingredients used, especially if you are mindful of your fat, carbs, or sugar intake, or if you are following a specific diet plan. Your dietary needs may vary, so adjust the calculations accordingly for a more accurate representation.
Taste & Texture
- This Red Velvet Oreo Cake is soft and moist, boosted by apple cider vinegar and aquafaba. Oreos make a sweet entrance, creating cool black specks on the red canvas. In the taste department, it's spot-on—just the right sweetness, amped up by creamy cream cheese frosting. Thinking of tossing in some chunky Oreos next time for an extra cookie kick. Every bite is a tasty adventure.
Nutrition
Recipe FAQs

I have tried to answer some of the FAQ with respect to Red Velvet cakes, please feel free to use the comments section if you have any other questions.
Yes, you can. Pour 1 cup of milk (dairy or non dairy) of your choice in a measuring mug. Stir in 1 tablespoon of vinegar or lemon juice. Keep it aside for 5-10 minutes until it curdles and then use. You can also dilute ¾ths of a cup of yogurt (dairy or non dairy) with ¼ cup water or milk.
It is advisable to use a liquid or gel red food coloring labeled as "no-taste red" for a vibrant color without altering the taste of the cake. Adjust the quantity according to the desired intensity of red hue. I baked and decorated 2 set of cakes. For one cake I used the liquid red color and the other cake I used the gel paste. While preparing the batter it looks like the liquid coloring turns the batter more pinkish instead of red. The batter that used the gel paste had the infamous red color. But once the cakes baked I couldn't see much of a difference. Either way I had to use a LOT of color for both the batters.
I once baked a supposedly "red velvet cake" with beet puree but it was more purple/pink than red. I read that beet powder works too but I haven't tried it out but I'm assuming that even with the beet powder the cake will be dark purple in color.
White vinegar or lemon juice can be used as substitutes for apple cider vinegar.
I have used 6 tablespoons of aquafaba to substitute 2 eggs. Half cup of pureed silken tofu or half cup of unsweetened applesauce can be good substitutes for the aquafaba. 2 flax eggs should do the trick as well.
The cake can be made vegan by using the non-dairy buttermilk alternative mentioned above. Oreo is vegan too. You might want to substitute vegan butter and cream cheese alternatives to make vegan cream cheese or you can try my recipe for vegan cream cheese frosting.
Using gluten-free baking mix might work but not sure how well it teams up with aquafaba to make it gluten-free and egg free. As I have not tried it I'm unable to share a definitive opinion because gluten-free and egg free baking can be quite tricky. Also you will have to use gluten-free Oreos.
Of course! Minus the Oreos this recipe will be perfect to bake the best red velvet cake with cream cheese frosting, from scratch and it will be eggless too. You don't have to change any other measurements to make it without Oreos.
Sift the dry ingredients, and don't overmix the batter. Also, ensure all ingredients are at room temperature.
When reading about the history of red velvet cake I came to know that the original cake didn't have a cream cheese frosting. Instead a frosting made with a paste of cooked all purpose flour, butter and sugar. But over the years the cream cheese frosting seemed to have gained popularity and consensus as being the best frosting for Red velvet cake. Cooking, baking is about exploring and using our creativity. So it's your choice ultimately.
Yes, you can bake the cake layers in advance and freeze them. Make sure that the you individually wrap each of the layers in plastic wrap, place the wrapped layers in a zip-lock bag and then freeze. Frosting is best applied closer to serving. Thaw the cakes overnight before frosting.
To keep your cake with cream cheese frosting fresh, store it in an airtight container in the refrigerator. The cold temperature preserves the frosting's texture and prevents spoilage. Bring slices to room temperature for about 30 minutes before serving for the best taste and texture.


Archana Pradeep says
Hi Madhu,
Very happy and glad to see you back into action in trying new baking recipes. During my stay in Germany, I used to try all your recipes and was a big hit in the family. We all enjoyed relishing and specially I enjoyed baking. Now that you have restarted baking, it’s prompting me too. Now that we have moved to India, finding ingredients is the biggest challenge for me. However will surely try and give you the feedback.
Madhuram says
Thank you very much for your kind words, Archana. I have been baking on and off but haven't been focussed on sending emails to subscribers etc. Restarting it again. Thank you for noticing it. All the best to you too to start baking again. I will try to include as many alternatives as possible for ingredients going forward. Please feel free to leave comments if you have any questions.